Support Entities
Accumulated Benefits Management
Accumulated Benefits
Accumulated Benefit Rule
Overview
Accumulated Benefit Rule Tab screen Field
| Fields | Description |
| Id | Unique identification code of the Accumulated Benefit Rule. |
| Allow Negative | If checked, indicates that it can allow negative. |
| Rule Action | Select from the drop down list. |
| Cost Item Scale Group | Use the lookup button to search and select the cost item. |
Accumulated Benefit Rule Maximum
Overview
Accumulated Benefit Rule Maximum Tab screen Field
| Fields | Description |
| Amount | Amount of Accumulated Benefit Rule Maximum. |
| Accumulated Benefit Rule Maximum Effect | Select from the drop down list. |
Accumulated Benefits Entitlement
Overview
The Accumulated Benefits Entitlements include entitlement details for a Particular Pay Code, Cost Item Group and Accumulated Benefits.
Navigation
Human Resourse ► Support Entities ► Accumulated Benefit Management ► Accumulated Benefit Entitlement
The Accumulated Benefit Entitlement screen includes the following fields:
| Fields | Description |
| Code | Unique identification code of the Accumulated Benefit Entitlement |
| Is Annual | If checked, indicates that the Entitlement is annual |
| Include Weekend | If checked, indicates that the week-end is counted towards the entitlement amount |
| Accumulated Benefit | Accumulated benefit associated to the Entitlement |
| Institution | Contains the name or ID of the Institution. |
| Situation Code Combination | Unique Situation Code Combination ID per Situation Code Combination, which is generated by the system. |
| Category | Category ID is a parameter which can be generated automatically or manually. |
| Pay Code | Unique pay Code ID generated by the system. Accompanying, Pay Code Description ex: monthly payroll. |
| Cost Item Scale Group | Cost Item Scale Group associated to the Entitlement |
| Cost Item Scale | The cost item scale contains the specific salary ranges |
| Language | Language used |
| Name | Name of the Accumulated Benefit Entitlement |
| Description | Full description of the Accumulated Benefit Entitlement |
Accumulated Benefit Entitlement Detail
Overview
Details of the Accumulated Benefit Entitlement.
Accumulated Benefit Entitlement Detail Fields
Field | Description |
From Years | Starting from Year. |
To Years | Ending to Year. |
Number Of Days | Number of days require. |
Accumulated Benefit Process
Overview
The Accumulated Benefits option gives the user the possibility to transfer Accumulated Benefits at the end of the fiscal year to the following year or to generate Accumulated Benefits Entitlement the selected criteria. In general Accumulated Benefits Entitlement occurs when the benefits is due. Two man scenarios where this process will be used are:
1. Transfer remaining balance of Accumulated Benefits to the new fiscal year and/or
2. When accumulated benefits, for e.g vacation are not accumulated on a monthly basis but instead the employees are given on entitlement on an annual basis.
Navigation
Human Resourse ► Support Entities ► Accumulated Benefit Management ► Accumulated Benefit Entitlement
The Accumulated Benefit Process screen includes the following fields:
| Fields | Description |
| Accumulated Benefit Process | Defines which option to choose for the process (ex. transfer, payment, reset, etc.) |
| Fiscal Year | The period of each fiscal year |
| Pay Code | Unique pay Code ID generated by the system |
| Pay Period | Collection of 1 to many pay periods |
| Institution | The organization responsible for the employee |
| Generic Position | Generic Position associated to the Employee Position |
| Employee | Employee Unique Identification Code |
| From Employee Assignment | Represents the employee assignment that the benefit is being transferred from |
| To Employee Assignment | Represents the employee assignment that the benefit is being transferred to |
| From Accumulated Benefit | Represents the old accumulated benefit information |
| To Accumulated Benefit | Represents the new accumulated benefit information |
Generate Entitlements
Overview
This feature is useful in case someone is hired in the middle of the year and their entitlements are calculated from the date of joining.
Navigation
Human Resources ► Support Entities ► Accumulated Benefit Management ► Generate Entitlements
Generate Entitlements screen Fields and Tabs:
Field | Description |
Type of Entitlement | Select from possible values ANNUAL, MONTHLY, MANUAL |
Accumulated Benefit | If type of entitlement = 'ANNUAL', display only Accumulated Benefits that have an entitlement frequency = 'ANNUAL' If type of entitlement = 'MONTHLY', display only Accumulated Benefits that have an entitlement frequency = 'MONTHLY' If type of entitlement = 'MANUAL', display only Accumulated Benefits that have an entitlement frequency = 'MANUAL' For all frequencies, the credit cost item cannot be null |
Pay Period | The Period is constructed from Fiscal Year - Pay code - Period. |
Effective Date | The user enters this date to determine when this entitlement has taken place. The start date must be less than or equal to fiscal year start date and fiscal year end date |
Employee | Provides a list of Employee to select from. |
Position Category | Provides a list of Position Category to select from. |
Cost Item Scale Group | Provides a list of Cost Item Scale Group to select from. |
Cost Item Scale | Provides a list of Cost Item Scale to select from. |
Situation Code Combination | Provides a list of Situation Code Combination to select from. |
Institution | Provides a list of Institution to select from. |
Assignment Management
Tardiness Policy
Overview
Navigation 
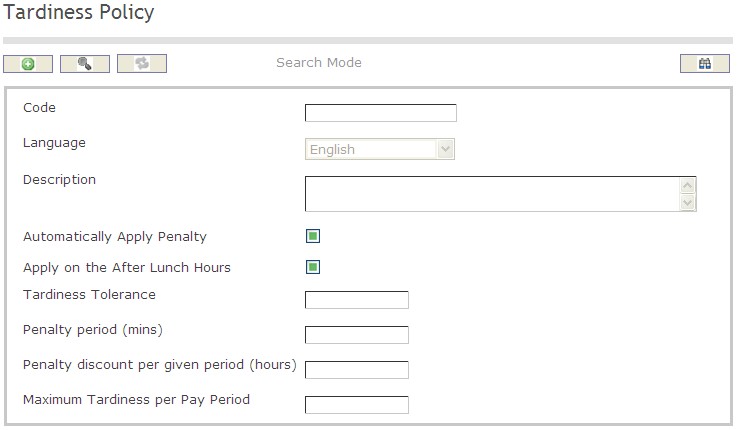
How to SEARCH:
- Enter the information to be used as retrieval criteria in the appropriate field (s). If you prefer to see a list of all tardiness policies, leave all fields blank
- Click on the Find icon

The Tardiness Policy screen includes the following fields:
| Field | Definition |
Code | Unique identification code describing the tardiness policy |
| Language | Language used |
| Description | Description of the Tardiness Policy |
| Apply on the After Lunch Hours | When checked it applies the tardiness policy on the work hous after lunch time |
| Tardiness Tolerance | The number of minutes allowed before the employee is considered late for the job |
| Penalty Period (mins) | The number of minutes deducted from the employee work hours |
| Penalty Discount | The number of hours deducted from the employee work hours |
| Maximum Tardiness per Pay Period | Describes the maximum number of times the employee is allowed to be late during a pay period |
Create A Tardiness Policy
To Create a Tardiness Policy on late assigned shift schedules, follow the steps below:
Navigation 
By default, you will be in Search Mode.
1. Click on the New icon ![]() . You will then be in Insert Mode.
. You will then be in Insert Mode.
2. Enter the new Tardiness Policy information. Fields with an asterisk  are mandatory fields.
3. Enter the Code, select the Language from the drop down menu, and type in the Tardiness Policy Description if any.
- Code: Tardiness Policy unique identification code
- Language: Language used
- Description: Description of the Tardiness Policy
4. Check the Automatically Apply Penalty to apply a penalty on tardiness on Time Recording.
5. Check the Apply on the After Lunch Hours to apply the tardiness policy when the employee comes back to work late after the lunch break.
6. Enter the Tardiness Tolerance, which is, the number of minutes allowed before the employee is considered late for the job.
7. Enter the Penalty Period (mins), which is the period expressed in minutes to which the penalty applies.
8. Type in the Penalty Discount, which is the penalty to be applied when tardiness has oocurred, expressed in regular hours rate.
9. Enter the Maximum Tardiness per Pay Period as required.
- The Maximum Tardiness per Pay Period describes the maximum number of times the employee is allowed to be late during a pay period. If this number is exceeded by the employee a notification is sent to the HR Manager and the Employees Manager.
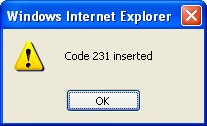
10. Click on the Save icon  at the bottom to save your new Tardiness Policy information. A window will appear to confirm the new Tardiness Policy creation. Click OK to confirm, and message will be displayed showing the code was inserted,
Delete A Tardiness Policy
To Delete a Tardiness Policy on late assigned shift schedules, follow the steps below:
Navigation 
By default, you will be in Search Mode.
- Find the Tardiness Policy you want to Delete
- Enter the information to be used as retrieval criteria in the appropriate field(s). If you prefer to see all Tardiness Policies, leave all fields blank.
- Click Find
 .
. - Select the Tardiness Policy you want to Delete.
- Click on the Delete icon
 .
. - A window will appear asking you to confirm

4. Click OK to confirm and delete the Tardiness Policy
5. A window will be displayed confirming the Tardiness Policy has been deleted 
To Verify that the Tardiness Policy has been Deleted:
- Click on the Search icon

- Enter the Tardiness Policy information in the appropriate field (s).
- Click on the Find icon

- This window will appear

Modify A Tardiness Policy
To Modify a Tardiness Policy on late assigned shift schedules, follow the steps below:
Navigation 
By default, you will be in Search Mode.
- Enter the information to be used as retrieval criteria in the appropriate field (s). If you prefer to see a list of all Tardiness Policies, leave all fields blank.
- Click on the Find icon
 .
. - Click on the Tardiness Policy Field you want to modify.
You will then be in Update/Delete Mode. - Make the necessary modification(s).
- Click on the Update icon
 at the bottom of the screen to save your modifications. A window will appear to confirm the modification. Click OK to confirm.

Overtime Policy
Overview
The Overtime Policy represents a policy that is used when the employee work hours exceed the maximum hours allowed per work period. The overtime policy varies depending on the organization's set guidelines. For example, if a company allow employees to work 44 hours with regular pay, any hours that the employees work after the 44th hour is considered an overtime work period and the overtime policy applies.
Navigation
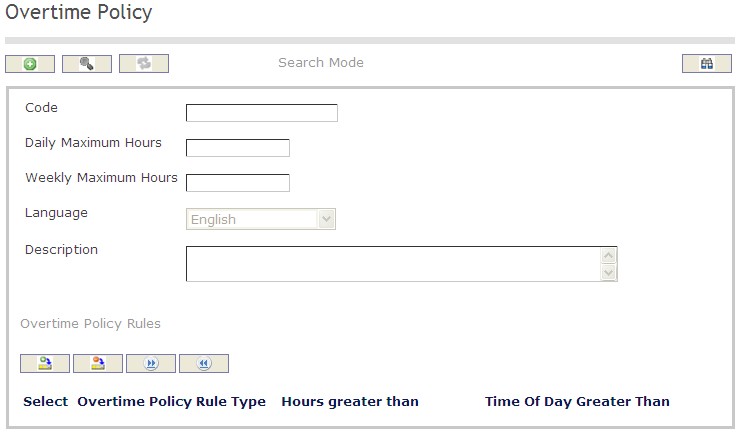
How to SEARCH:
- Enter the information to be used as retrieval criteria in the appropriate field (s). If you prefer to see a list of all tardiness policies, leave all fields blank
- Click on the Find icon

The Overtime Policy screen includes the following fields:
| Field | Definition |
Code | Accumulated Benefit unique identification code |
| Daily Maximum Hours | Daily Maximum of Hours |
| Weekly Maximum Hours | Weekly Maximum of Hours |
| Description | Description of the Overtime Policy |
| Overtime Policy Rules | Guidelines set by the organization regarding overtime policies |
Create An Overtime Policy
To Create an Overtime Policy when the employee work hours exceed the maximum hours allowed per work period, follow the steps below:
Navigation
By default, you will be in Search Mode.
- Click on the New icon
 . You will then be in Insert Mode.
 - Enter the new Overtime Policy information. Fields with an asterisk
 are mandatory fields.
 - Enter the Code, the Daily Maximum Hours, and the Weekly Maximum Hours in the fields provided.
- Code: Accumulated Benefit unique identification code
- Daily Maximum Hours: Daily Maximum of Hours
- Weekly Maximum Hours: Weekly Maximum of Hours
4. Choose the Language from the drop down menu.
5. Enter the Description of the Overtime Policy in the description field.
6. Click on the New icon  under
under  to enter the Overtime Policy Rules (refer to Overtime Policy Rules for more information).
7. Click on the Save and Return icon  to save the Policy Overtime Rules information and return to the Overtime Policy, or click on the Discard icon
  to discard the Overtime Policy Rules entry and return to the Overtime Policy.
8. Click the individual Select Checkbox (es), under Overtime Policy Rules to select and de-select the Overtime Policy Rule (s), as required, or click the Select All icon  or Unselect All
  icon, to select or de-select all Overtime Policy Rules (s), if required.
9. Click the Remove icon  to remove the selected Overtime Policy Rules,if required
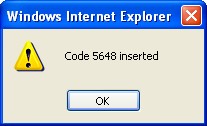
10. Click on the Save icon  at the bottom to save your new Overtime Policy information. A window will appear to confirm the new Overtime Policy creation. Click OK to confirm.
Overtime Policy Rules
Navigation (From click the New Icon
 under
under  )
)
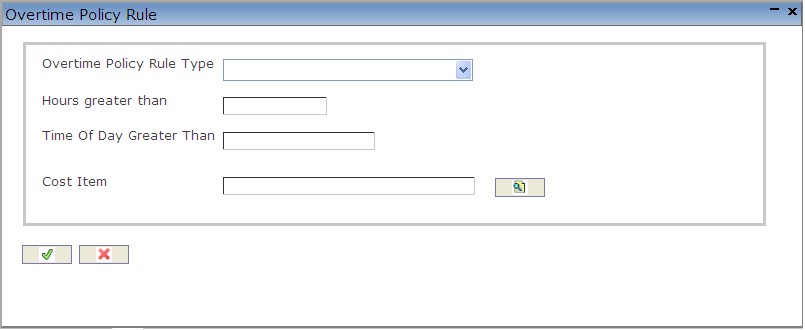
Create An Overtime Policy Rule
To Create an Overtime Policy Rule when the employee work hours exceed the maximum hours allowed per work period, follow the steps below:
Navigation (From click the New Icon
 under
under  )
)
1. Enter the new Overtime Policy Rule information. Fields with an asterisk  are mandatory fields.
2. Choose the Overtime Policy Rule Type from the drop down menu.
3. Fil in the Hours greater than and the Time Of Day Greater Than fields as required.
4. Click on the Lookup icon  to enter a Cost Item. Refer to Cost Item for more information.
5. Click on the Save and Return icon  to save the Overtime Policy Rule and return to the Overtime Policy, or click on the Discard icon
  to discard the Overtime Policy Rule entry and return to the Overtime Policy.
Delete An Overtime Policy
To Delete an Overtime Policy when the employee work hours exceed the maximum hours allowed per work period, follow the steps below:
Navigation:
By default, you will be in Search Mode.
- Find the Overtime Policy you want to Delete
- Enter the information to be used as retrieval criteria in the appropriate field(s). If you prefer to see all Overtime Policy, leave all fields blank.
- Click Find
 .
. - Select the Overtime Policy you want to Delete.
- Click on the Delete icon
 .
. - A window will appear asking you to confirm

- Click OK to confirm and delete the Overtime Policy.
- A window will be displayed confirming the Overtime Policy has been deleted

To Verify that the Overtime Policy has been Deleted:
- Click on the Search icon

- Enter the Overtime Policy information in the appropriate field (s).
- Click on the Find icon

- This window will appear

Modify An Overtime Policy
To Modify an Overtime Policy when the employee work hours exceed the maximum hours allowed per work period, follow the steps below:
Navigation:
By default, you will be in Search Mode.
- Enter the information to be used as retrieval criteria in the appropriate field (s). If you prefer to see a list of all Overtime Policies, leave all fields blank.
- Click on the Find icon
 .
. - Click on the Overtime Policy you want to modify.
You will then be in Update/Delete Mode. - Make the necessary modifications. To add or remove Overtime Policy Rules, refer to Overtime Policy Rules.
- Click on the Update icon
 at the bottom of the screen to save your modifications. A window will appear to confirm the modification. Click OK to confirm.

Promotion Policy
Overview
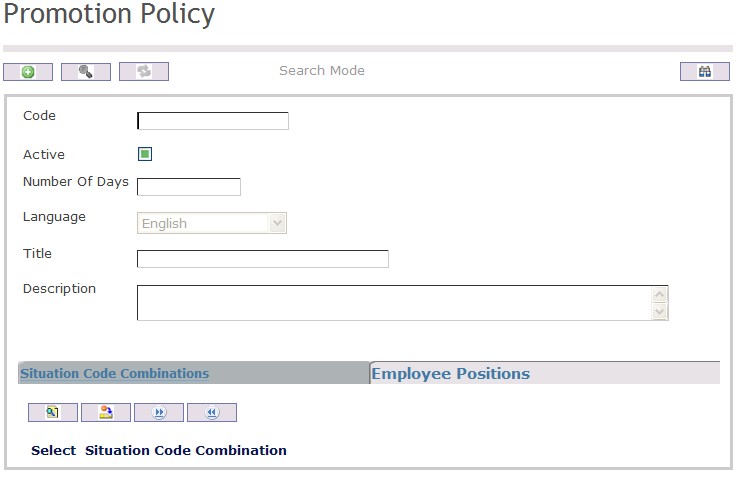
This screen holds the HR promotion policies for a given Employee Position.
Navigation 
Create A Promotion Policy
Navigation 
By default, you will be in Search Mode.
- Click on the New icon
 (you will then be in Insert Mode).
 - Enter the new Promotion Policy information. Fields with an asterisk
 are mandatory fields.
 - Enter the Code, click on the Active checkmark, as required, the Number Of Days and select the Language, as required.
- Code: Unique identification code of the skill.
- Active: Active Status - if checked, Skill is available.
- Number Of Days: Minimum number of days a person is in the Employee Position before the Promotion policy can be applied.
4. Enter the Title, which is the name of the policy.
5. In Description, enter a detailed description of the policy
To ADD Employee Positions to Promotion Policy, if required:
- Click on Lookup icon
 , and enter the Employee Positions information, or leave the Employee Positions information blank to retrieve all Employee Positions.
 - Click Find icon

- Click the individual Select Checkbox (es) to select and de-select the Employee Position(s), as required.
- Repeat steps 1, 2 and 3 for all required Employee Positions .
- Click the Return icon
 to return to the Promotion Policyscreen, or click the Discard button
  to discard the selection entry and return to Skill.
 - Click the individual Select Checkbox (es) to select and de-select the Employee Position(s), as required, or click the Select All icon
 or Unselect All
  icon, to select all Employee Positions or de-select all Employee Positions , if required.
 - Click the Remove icon to remove the selected Employee Positions information, if required.
8. Click on the New icon  under
under  to enter the Situation Code Combinations (refer to Situation Code Combinations for more information), if required.
9. Click on the New icon  under
under  to enter the Employee Positions (refer to Employee Positions for more information), if required.
Click on the Save icon  at the bottom of the Promotion Policy to save your new Promotion Policy information. A window will appear to confirm.
Delete A Promotion Policy
Navigation 
By default, you will be in Search Mode.
- Find the Promotion Policy you want to Delete
- Enter the information to be used as retrieval criteria in the appropriate field(s). If you prefer to see all Promotion Policies , leave all fields blank.
- Click Find

- Select the Promotion Policy you want to Delete
- Click on the Delete icon

- A window will appear asking you to confirm
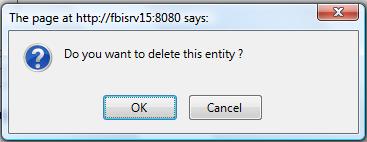
- Click OK to confirm and delete the Promotion Policy .
- A window will be displayed confirming the Promotion Policy has been deleted
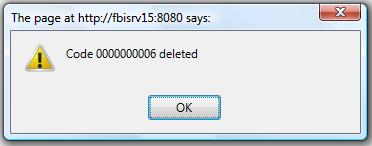
- Click on the Delete icon
To Verify that the Promotion Policy has been Deleted:
- Click on the Search icon

- Enter the Promotion Policy information
- Click on the Find icon

The window will appear 
Modify A Promotion Policy
Navigation 
By default, you will be in Search Mode.
- Enter the information to be used as retrieval criteria in the appropriate field(s).
If you prefer to see the list of all Promotion Policy, leave all fields blank. - Click on the Find icon
 . The list of Promotion Policies meeting the retrieval criteria will appear.
 - Click on the Promotion Policy you want to modify.
You will then be in Update/Delete Mode. - Make the necessary modification(s).
Click on the Update icon
 at the bottom of the screen to save your modifications. A window will appear to confirm the modification. Click OK to confirm.
Shift Schedule Definition
Overview
Shift Schedule Definition is used to organize shift hours with the number of working days per week. HR managers can associate overtime policies and tardiness policies to Shift Schedules and define the work hours and work days of each Shift Schedule.
Navigation 
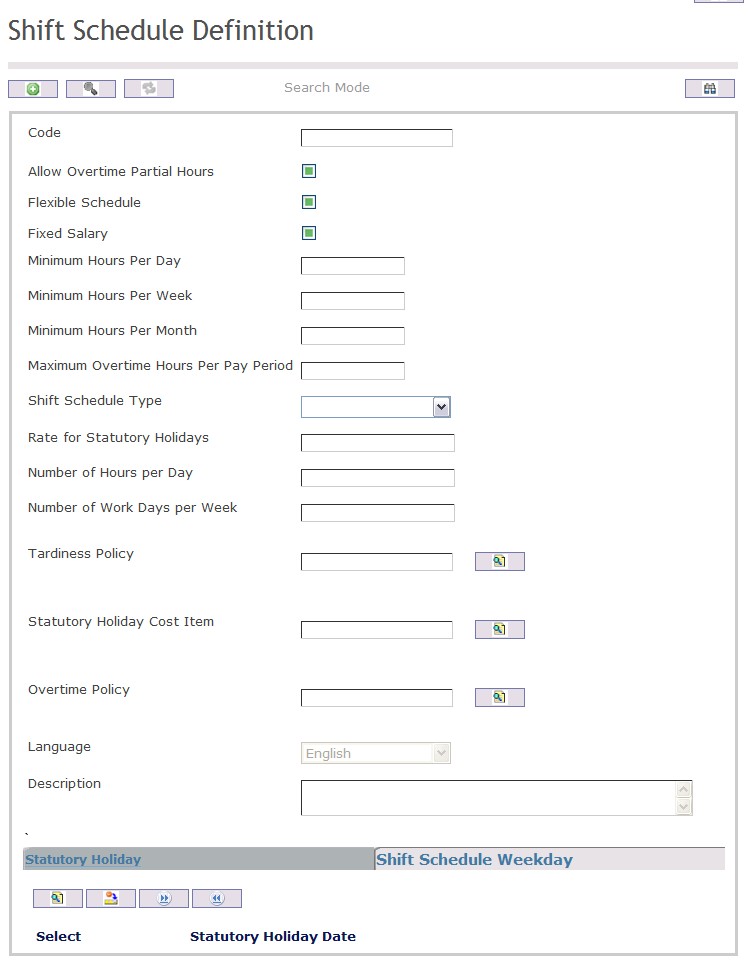
How to SEARCH:
- Enter the information to be used as retrieval criteria in the appropriate field (s). If you prefer to see a list of all Shift Schedule Definition, leave all fields blank
- Click on the Find icon

The Shift Schedule Definition screen includes the following fields:
| Field | Definition |
Code | Shift Schedule unique identification code |
| Allow Overtime Partial Hours | Specifies whether this shift schedule definition accepts partial hours to be paid on overtime or not |
| Flexible Schedule | Specifies whether this shift schedule definitions accepts flexibility on schedule or not |
| Fixed Salary | This is to indicate if the employee gets paid a fixed salary independent of the fact that there is 21 days in a month or 22 days |
| Minimum Hours Per Day | Specifies the minimum hours per day that must be fulfilled |
| Minimum Hours Per Week | Specifies the minimum hours per week that must be fulfilled |
| Minimum Hours Per Month | Specifies the minimum hours per month that must be fulfilled |
| Maximum Overtime Hours Per Pay Period | Specifies the maximum overtime hours allowed to be paid for the pay period |
| Shift Schedule Type | Can be on a 'Weekly' or 'Per Pay Period' basis |
| Rate for Statutory Holidays | Rate to apply to statutory holidays per Schedule Definition |
| Number ' | |
| Policy | The tardiness policy to be applied for this shift schedule definition |
| Overtime Policy | Overtime policy to be applied for this shift schedule definition. |
| Statutory Holiday | Statutory holidays for the shift schedule definition. |
| Shift Schedule Weekday | Organizes shift hours with the number of working days per week |
Create A Shift Schedule Definition
To CREATE a Shift Schedule Definition that organizes shift hours with the number of working days per week, follow these steps:
Navigation 
By default, you will be in Search Mode.
1. Click on the New icon ![]() . You will then be in Insert Mode.
. You will then be in Insert Mode.
2. Enter the new Shift Schedule Definition information. Fields with an asterisk  are mandatory fields.
3. Enter the Code, and click on the Allow Overtime Partial Hours, Flexible Schedule, Fixed Salary, as required.
- Code: Unique identification number representing the Shift Schedule Definition
- Allow Overtime Partial Hours: Specifies whether this shift schedule definition accepts partial hours to be paid on overtime or not.
- Flexible Schedule: Specifies whether this shift schedule definitions accepts flexibility on schedule or not. When this box is checked that means that this shift schedule definition will be validating only the hours per day that must be fulfilled.
- Fixed Salary: This is to indicate if the employee gets paid a fixed salary independent of the fact that there is 21 days in a month or 22 days.
4. Fill the Minimum Hours Per Day, Minimum Hours Per Week, Minimum Hours Per Month, and Maximum Overtime Hours Per Pay Period fields as required.
- Minimum Hours Per Day: Specifies the minimum hours per day that must be fulfilled.
- Minimum Hours Per Week: Specifies the minimum hours per week that must be fulfilled.
- Minimum Hours Per Month: Specifies the minimum hours per month that must be fulfilled.
- Maximum Overtime Hours Per Pay Period: Specifies the maximum overtime hours allowed to be paid for the pay period.
5. Select the Shift Schedule Type from the drop down menu.
- Shift Schedule Type: Can be on a 'Weekly' or 'Per Pay Period' basis.
6. Fill in the Rate for Statutory Holidays, Number of Hours per Day, and the Number of Work Days per Week as required.
- Rate for Statutory Holidays: Rate to apply to statutory holidays per Schedule Definition.
- Number of Hours per Day: Used during pay calculation to do salary conversions such as converting an annual salary to hourly.
- Number of Work Days per Week: Used during pay calculation to do salary conversions such as converting a weekly salary to a daily salary.
7. To enter the Tardiness Policy, click on the Lookup icon  , click on Find icon
  to retrieve the Tardiness Policy list, then select the Tardiness Policy.
- Tardiness Policy: The tardiness policy to be applied for this shift schedule definition.
8. To enter the Statutory Holiday Cost Item, click on the Lookup icon  , click on Find icon
  to retrieve the Cost Item list, then select the Cost Item. Refer to Cost Items for more information.
9. To enter the Overtime Policy, if required, click on the Lookup icon  , click on Find icon
  to retrieve the Overtime Policy list, then select the Overtime Policy. Refer to Overtime Policy for more information.
- Overtime Policy: If no overtime is selected this schedule will not allow overtime payment calculations.
10. Select the Language desired from the drop down menu.
11. Enter the Shift Schedule Description in the Description field.
12. To enter the Statutory Holiday, click on the Lookup icon  under
under click on Find icon
  to retrieve the Statutory Holiday list, then select the Statutory Holiday. Refer to the Statutory Holiday for more info.
13. Click the Remove icon  to remove the selected Statutory Holiday
14. Click the individual Select Checkbox (es), under  to select and de-select the Statutory Holiday (s), as required, or click the Select All icon
  or Unselect All
  icon, to select or de-select all Statutory Holidays.
15. Click on the New icon  under
under  to enter the Shift Schedule Weekday (refer to Shift Schedule Weekday for more information).
16. Click on the Save and Return icon  to save the Shift Schedule Weekday information and return to the Shift Schedule screen, or click on the Discard icon
  to discard the Shift Schedule Weekday entry and return to the Shift Schedule.
17. Click the Remove icon  to remove the selected Shift Schedule Weekday
18. Click the individual Select Checkbox (es), under  to select and de-select the Shift Schedule Weekday (s) as required, or click the Select All icon
  or Unselect All
  icon, to select or de-select all Shift Schedule Weekday.
19. Click on the Save icon  at the bottom to save your new Statutory Holiday information. A window will appear to confirm the new Statutory Holiday . Click OK to confirm.

Shift Schedule Weekday
Navigation  click the New Icon
 under
under 
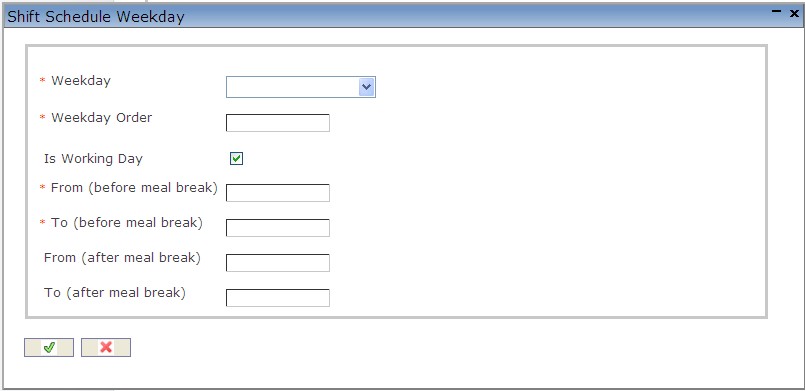
Create Shift Schedule Weekday
To CREATE a Shift Schedule Weekday that organizes shift hours with the number of working days per week, follow these steps:
1. Click on the New icon  under
under  to enter the Shift Schedule Weekday.
2. Select the Weekday from the drop down menu.
3. Enter the Weekday Order in the required field.
4. Check the Is Working Day box, if shift falls into that category.
5. Fill in the From (before meal break). To (before meal break), From (after meal break), and the To (after meal break) fields.
6. Click on the Save and Return icon  to save the Shift Schedule Weekday information and return to the Shift Schedule, or click on the Discard icon
  to discard the Shift Schedule Weekday entry and return to the Shift Schedule.
Delete A Shift Schedule Definition
To DELETE a Shift Schedule Definition that organizes shift hours with the number of working days per week, follow these steps:
Navigation 
By default, you will be in Search Mode.
- Find the Shift Schedule Definition you want to Delete
- Enter the information to be used as retrieval criteria in the appropriate field(s). If you prefer to see all Shift Schedule Definitions, leave all fields blank.
- Click Find
 .
. - Select the Shift Schedule Definitions you want to Delete.
- Click on the Delete icon
 .
. - A window will appear asking you to confirm

- Click OK to confirm and delete the Shift Schedule Definition.
- A window will be displayed confirming the Shift Schedule Definition has been deleted

To Verify that the Shift Schedule Definition has been Deleted:
- Click on the Search icon

- Enter the Shift Schedule Definition information in the appropriate field (s).
- Click on the Find icon

- This window will appear

Modify A Shift Schedule Definition
To DELETE a Shift Schedule Definition that organizes shift hours with the number of working days per week, follow these steps:
Navigation 
By default, you will be in Search Mode.
- Enter the information to be used as retrieval criteria in the appropriate field (s). If you prefer to see a list of all Shift Schedule Definitions, leave all fields blank.
- Click on the Find icon
 .
. - Click on the Shift Schedule Definition you want to modify.
You will then be in Update/Delete Mode. - Make the necessary modifications. To add or remove Shift Schedule Weekday (s), refer to Shift Schedule Weekday.
- Click on the Update icon
 at the bottom of the screen to save your modifications. A window will appear to confirm the modification. Click OK to confirm.
. 
Situation Code Levels Definition
Overview
This screen includes the names of the situation code Levels. A situation code can have up to 4 levels.
Navigation 
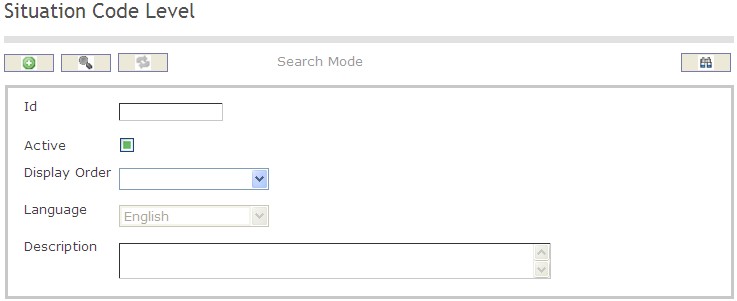
Create A Situational Code Levels Definition
Navigation 
By default, you will be in Search Mode.
- Click on the New icon
 (you will then be in Insert Mode).
 - Enter the new Situational Code Levels Definition information. Fields with an asterisk
 are mandatory fields.
 - Enter the Code, click on the Active checkmark, as required, and select the Language, as required.
- Code: Unique identification code of the Situational Code Levels Definition.
- Active: Active Status - if checked, Situational Code Levels Definition is available.
- Enter A Description
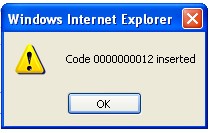
- Click Onto the Save icon at the bottom of the Situational Code Levels Definition to save your new Situational Code Levels Definition

- The following window will appear to confirm
Delete A Situation Code Levels Definition
By default, you will be in Search Mode.
- Find the Situation Code Levels Definition you want to Delete
- Enter the information to be used as retrieval criteria in the appropriate field(s). If you prefer to see all Situation Code Levels Definitions, leave all fields blank.
- Click Find

- Select the Situation Code Levels Definition you want to Delete
- Click on the Delete icon

- A window will appear asking you to confirm

- Click OK to confirm and delete the Situation Code Levels Definition.
- A window will be displayed confirming the Situation Code Levels Definitionhas been deleted

- Click on the Delete icon
To Verify that the Situation Code Levels Definition has been Deleted:
- Click on the Search icon

- Enter the Situation Code Levels Definition information
- Click on the Find icon

The window will appear 
Modify a Situation Code Levels Definition
Navigation 
By default, you will be in Search Mode.
- Enter the information to be used as retrieval criteria in the appropriate field(s).
If you prefer to see the list of all Situation Code Levels Definitions, leave all fields blank. - Click on the Find icon
 . The list of Situation Code Levels Definitions meeting the retrieval criteria will appear.
 - Click on the Situation Code Levels Definition you want to modify.
You will then be in Update/Delete Mode. - Make the necessary modification(s).
- Click on the Update icon
 at the bottom of the screen to save your modifications. A window will appear to confirm the modification. Click OK to confirm.
Situation Code Catalog
Overview
A situation code is an identifier that defines the employment status of an employee in the assignment. For example, a situation code will describe a position and the associated pay along with a start and end date of employment and other required information pertaining to that employee position. A Catalog of Situation Codes gathers together all the valid Situation Codes that can be used when linking an employee and a position. This function is available to search the catalog of situation codes as well as create, modify and delete codes. Situation Codes listed in this function can be combined with others that will be managed and organized in another function called Situation Code Combinations. Cost Items, which are further explained in various other functions, work closely with the situation code catalog as well. Situation Codes will be retrieved from the catalog here to produce situation code combinations and link them with cost items.
Navigation: 
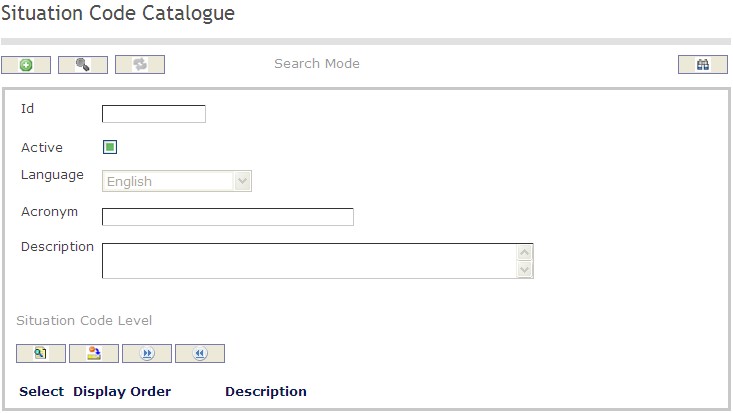
How to SEARCH:
- Enter the information to be used as retrieval criteria in the appropriate field (s). If you prefer to see a list of all Situation Code Catalogs, leave all fields blank.
- Click on the Find icon
 .
.
The Situation Code Catalog screen includes the following fields:
| Fields | Definitions |
| Active | Active Status - if checked, Situation Code is available |
| Acronym | Used for reporting and searching purposes. |
| Description | Situation Code description |
| Language | Language as chosen. |
Create a Situation Code
To CREATE a situation code in the Situation Code Catalog, follow the steps below:
Navigation 
By default, you will be in Search Mode.
- Click on the New icon
 . You will then be in Insert Mode.
 - Click on the Active, select Language from Drop Down List, enter the Acronym and Description
- Active: Active Status - if checked, Situation Code is available
- Acronym: used for reporting and searching purposes.
- Description: Situation Code description
- Language: Language as chosen.
3. Click on the Lookup icon  ,under
  , click on Find icon
  to retrieve the Situation Code Level list, then select the desired ID/Description and click Return
  or click on the Discard icon
  to discard the Situation Code entry and return to the Situation Codes Catalog screen.
4. Click the individual Select Checkbox(es), under  to select and de-select the Situation Code Level (s), as required, or click the Select All icon
  or Unselect All
  icon, to select or de-select all Situation Code Level (s), if required.
5. Click the Remove icon  to remove the selected Situation Code,if required.
6. Repeat steps 3 to 5 for all required Situation Codes.
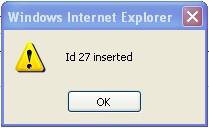
7. Click on the Save icon  at the bottom to save your new Situation Codes Catalog information. A window will appear to confirm the new Situation Code Catalog creation. Click OK to confirm
Delete a Situation Code
To DELETE a situation code from the Situation Codes Catalog, follow the steps below:
Navigation: 
By default, you will be in Search Mode.
- Find the Situation Code you want to Delete
- Enter the information to be used as retrieval criteria in the appropriate field(s). If you prefer to see all Situation Codes, leave all fields blank.
- Click Find
 .
. - Select the Situation Code you want to Delete.
- Click on the Delete icon
 .
. - A window will appear asking you to confirm

- Click OK to confirm and delete the Situation Code.
- A window will be displayed confirming the Situation Code has been deleted

To Verify that the Situation Code has been Deleted:
- Click on the Search icon

- Enter the Situation Code Catalog information in the appropriate field(s).
- Click on the Find icon

- This window will appear

Modify a Situation Code
To MODIFY a situation code in the Situation Code Catalog, follow the steps below:
Navigation: 
By default, you will be in Search Mode.
- Enter the information to be used as retrieval criteria in the appropriate field(s). If you prefer to see a list of all Situation Code Catalogs, leave all fields blank.
- Click on the Find icon
 .
. - Click on the Situation Code you want to modify.
You will then be in Update/Delete Mode. - Make the necessary modifications.
- Click on the Update icon
 at the bottom of the screen to save your modifications. A window will appear to confirm the modification. Click OK to confirm.
Situation Code Combination
Overview
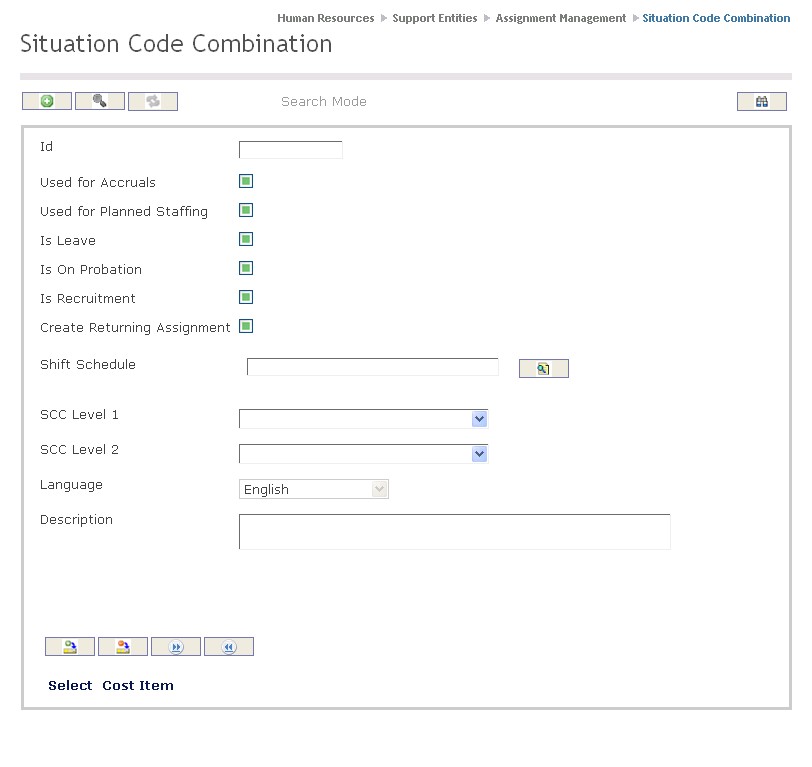
This screen includes the list of valid situation code combinations with the associated cost items, deductions and financial coding. Cost items can be linked to one or more situation codes that may be combined together. This function organizes and manages these combinations of situation codes that are to be associated with a specific cost item. There are variations of how each combination can affect a cost item, which is why this screen provides alternative options of how a situation code combination may function. These variances produce multiple calculation methods and differences between the cost items and deductions. There are two separate tabs in this function that individually organize cost items and deductions. One tab manages the relationship between a cost item and a situation code combination while the other tab manages the relationship between possible deductions and a situation code combination. Together all this data provides key information that will be utilized for payroll calculation and financial planning and forecasting. It is also a key component for tracking employee assignments and making any necessary decisions or modifications.
Navigation
How to SEARCH:
- Enter the information to be used as retrieval criteria in the appropriate field (s). If you prefer to see a list of all Situation Code Combinations, leave all fields blank.
- Click on the Find icon
 .
.
The Situation Code Combination screen includes the following fields:
| Fields | Definition |
| ID | Unique Situation Code Combination ID per Situation Code Combination generated by the system. |
| Used for Accruals | By default - Used for Accruals is not selected. It should be checked if accruals are generated by salary planning and forecasting. |
| Used for Planned Staffing | By default - Used for Planned Staffing is not selected. Should be checked if the Situation Code Combination is used for Planned Staffing. |
| Is Leave | By default - Is Leave is not selected. If checked, indicates Situation Code is Leave related. |
| Is On Probation | By default - Is On Probation is not selected. If checked, indicates combination is related to Probationary Period. |
| Is Recruitment | By default - Is Recruitment is not selected. If checked this situation code combination will be displayed in the recruitment management. |
| Shift Schedule | The work schedule related to the Situation Code Combination created and listed in the Shift Schedule Definition. |
| Situation Code Combination (SCC) | Is comprised of 0 or 1 Situation Code per level. A SCC can include as many Situation Codes as the number of Levels indicated. A Situation Code of Level1 is MANDATORY and all Levels must be distinct. All Situation Codes must be ordered consecutively in relation to their Levels. (Ex. 1-2-3-4 is valid. 1-2-4-3 is not valid) |
| Language | Language as chosen. |
| Description | Situation Code Combination Code Description. |
Create a Situation Code Combination
To CREATE a Situation Code Combination that lists all valid situation codes, follow the steps below:
Navigation 
By default, you will be in Search Mode.
- Click on the New icon
 (you will then be in Insert Mode).
 - Fields with an asterisk
 are mandatory fields.
 - Click on Used for Accruals, Used for Planned Staffing, Is Leave and Is On Probation as required.
- Used for Accruals: By default - Used for Accruals is not selected. It should be checked if the Situation Code Combination is used for accruals calculation.
- Used for Planned Staffing: By default - Used for Planned Staffing is not selected. Should be checked if the Situation Code Combination is used for Planned Staffing.
- Is Leave: By default - Is Leave is not selected. If checked, indicates Situation Code is Leave related.
- Is On Probation: By default - Is On Probation is not selected. If checked, indicates combination is related to Probationary Period.
4. To enter Shift Schedule, click on the Lookup icon  ,click on the Find icon
  to retrieve the Shift information, then select the Shift Schedule.
- Shift Schedule: The work schedule related to the Situation Code Combination created and listed in the Shift Schedule Definition.
5. Select the Situation Code Combination from the drop down menus as required.
- Situation Code Combination (SCC): is comprised of 0 or 1 Situation Code per level. A SCC can include as many Situation Codes as the number of Levels indicated. A Situation Code of Level 1 is MANDATORY and all Levels must be distinct. All Situation Codes must be ordered consecutively in relation to their Levels. (Ex. 1-2-3-4 is valid. 1-2-4-3 is not valid)
7. Select Language from Language Bar and enter Description.
- Language: Language as chosen.
- Description: Situation Code Combination Code Description.
To ADD a Cost Item to a Code Combination if required:
1. Click on the Cost Item tab, , Cost Item New icon
  and enter the new Cost Item (refer to Cost Item Per Situation Code Combination for more information).
2. Click the individual Select Checkbox(es), under  to select and de-select the Cost Items, as required, or click the Select All icon
  or Unselect All
  icon, to select or de-select all the Cost Items, if required.
3. Click the Remove icon  to remove the selected Cost Item, if required.
4. Repeat steps 1 to 3 as required for all Cost Items.
To ADD a new Deduction for a Situation Code Combination if required:
1. Click on the Deductions tab, , Deductions New icon
  ,and enter the new Deduction Per Situation Code (refer to Deductions Per Situation Code Combination for more information).
2. Click the individual Select Checkbox(es), under to select and de-select the Deduction(s), as required, or click the Select All icon
  or Unselect All
  icon, to select or de-select all Deductions, if required.
3. Click the Remove icon  to remove the selected Deduction(s), if required.
4. Repeat steps 1 to 3 as required for all Deductions Per Situation Code Combination.
Click on the Save icon  at the bottom to save your new Situation Code Combination information. A window will appear to confirm the new Situation Code Combination creation. Click OK to confirm.

Cost Item Per Situation Code Combination
Navigation (From click the New icon
 under
under )
)
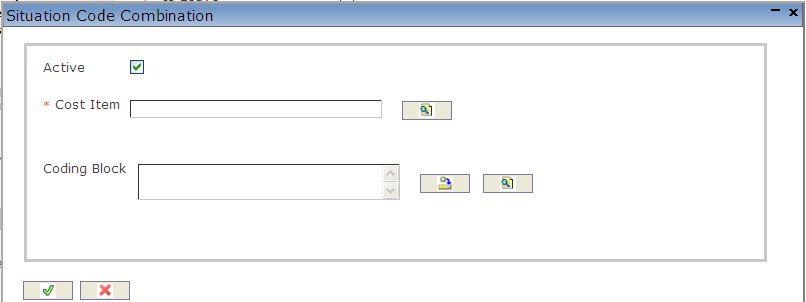
Create a Cost Item Per Situation Code Combination
1. Enter the new Situation Code Combination information. Field with an asterisk  are mandatory fields.
2. Check the Active checkmark if required. By Default - Active is selected.
- Active - when checked indicates the Situation Code Combination is available.
3. To enter the Cost Item, click on the Lookup icon  , click on Find icon
  to retrieve the Cost Item list, then select the appropriate Cost Item.
4. To enter the Coding Block, if required, click on the New icon or click on the Lookup icon
 to retrieve the appropriate Coding Block. Click on Find icon
  to retrieve the Coding Block list, then select the appropriate Coding Block.
- Coding Block: This field has the full or partial coding block information. This entry is optional. If entered, the full or partial coding block will overwrite the coding from Employee Assignment.
5. Click on the Save and Return icon  to save the Cost Item information and return to the Situation Code Combination, or click on the Discard icon
  to discard the Cost Item entry and return to the Situation Code Combination.
Deductions Per Situation Code Combination
Navigation (From click the New icon
 under
under )
)
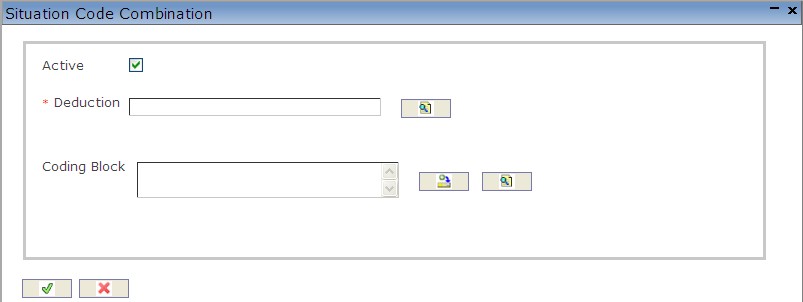
Create a Deduction Per Situation Code Combination
1. Enter the new Situation Code Combination information. Field with an asterisk  are mandatory fields.
2. Check the Active checkmark if required. By Default - Active is selected.
- Active - when checked indicates the Situation Code Combination is available.
3. To enter the Deduction, click on the Lookup icon  , click on Find icon
  to retrieve the Deduction list, then select the appropriate Deduction.
4. To enter the Coding Block, if required, click on the New icon or click on the Lookup icon
  to retrieve the appropriate Coding Block. Click on Find icon
  to retrieve the Coding Block list, then select the appropriate Coding Block.
- Coding Block: This field has the full or partial coding block information. This entry is optional. If entered, full or partial coding block will overwrite the coding from Employee Assignment.
5. Click on the Save and Return icon  to save the Deduction information and return to the Situation Code Combination, or click on the Discard icon
  to discard the Deduction entry and return to the Situation Code Combination.
Delete a Situation Code Combination
To DELETE a Situation Code Combination that lists all valid situation codes, follow the steps below:
Navigation
By default, you will be in Search Mode.
- Find the Situation Code Combination you want to Delete
- Enter the information to be used as retrieval criteria in the appropriate field(s). If you prefer to see all Situation Code Combinations, leave all fields blank.
- Click Find
 .
. - Select the Situation Code Combination you want to Delete.
- Click on the Delete icon
 .
. - A window will appear asking you to confirm

- Click OK to confirm and delete the Situation Code Combination.
- A window will be displayed confirming the Situation Code Combination has been deleted.

To Verify that the Situation Code Combination has been Deleted:
- Click on the Search icon

- Enter the Situation Code Combination information in the appropriate field(s).
- Click on the Find icon

- This window will appear

Modify a Situation Code Combination
To MODIFY a Situation Code Combination that lists all valid situation codes, follow the steps below:
Navigation
By default, you will be in Search Mode.
- Enter the information to be used as retrieval criteria in the appropriate field(s). If you prefer to see a list of all Situation Combination Codes, leave all fields blank.
- Click on the Find icon
 .
. - Click on the Situation Code Combination you want to modify.
You will then be in Update/Delete Mode. - Make the necessary modifications. To add or remove Cost Items, refer to Cost Items Per Situation Code Combination. To add or remove Deductions, refer to the Deductions Per Situation Code Combination.
- Click on the Update icon
 at the bottom of the screen to save your modifications. A window will appear to confirm the modification. Click OK to confirm.
Statutory Holiday
Overview
Here you will find a list of Statutory Holidays. Statutory holidays manage one of the cost items associated with an employee assignment. Statutory holidays produce another cost applied against the organization. Holidays can be created, deleted and modified in this screen. This function allows the ability to specify whether employees will be paid or not on a particular Statutory Holiday. The Statutory Holiday function manages one of the cost items associated with an employee. Statutory holidays and associated Cost Items are used by payroll calculation and financial planning and forecasting.
Navigation

How to SEARCH:
- Enter the information to be used as retrieval criteria in the appropriate field (s). If you prefer to see a list of all Statutory Holidays, leave all fields blank.
- Click on the Find icon
 .
.
The Statutory Holiday screen includes the following fields:
| Fields | Definitions |
| Date | Choose date from the Calendar. |
| Name | Full name |
| Is Payable | By Default - is checked, and indicates that the employee will be paid on that Statutory Holiday. |
Create a Statutory Holiday
To CREATE a Statutory Holiday, which applies another cost to an organization, follow the steps below:
Navigation
By default, you will be in Search Mode.
- Click on the New icon
 (you will then be in Insert Mode).
 - Enter the new Statutory Holiday information. Fields with an asterisk
 are mandatory fields.
 - Select the Date, Is Payable if required, Language from the Language Bar and enter Name.
- Date: Choose date from the Calendar.
- Name: Full name
- Is Payable: By Default - is checked and indicates that the employee will be paid on that Statutory Holiday.
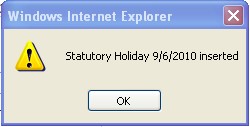
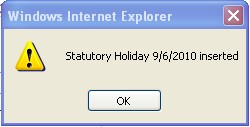
- Click on the Save icon
 at the bottom to save your new Statutory Holiday information. A window will
appear to confirm the new Holiday creation. Click OK to continue.
 .
.
.
Delete a Statutory Holiday
To DELETE a Statutory Holiday, which applies another cost to an organization, follow the steps below:
Navigation: 
By default, you will be in Search Mode.
- Find the Statutory Holiday you want to Delete
- Enter the information to be used as retrieval criteria in the appropriate field(s). If you prefer to see all Statutory Holidays, leave all fields blank.
- Click Find
 .
. - Select the Statutory Holiday you want to Delete.
- Click on the Delete icon
 .
. - A window will appear asking you to confirm

- Click OK to confirm and delete the Statutory Holiday.
- A window will be displayed confirming the Statutory Holiday has been deleted

To Verify that the Statutory Holiday has been Deleted:
- Click on the Search icon

- Enter the Statutory Holiday information in the appropriate field(s).
- Click on the Find icon

- This window will appear

Modify a Statutory Holiday
To MODIFY a Statutory Holiday, which applies another cost to an organization, follow the steps below:
Navigation
By default, you will be in Search Mode.
- If you know the Date and/or Name, enter the information in the appropriate fields. If you want to see a list of all Holidays, click on Search icon
 and leave fields blank.
 - Click on the Find icon
 .
. - Click on the Holiday you want to modify.
You will then be in Update/Delete Mode. - Make the necessary modifications. Click on the Update icon
 at the bottom to save your modifications.
 - A Window will appear confirming your updates. Click OK to confirm
Position Management
Association
Overview
Association is a screen that contains general information about each employees position with different associations. For example, a medical doctor may be associated with a specific association for doctors and work at a hospital.
Navigation 
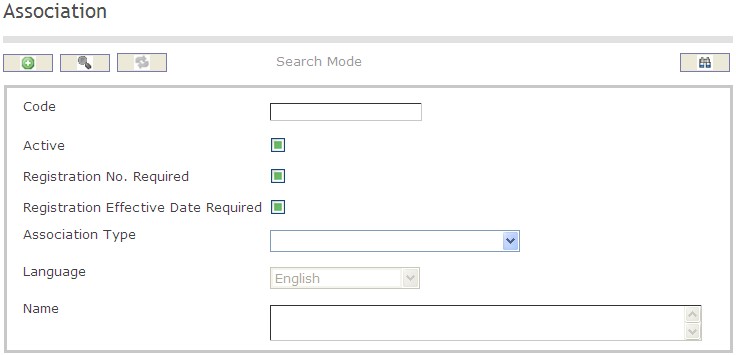
To SEARCH an Association
- Enter the information to be used as retrieval criteria in the appropriate field(s).
If you prefer to see the list of all Association, leave all fields blank. - Click on the Find icon
 .
.
The screen Association includes the following fields:
| Field | Definition |
| Code | Unique identification code |
| Active | Default |
| Association Number Required | Number of the association |
| Association Effective Date Required | Date when the association is effective |
| Association Type | Type of association |
| Language | Language of use |
| Name | Name of the association |
Create An Association
Association is a screen that contains general information about each employees position with different associations. To CREATE an Association, please follow the steps provided below:
Navigation 
By default, you will be in Search Mode.
1. Click on the New icon ![]() . You will then be in Insert Mode.
. You will then be in Insert Mode.
2. Enter the new Association information. Fields with an asterisk  are mandatory fields.
3. Enter the Code, and check box the Active, Registration No. Required, and Registration Effective Date Required as required.
- Code: Unique identification number representing the Association.
4. Select the Association Type from the drop down menu (i.e. Union, Professional Association)
5. Select the language from the drop down menu
6. Enter the description in the field provided
7. Click on the Save icon  at the bottom to save your new Association information. A window will appear to confirm the new Association . Click OK to confirm.

Delete An Association
Association is a screen that contains general information about each employees position with different associations. To DELETE an Association, please follow the steps provided below:
Navigation 
By default, you will be in Search Mode.
- Find the Association you want to Delete
- Enter the information to be used as retrieval criteria in the appropriate field(s). If you prefer to see all Association , leave all fields blank.
- Click Find

- Select the Association you want to Delete
- Click on the Delete icon

- A window will appear asking you to confirm

- Click OK to confirm and delete the Association.
- A window will be displayed confirming the Association has been deleted

To Verify that the Association has been Deleted:
- Click on the Search icon

- Enter the Association information
- Click on the Find icon

The window will appear 
Modify An Association
Association is a screen that contains general information about each employees position with different associations. To MODIFY an Association, please follow the steps provided below:
Navigation 
By default, you will be in Search Mode.
- Enter the information to be used as retrieval criteria in the appropriate field(s).
If you prefer to see the list of all Associations, leave all fields blank. - Click on the Find icon
 . The list of Associations meeting the retrieval criteria will appear.
 - Click on the Association you want to modify.
You will then be in Update/Delete Mode. - Make the necessary modification(s).
- Click on the Update icon
 at the bottom of the screen to save your modifications. A window will appear to confirm the modification. Click OK to confirm.
Association Type
Overview
The Association Type indicates if the association is part of an Union or not.
Navigation 
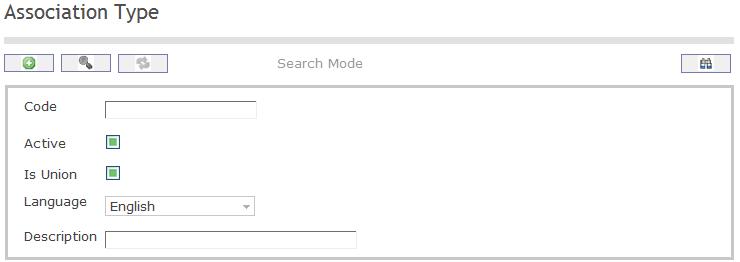
Create an association type
By default, you will be in Search Mode.
- Click on the New icon
 (you will then be in Insert Mode).
 - Enter the new Association Type information. Fields with an asterisk
 are mandatory fields.
 - Enter the Code, click on the Active, and Is Union checkmarks, as required, and select the Language, as required. Enter Description.
- Code: Unique identification code of the Association Type.
- Active: Active Status - if checked the Association Type is available.
- Is Union: Union indicator - if checked, the Association is part of an Union.
- Language: Language used
- Description: Description of the Type (e.g. retired, union, regular)
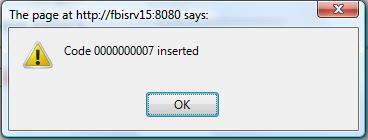
- Click on the Save icon
 at the bottom of the Skill screen to save your new Skill information. A window will appear to confirm. Click OK to confirm.
Delete an Association Type
By default, you will be in Search Mode.
- Find the Association Type you want to Delete
- Enter the information to be used as retrieval criteria in the appropriate field(s). If you prefer to see all Association Types , leave all fields blank.
- Click Find
 .
. - Select the Association Type you want to Delete.
- Click on the Delete icon
 .
. - A window will appear asking you to confirm.
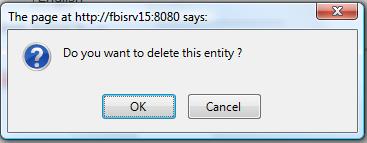
- Click OK to confirm and delete the Association Type.
- A window will be displayed confirming the Association Type has been deleted
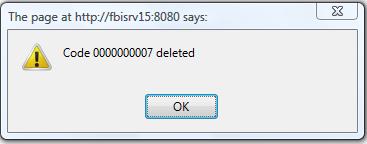
To Verify that the Association Type has been deleted:
- Click on the Search icon

- Enter the Association Type information in the appropriate field (s).
- Click on the Find icon

- This window will appear

By default, you will be in Search Mode.
- Find the Association you want to Delete
- Enter the Association information in the Field(s)
- Click Find

- Select the Association you want to Delete
- Click on the Delete icon

- A window will appear asking you to confirm

- Click OK to confirm and delete the Association.
- A window will be displayed confirming the Employee has been deleted.

To Verify that the Association Type has been Deleted:
- Click on the Search icon

- Enter the Association Type information
- Click on the Find icon

- The window will appear

Modify an association type
By default, you will be in Search Mode.
- Enter the information to be used as retrieval criteria in the appropriate field (s). If you prefer to see a list of all Association Types, leave all fields blank.
- Click on the Find icon
 .
. - Click on the Association Type you want to modify.
You will then be in Update/Delete Mode. - Make the necessary modifications.
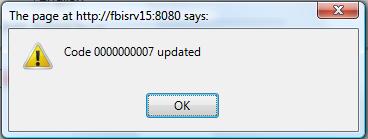
- Click on the Update icon
 at the bottom of the screen to save your modifications. A window will appear to confirm the modification. Click OK to confirm
Certificate
Overview
This screen contains a Certificate catalogue, which could be used among other screens on the system. A certificate can be mandatory or desirable for a given Generic/Employee Position. It is important to match different requirements of position available to the qualifications of the candidate. For a position, a certain certificate required could be the CA (Chartered Accountant) Certification.
Navigation
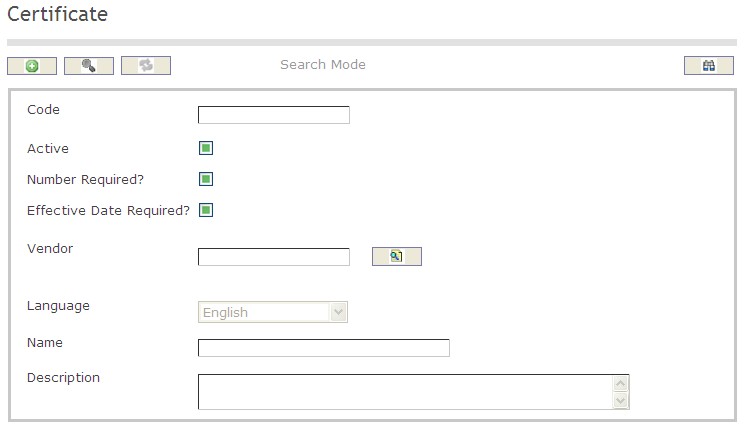
How to SEARCH:
- Enter the information to be used as retrieval criteria in the appropriate field (s). If you prefer to see a list of all Certificates, leave all fields blank.
- Click on the Find icon
 .
.
The Certificate screen includes the following fields:
| Report Fields | Description |
| Code | Unique identification code of the Certificate |
| Active | Active Status - if checked, Certificate is available |
| Number Required | Number Required Status - if checked, Number Required is available |
| Effective Date Required | Effective Date Required Status - if checked, Effective Date Required is available |
| Language | Language used |
| Vendor | The Organization that provides the Certificate |
| Name | Name of the Certificate |
| Description | Short description of the Certificate |
Create a Certificate
Certificate contains a Certificate catalogue, which could be used among other screens on the system. To CREATE a Certificate, follow the steps below:
Navigation 
By default, you will be in Search Mode.
- Click on the New icon
 (you will then be in Insert Mode).
 - Enter the new Certificate information. Fields with an asterisk
 are mandatory fields.
 - Enter the Code, click on the Active, Number Required, and Effective Date Required checkmarks, and select the Language, as required.
- Code: Unique identification code of the Certificate.
- Active: Active Status - if checked, Certificate is available.
- Number Required: Number Required Status - if checked, Number Required is available
- Effective Date Required: Effective Date Required Status - if checked, Effective Date Required is available
- Language: Language used
4. To enter the Vendor information, if required, click on the Lookup icon  , click on Find icon
  to retrieve the Vendor list, then select the Vendor.
- Vendor: The Organization that provides the Certificate.
5. Enter Name.
- Name: Name of the Certificate.
6. Enter Description.
- Description: Short description of the Certificate.
7. Click on the Save icon  at the bottom of the Certificate to save your new Certificate information. A window will appear to confirm.

Delete a Certificate
Certificate contains a Certificate catalogue, which could be used among other screens on the system. To DELETE a Certificate, follow the steps below:
Navigation 
By default, you will be in Search Mode.
- Find the Certificate you want to Delete
- Enter the information to be used as retrieval criteria in the appropriate field(s). If you prefer to see all Certificates, leave all fields blank.
- Click Find

- Select the Certificate you want to Delete
- Click on the Delete icon

- A window will appear asking you to confirm
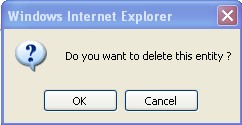
4. Click OK to confirm and delete the Certificate.
5. A window will be displayed confirming the Certificate has been deleted
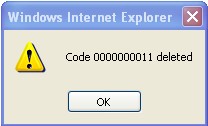
To Verify that the Certificate has been Deleted:
- Click on the Search icon

- Enter the Certificate information
- Click on the Find icon

- The window will appear

Modify a Certificate
Certificate contains a Certificate catalogue, which could be used among other screens on the system. To MODIFY a Certificate, follow the steps below:
Navigation 
By default, you will be in Search Mode.
- Enter the information to be used as retrieval criteria in the appropriate field(s).
If you prefer to see the list of all Certificates, leave all fields blank. - Click on the Find icon
 . The list of Certificates meeting the retrieval criteria will appear.
 - Click on the Certificate you want to modify.
You will then be in Update/Delete Mode. - Make the necessary modification(s).
- Click on the Update icon
 at the bottom of the screen to save your modifications. A window will appear to confirm the modification. Click OK to confirm.
Skill
Overview
This skill screen describes all skills that can be mandatory or desirable for a given Generic/Employee position.
Navigation 
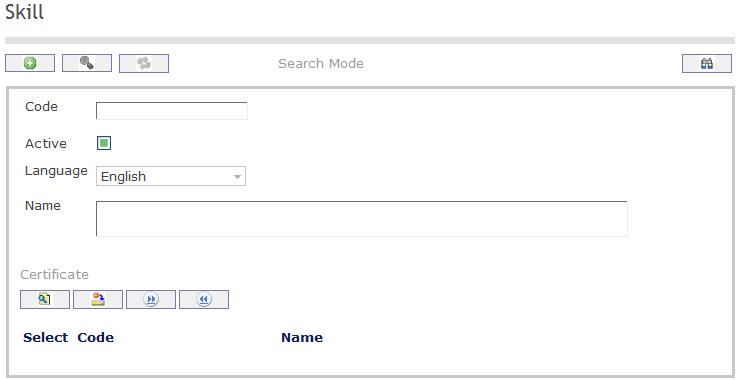
Create a skill
Navigation 
By default, you will be in Search Mode.
- Click on the New icon
 (you will then be in Insert Mode).
 - Enter the new Skill information. Fields with an asterisk
 are mandatory fields.
 - Enter the Code, click on the Active checkmark, as required, and select the Language, as required.
- Code: Unique identification code of the skill.
- Active: Active Status - if checked, Skill is available.
- Enter Name.
- Name: Name of the skill.
To ADD Certificates to Skills, if required:
- Click on Lookup icon
 , and enter the Certificate information, or leave the Certificate information blank to retrieve all Certificates.
 - Click Find icon

- Click the individual Select Checkbox (es) to select and de-select the Certificate (s), as required.
- Repeat steps 1, 2 and 3 for all required certificates.
- Click the Return icon
 to return to the Skill screen, or click the Discard button
  to discard the selection entry and return to Skill.
 - Click the individual Select Checkbox (es) to select and de-select the Certificates (s), as required, or click the Select All icon
 or Unselect All
  icon, to select all Certificates or de-select all Certificates, if required.
 - Click the Remove icon to remove the selected Certificate information, if required.
To ADD new Certificates, refer to Certificate.
Click on the Save icon  at the bottom of the Skill to save your new Skill information. A window will appear to confirm.
Delete a skill
Navigation 
By default, you will be in Search Mode.
- Find the Skill you want to Delete
- Enter the information to be used as retrieval criteria in the appropriate field(s). If you prefer to see all Skills , leave all fields blank.
- Click Find

- Select the Skill you want to Delete
- Click on the Delete icon

- A window will appear asking you to confirm

- Click OK to confirm and delete the Skill.
- A window will be displayed confirming the Skill has been deleted

To Verify that the Skill has been Deleted:
- Click on the Search icon

- Enter the Skill information
- Click on the Find icon

- The window will appear

Modify a skill
Navigation 
By default, you will be in Search Mode.
- Enter the information to be used as retrieval criteria in the appropriate field(s).
If you prefer to see the list of all Skills, leave all fields blank. - Click on the Find icon
 . The list of Skills meeting the retrieval criteria will appear.
 - Click on the Skill you want to modify.
You will then be in Update/Delete Mode. - Make the necessary modification(s).
- Click on the Update icon
 at the bottom of the screen to save your modifications. A window will appear to confirm the modification. Click OK to confirm.
Degree
Overview
This screen describes degree of Education. Employees may enter their degree information in this form and add a description further explaining the degree. Organizations may use this to locate a certain employee by their degree
Objective and Benefits
Navigation 
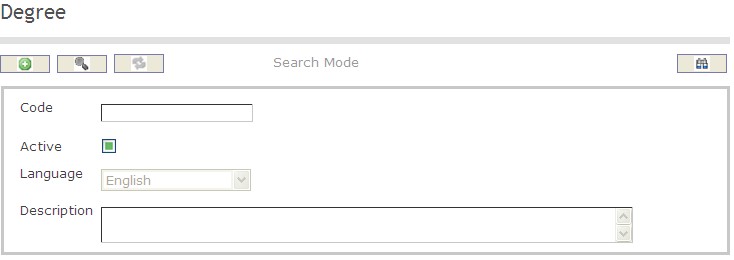
To SEARCH a degree:
1. Enter the information to be used as retrieval criteria in the appropriate field(s).
If you prefer to see the list of all Degrees, leave all fields blank.
2. Click on the Find icon  .
.
The screen Degree includes the following fields:
| Field | Definition |
| Code | Unique identification code |
| Active | Default |
| Language | Language of use |
| Description | Comments or Remarks about the degree |
Create A Degree
Navigation 
By default, you will be in Search Mode.
- Click on the New icon
 (you will then be in Insert Mode).
 - Enter the new Degree information. Fields with an asterisk
 are mandatory fields.
 - Enter the Code, click on the Active checkmark, as required, and select the Language, as required.
- Code: Unique identification code of the degree.
- Active: Active Status - if checked, Degreeis available.
- Enter a Description
- Click Onto the Save icon at the bottom of the Degree to save your new Degree

- This window will appear to confirm
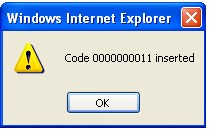
Delete a Degree
Navigation 
By default, you will be in Search Mode.
- Find the Degree you want to Delete
- Enter the information to be used as retrieval criteria in the appropriate field(s). If you prefer to see all Degrees , leave all fields blank.
- Click Find

- Select the Degree you want to Delete
- Click on the Delete icon

- A window will appear asking you to confirm

- Click OK to confirm and delete the Degree.
- A window will be displayed confirming the Degree has been deleted

To Verify that the Degree has been Deleted:
- Click on the Search icon

- Enter the Degree information
- Click on the Find icon

The window will appear 
Modify A Degree
Navigation 
By default, you will be in Search Mode.
- Enter the information to be used as retrieval criteria in the appropriate field(s).
If you prefer to see the list of all Degrees, leave all fields blank. - Click on the Find icon
 . The list of Degrees meeting the retrieval criteria will appear.
 - Click on the Degree you want to modify.
You will then be in Update/Delete Mode. - Make the necessary modification(s).
- Click on the Update icon
 at the bottom of the screen to save your modifications. A window will appear to confirm the modification. Click OK to confirm.
Position Category
Overview
This screen contains information regarding the organizations categories of positions and each position is placed somewhere within the hierarchy of all possible positions. Each position has a parent to which it responds to which is located higher up in the hierarchy.
Navigation 
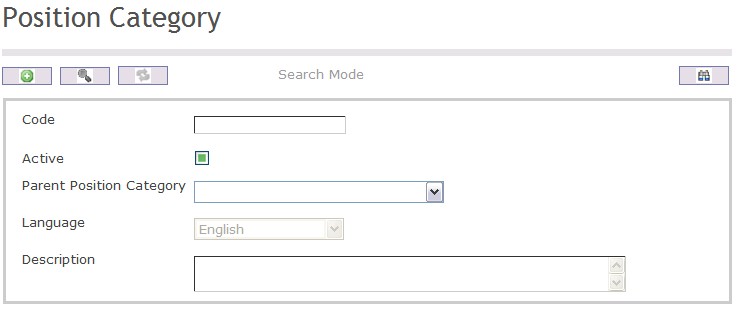
To SEARCH a Position Category
- Enter the information to be used as retrieval criteria in the appropriate field(s).
If you prefer to see the list of all Position Categories, leave all fields blank. - Click on the Find icon
 .
.
The screen Position Category includes the following fields:
| Field | Definition |
| Code | Unique identification |
| Active | Default |
| Parent Position Category | Position Category under which the current position category being put in falls under |
| Language | Language of use |
| Description | Comments and remarks |
Create a Position Category
Navigation 
By default, you will be in Search Mode. Fields with an asterisk  are mandatory fields
Click on the New icon  (you will then be in Insert Mode).
1. Enter the Code, click on the Active checkmark, as required,
- Code: Unique identification code of the Position Category.
2. Active: Active Status - if checked, Position Category is available.
3. Select Parent Position Category from the drop down menu.
5. select the Language, as required.
6. Add the Description,as required
7. The following display will confirm
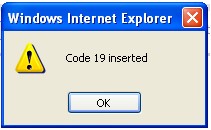
Delete a Position Category
Navigation 
By default, you will be in Search Mode.
- Find the Position Category you want to Delete
- Enter the information to be used as retrieval criteria in the appropriate field(s). If you prefer to see all Position Categories, leave all fields blank.
- Click Find

- Select the Position Category you want to Delete
- Click on the Delete icon

- A window will appear asking you to confirm
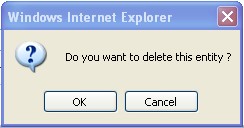
4. Click OK to confirm and delete the Position Category.
5. A window will be displayed confirming the Position Category has been deleted
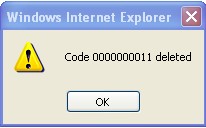
To Verify that the Position Category has been Deleted:
- Click on the Search icon

- Enter the Position Category information
- Click on the Find icon

- The window will appear

Modify a Position Category
Navigation 
By default, you will be in Search Mode.
- Enter the information to be used as retrieval criteria in the appropriate field(s).
If you prefer to see the list of all Position Categories, leave all fields blank. - Click on the Find icon
 . The list of Position Category meeting the retrieval criteria will appear.
 - Click on the Position Category you want to modify.
You will then be in Update/Delete Mode. - Make the necessary modification(s).
- Click on the Update icon
 at the bottom of the screen to save your modifications. A window will appear to confirm the modification. Click OK to confirm.
Work Location
Overview
Work Location provides information regarding where each employee works. An Institution will have many different locations and the employees of an organization can work in different locations and regions.
Navigation 
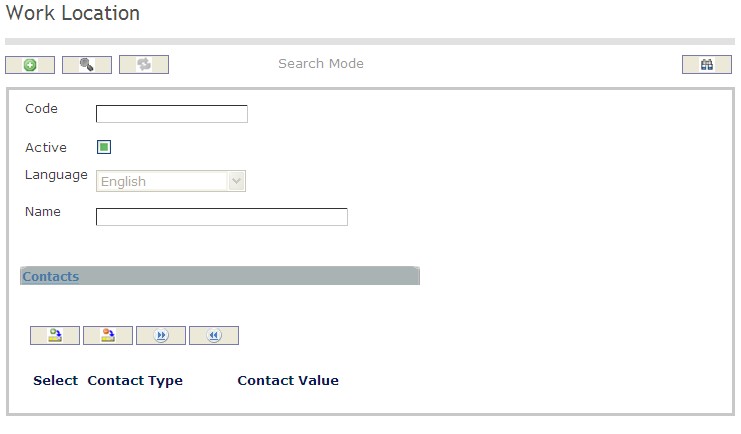
How to SEARCH:
- Enter the information to be used as retrieval criteria in the appropriate field (s). If you prefer to see a list of all Work Locations, leave all fields blank.
- Click on the Find icon
 .
.
The Work Location screen includes the following fields:
| Report Fields | Description |
| Code | Unique identification code of the work location |
| Active | Active Status - if checked, Work Location is available |
| Language | Language used |
| Name | Name of the Work Location |
Create a Work Location
Work Location provides information regarding where each employee works.
To CREATE a Work Location, follow the steps below:
Navigation 
By default, you will be in Search Mode.
- Click on the New icon
 (you will then be in Insert Mode).
 - Enter the new Work Location information. Fields with an asterisk
 are mandatory fields.
 - Enter the Code, click on the Active checkmark, and select the Language, as required.
- Code: Unique identification code of the work location.
- Active: Active Status - if checked, Work Location is available.
- Language: Language used.
- Enter Name.
- Name: Name of the Work Location.
To ADD Contacts to the Work Location, if required:
1. Click on the  tab and then click on the New icon
  to enter Contacts (refer to Contacts for more information).
2. Click on the Save and Return icon  to save the Contact information and return to Work Locations, or click on the Discard icon
  to discard the Contact entry and return to Work Locations.
3. Click the Remove icon  to remove the selected Contacts, if required.
4. Click the individual Select Checkbox (es) to select and de-select the Contact (s), as required, or click the Select All icon  or Unselect All
  icon, to select all Contacts or de-select all Contacts, if required.
Click on the Save icon  at the bottom of the Work Location to save your new Work Location information. A window will appear to confirm.

Contacts
Navigation (From  click the New Icon
 under
under  )
)
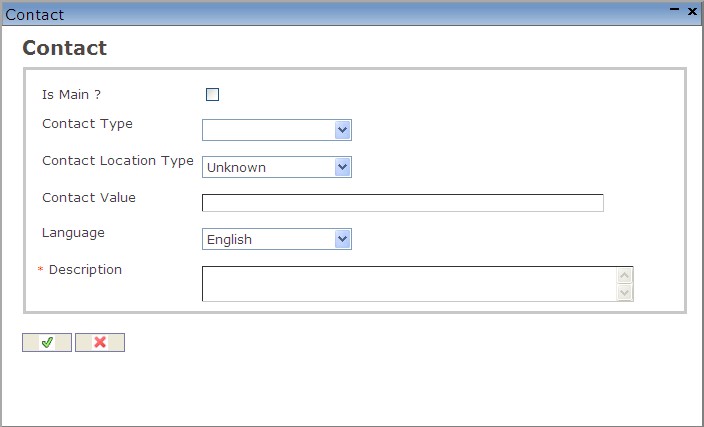
Create a Contact
Navigation (From  click the New Icon
 under
under  )
)
1. Enter the new Contact information. Fields with an asterisk  are mandatory fields.
2. Click on the Is Main? checkmark, as required.
- Is Main?: Is Main? Status - if checked, this will be the main contact information.
3. Select Contact Type.
- Contact Type: Choose from the drop-down menu, either Electronic Mail, Fax, Mobile Phone, Pager, Phone, or Web Site.
4. Select Contact Location Type.
- Contact Location Type: Choose from the drop-down menu
5. Enter Contact Value.
- Contact Value: Enter a description of the contact value
6. Select a Language.
- Language: Language used
7. Enter Description.
- Description: Enter a short description of the contact
8. Click on the Save and Return icon  to save the Contact information and return to the Work Location screen, or click on the Discard icon
  to discard the Contact entry and return to the Work Location screen.
Delete a Work Location
Work Location provides information regarding where each employee works.
To DELETE a Work Location, follow the steps below:
Navigation 
By default, you will be in Search Mode.
- Find the Work Location you want to Delete
- Enter the information to be used as retrieval criteria in the appropriate field(s). If you prefer to see all Work Locations, leave all fields blank.
- Click Find

- Select the Work Location you want to Delete
- Click on the Delete icon

- A window will appear asking you to confirm

4. Click OK to confirm and delete the Work Location.
5. A window will be displayed confirming the Work Location has been deleted

To Verify that the Work Location has been Deleted:
- Click on the Search icon

- Enter the Work Location information
- Click on the Find icon

- The window will appear

Modify a Work Location
Work Location provides information regarding where each employee works.
To MODIFY a Work Location, follow the steps below:
Navigation 
By default, you will be in Search Mode.
- Enter the information to be used as retrieval criteria in the appropriate field(s).
If you prefer to see the list of all Work Locations, leave all fields blank. - Click on the Find icon
 . The list of Work Locations meeting the retrieval criteria will appear.
 - Click on the Work Location you want to modify.
You will then be in Update/Delete Mode. - Make the necessary modification(s). To add or remove Contacts, refer to Contacts.
- Click on the Update icon
 at the bottom of the screen to save your modifications. A window will appear to confirm the modification. Click OK to confirm.
Dimension
Overview
This feature describes the Dimensions as Economic Magnitude or Number of Subalterns associated for a position.
Navigation
Dimension screen fields
| Fields | Description |
| Code | Unique String Code. Depends on parameter settings to deterimne if it is entered by user or system generated. When system generated, it is left padded with zeros. |
| Active | True by default. When False the Dimension is not available for use. |
| Dimension Type Status | This attribute takes one of the following values:
The default value is 'Economic Magnitudes'. when inherited it is READONLY, otherwise it is editable. |
| Origin | Read Only field. Displays the source of the Dimension. Default value is 'Manual' when record is created manually. |
| Language | Select language to register the description. |
| Description | A detail description of the Dimension. |
Main Functions Activity
Overview
This feature allows users to store the Main function/activities require or desirable for a position. This is used by users to create a position.
Navigation
Human Resources ► Support Entities ► Position Management ► Main Functions Activity
Main Functions Activity screen fields
| Fields | Description |
| Code | It is a unique string code for the Main Functions Activity. It is system generated or manually entered. |
| Active | By default this check box is checked, when the user makes it unchecked then it would be not available anymore to use. |
| Origin | It displays the origin of the Main Function Activity. |
| Language | It allows users to select the language to write the description. The default language is English. |
| Description | The details description of the Main Function Activity. |
Main Relationship
Overview
This feature allows creating the main relationships require or desirable for a position. It is required in some cases when users create a position.
Navigation
Human Resources ► Support Entities ► Position Management ► Main Relationship
Main Relationship screen fields
| Fields | Descriptions |
| Code | This field displays the unique string code of the main relationship. It can be system generated or the user-generated, it depends on the system parameter setting for this field. |
| Active | By default it is checked, when it is marked as unchecked then it (Main Relationship) is not available to use for all modules. |
| Relationship Type | This field allows users to select the relationship type from the drop-down list. The possible values are "Other Positions", and "Other Institutions". |
| Origin | It displays the origin information. |
| Language | It allows users to select the language to write the description. The default language is English. |
| Description | Users can write the details description related to Main Relationship in the selected language. |
Nature
Overview
This support entity allows creating the Nature of Problems and Responsibilities associated and required for a position. It would be used by the user while creating a Position in the system.
Navigation
Human Resources ► Support Entities ► Position Management ► Nature
Nature screen fields
| Fields | Descriptions |
| Code | It shows the unique string code. It is system generated or user-generated, depends on the parameter setting in the system. |
| Active | By default this check box is checked, when the user makes it unchecked then it would be not available anymore to use. |
| Nature Type | The user can select the nature type from the drop-down list. The possible values are "Problem" and "Responsibility". |
| Origin | It displays the origin information of the Nature. |
| Language | It allows the user to select the language to write the description. The default language is English. |
| Description | The user can write details description related to the nature in the selected language. |
Other Aspect
Overview
This support entity allows creating Other Aspect for the position. It would be used by the user while creating a position.
Navigation
Human Resources ► Support Entities ► Position Management ► Other Aspect
Other Aspect Screen Fields
| Fields | Descriptions |
| Code | It is a unique string code generated by the system or by the user, depends on the system parameter setting for this feature. |
| Active | By default this check box is checked, when the user makes it unchecked then it would be not available anymore to use. |
| Origin | It displays the origin of the Other Aspect. |
| Language | It allows the user to select the language to write the description. The default language is English. |
| Description | The user can write details description related to the Other Aspect in the selected language. |
Position Experience
Overview
This screen describes all the experience requirements or desirable for a position.
Navigation
Human Resources ► Support Entities ► Position Management ► Position Experience
Position Experience Screen Fields
| Fields | Descriptions |
Code | The unique String Code. It is generated by the system or entered by user depends on the parameter setting for this screen. |
| Active | By default, the checkbox is marked as checked, if it is unchecked then it would be not available anymore to use elsewhere. |
| Years of Experience | It allows entering the total work experience required for the position. |
| Origin | It displays the origin of the Position Experience. |
| Language | It allows the user to select the language to write the description. The default language is English. |
| Description | The user can write details description related to the Position Experience in the selected language. |
Position Knowledge
Overview
This screen describes the knowledge required or desirable for a position.
Navigation
Human Resources ► Support Entities ► Position Management ► Position Knowledge
Position Knowledge Screen Fields
| Fields | Descriptions |
Code | It is a unique string code generated by the system or by the user, depends on the system parameter setting for this feature. |
| Active | By default this check box is checked, when the user makes it unchecked then it would be not available anymore to use. |
| Knowledge Type | It allows to enter the knowledge type for the position. The default value is 'Specific Knowledge'. |
| Origin | It displays the origin of the Position Knowledge. |
| Language | It allows the user to select the language to write the description. The default language is English. |
| Description | The user can write details description related to the Position Knowledge in the selected language. |
Work Condition
Overview
This screen contains the Work Conditions associated for a position.
Navigation
Human Resources ► Support Entities ► Position Management ► Work Condition
Work Condition Screen Fields
| Fields | Descriptions |
| Code | The unique String Code. It is generated by the system or entered by user depends on the parameter setting for this screen. |
| Active | By default, the checkbox is marked as checked, if it is unchecked then it would be not available anymore to use elsewhere. |
| Origin | It displays the origin of the Work Condition. |
| Language | It allows the user to select the language to write the description. The default language is English. |
| Description | Detailed Description of the Work Condition. |
Employee Management
Life Certificate
Overview
This screen contains information that helps users understand the requirements that are necessary to obtain pensions
Navigation 
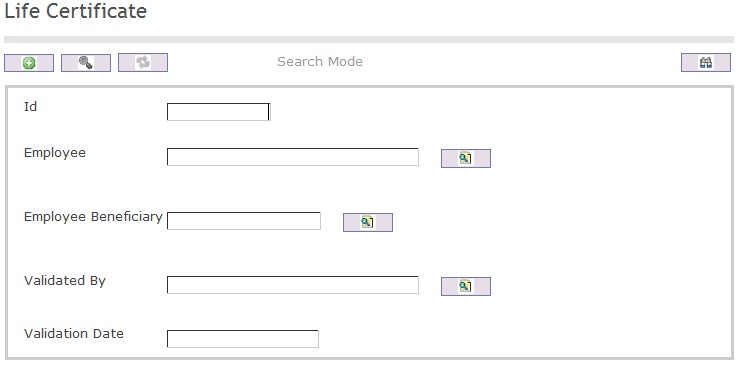
To SEARCH a Life Certificate
- Enter the information to be used as retrieval criteria in the appropriate field(s).
If you prefer to see the list of all Life Certificates, leave all fields blank. - Click on the Find icon
 .
.
| Field | Definition |
| ID | Unique identification code |
| Employee | User within the organization |
| Employee Beneficiary | Employee benefits |
| Validated By | Employee completing the validation |
| Validation Date | Date of validation |
Create A Life Certificate
Overview
This screen contains information that helps users understand the requirements that are necessary to obatin a pensions
Navigation 
To CREATE a Life Certificate follow the steps below
By default, you will be in Search Mode.
- Click on the New icon
 (you will then be in Insert Mode).
 - Enter the new Life Certificate information. Fields with an asterisk
 are mandatory fields.
 - Enter the ID
- To enter the Employee, if required, click on the Lookup icon
 , click on Find icon
  to retrieve the Employee list, then select the Employee.
 - To enter the Employee Beneficiary, if required, click on the Lookup icon
 , click on Find icon
  to retrieve the Employee Beneficiary list, then select the Employee Beneficiary .
 - To enter the Validated By, if required, click on the Lookup icon
 , click on Find icon
  to retrieve the Validated By list, then select the Validated By.
 - Enter the Validation Date
Click on the Save icon  at the bottom of the Life Certificate to save your new Life Certificate information. A window will appear to confirm.
Delete A Life Certificate
Overview
This screen contains information that helps users understand the requirements that are necessary to obatin a pensions
Navigation 
To DELETE a Life Certificate follow the steps below
By default, you will be in Search Mode.
- Find the Life Certificate you want to Delete
- Enter the information to be used as retrieval criteria in the appropriate field(s). If you prefer to see all Life Certificates , leave all fields blank.
- Click Find

- Select the Life Certificate you want to Delete
- Click on the Delete icon

- A window will appear asking you to confirm

- Click OK to confirm and delete the Life Certificate.
- A window will be displayed confirming the Life Certificate has been deleted

To Verify that the Life Certificate has been Deleted:
- Click on the Search icon

- Enter the Life Certificate information
- Click on the Find icon

The window will appear 
Modify A Life Certificate
Overview
This screen contains information that helps users understand the requirements that are necessary to obtain a pensions
Navigation 
To MODIFY a Life Certificate follow the steps below
By default, you will be in Search Mode.
- Enter the information to be used as retrieval criteria in the appropriate field(s).
If you prefer to see the list of all Life Certificates, leave all fields blank. - Click on the Find icon
 . The list of Life Certificates meeting the retrieval criteria will appear.
 - Click on the Life Certificate you want to modify.
You will then be in Update/Delete Mode. - Make the necessary modification(s).
- Click on the Update icon
 at the bottom of the screen to save your modifications. A window will appear to confirm the modification. Click OK to confirm.
School Type
Overview
School Type is used to identify the type of school the employee attended.
Navigation 
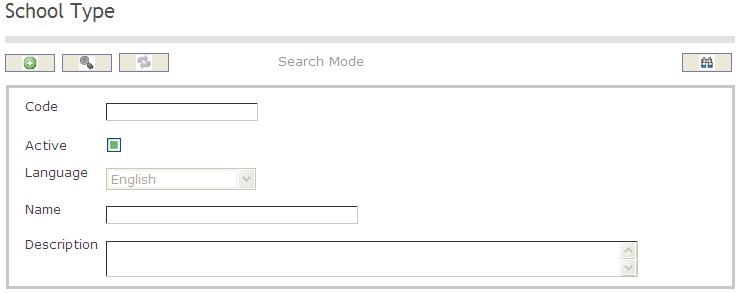
How to SEARCH:
- Enter the information to be used as retrieval criteria in the appropriate field (s). If you prefer to see a list of all , leave all fields blank
- Click on the Find icon

The School Type screen includes the following fields:
Field | Definition |
Code | School Types unique identification code |
Active | Active Status - if checked, School Type will become available |
Name | Name of the School Type |
Description | Description of the School Type |
Create A School Type
To CREATE a School Type that identifes the type of school the employee attended, follow these steps:
Navigation 
By default, you will be in Search Mode.
1. Click on the New icon ![]() . You will then be in Insert Mode.
. You will then be in Insert Mode.
2. Enter the new School Type information. Fields with an asterisk  are mandatory fields.
3. Enter the Code, check the Active box as necessary, and then select the Language from the drop down menu.
- Code: School Type unique identification code
- Active: Active Status when checked, the School Type will not be used/active
4. Enter the Name of the school type in the Name field, and describe the School Type in the Description field.
Click on the Save icon  at the bottom to save your new School Type information. A window will appear to confirm the new School Type creation. Click OK to confirm.
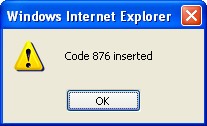
Delete A School Type
To DELETE a School Type that identifes the type of school the employee attended, follow these steps:
Navigation 
By default, you will be in Search Mode.
- Find the School Type you want to Delete
- Enter the information to be used as retrieval criteria in the appropriate field(s). If you prefer to see all School Types, leave all fields blank.
- Click Find
 .
. - Select the School Type you want to Delete.
- Click on the Delete icon
 .
. - A window will appear asking you to confirm

- Click OK to confirm and delete the School Type.
- A window will be displayed confirming the School Type has been deleted
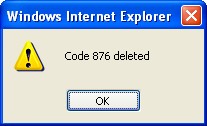
To Verify that the School Type has been Deleted:
- Click on the Search icon

- Enter the School Type information in the appropriate field (s).
- Click on the Find icon

- This window will appear

Modify A School Type
To MODIFY a School Type that identifes the type of school the employee attended, follow these steps:
Navigation 
By default, you will be in Search Mode.
- Enter the information to be used as retrieval criteria in the appropriate field (s). If you prefer to see a list of all School Types, leave all fields blank.
- Click on the Find icon
 .
. - Click on the School Type you want to modify.
You will then be in Update/Delete Mode. - Make the necessary modifications. To add or remove School Types, refer to School Type.
- Click on the Update icon
 at the bottom of the screen to save your modifications. A window will appear to confirm the modification. Click OK to confirm.
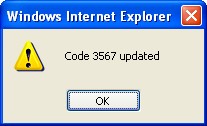
School
Overview
School describes the names of various Education institutions.
Navigation 
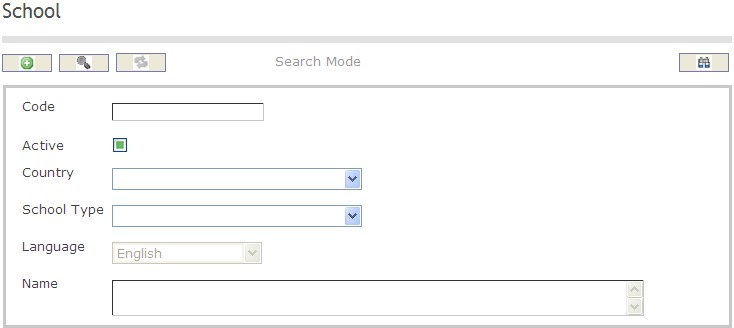
How to SEARCH:
- Enter the information to be used as retrieval criteria in the appropriate field (s). If you prefer to see a list of all Educations, leave all fields blank
- Click on the Find icon

The School screen includes the following fields:
Field | Definition |
Code | School unique identification code |
Active | Active Status - if checked, School become available |
Name | Name of the Major Education Field |
School Type | The type of school the employee attended |
Create A School
To CREATE a School that identifies the name of schools the employees attended, follow these steps:
Navigation 
By default, you will be in Search Mode.
1. Click on the New icon ![]() . You will then be in Insert Mode.
. You will then be in Insert Mode.
2. Enter the new School information. Fields with an asterisk  are mandatory fields.
3. Enter the Code as required, and check the Active box.
4. Choose the Country, School Type, and Language from the drop down menus.
5. Enter the name of the school in the Name field.
6. Click on the Save icon  at the bottom to save your new School information. A window will appear to confirm the new School creation. Click OK to confirm.
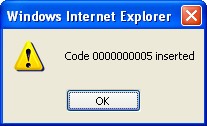
Delete A School
To DELETE a School that identifes the name of schools the employees attended, follow these steps:
Navigation 
By default, you will be in Search Mode.
- Find the School you want to Delete
- Enter the information to be used as retrieval criteria in the appropriate field(s). If you prefer to see all Schools, leave all fields blank.
- Click Find
 .
. - Select the School you want to Delete.
- Click on the Delete icon
 .
. - A window will appear asking you to confirm

- Click OK to confirm and delete the School
- A window will be displayed confirming the School has been deleted
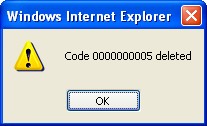
To Verify that the School has been Deleted:
- Click on the Search icon

- Enter the School information in the appropriate field (s).
- Click on the Find icon

- This window will appear

Modify A School
To MODIFY a School that identifes the name of schools the employees attended, follow these steps:
Navigation 
By default, you will be in Search Mode.
- Enter the information to be used as retrieval criteria in the appropriate field (s). If you prefer to see a list of all School, leave all fields blank.
- Click on the Find icon
 .
. - Click on the School you want to modify.
You will then be in Update/Delete Mode. - Make the necessary modifications.
- Click on the Update icon
 at the bottom of the screen to save your modifications. A window will appear to confirm the modification. Click OK to confirm.
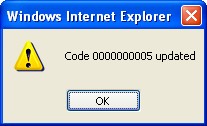
Pay Agent
Overview
This Entity contains information about a pay agent. A pay agent is a person who delivers cash or cheques to empoyees.
Navigation
Pay Agent Screen Fields
| Fields | Definitions |
| Code | Unique identification code of the Pay Agent. |
| Active | Active Status - if checked, Pay Master is available for all modules. |
| Employee | This indicates the employee number if the pay agent is an internal employee. |
| Vendor | The pay source that is used by the Pay Agent to deliver employee earnings. |
| Bank Account | Bank account for pay agent. |
| Paid by Cheque | Default = TRUE |
| Language | Language as chosen for name of pay agent. |
| Name | Name of Pay Agent. |
Address
Overview
A pay agent has one or many addresses.
Address Screen Fields
| Fields | Description |
| Is Main ? | Identifies the main address |
| Region | Region of the Agent |
| Address Type | Choose from the Drop Down Menu and select the appropriate address type. |
| Address | Address of the Pay Agent. |
| Location | Location of the Agent |
| City | City of Pay Agent |
| State | State of Pay Agent. |
| Zip Code | Zip Code of Pay Agent. |
| Country | Country of the Agent |
Medical Catalog
Overview
This screen specifies the possible Medical Conditions that an employee could experience during their employment career. A user will enter the appropriate medical information on this screen and then associate the conditions to the employees who suffer from them. Some examples of medical conditions are asthma, allergies, common colds, viral infections, or cancer.
Navigation 
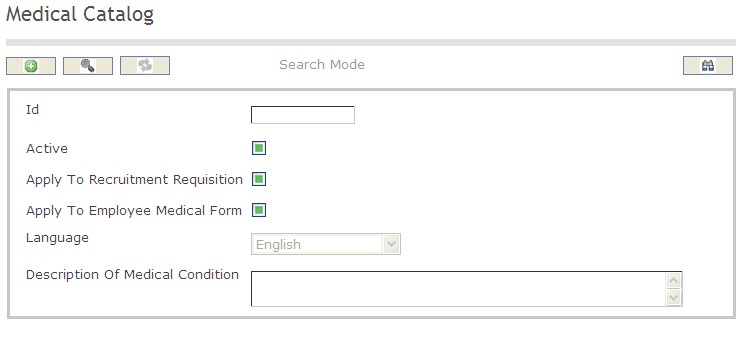
How to SEARCH:
- Enter the information to be used as retrieval criteria in the appropriate field (s). If you prefer to see a list of all Medical Catalogs, leave all fields blank.
- Click on the Find icon
 .
.
The Medical Catalog screen includes the following fields:
| Report Fields | Description |
| ID | Unique identification code of the Medical Catalog |
| Active | Active Status - if checked, Medical Catalog is available |
| Apply to Recruitment Requisition | Apply to Recruitment Requisition Status - if checked, Apply to Recruitment Requisition is available |
| Apply to Employee Medical Form | Apply to Employee Medical Form Status - if checked, Apply to Employee Medical Form is available |
| Language | Language used |
| Description | Provide a short description of the medical condition |
Create a Medical Catalog
The Medical Catalog specifies the possible Medical Conditions that an employee could experience during their employment career. To CREATE a Medical Catalog, follow the steps below:
Navigation 
By default, you will be in Search Mode.
- Click on the New icon
 (you will then be in Insert Mode).
 - Enter the new Medical Catalog information. Fields with an asterisk
 are mandatory fields.
 - Enter the ID, click on the Active, Apply to Recruitment Requisition, and Apply to Employee Medical Form checkmarks, and select the Language, as required.
- ID: Unique identification code of the Medical Catalog.
- Active: Active Status - if checked, Medical Catalog is available.
- Apply to Recruitment Requisition: Apply to Recruitment Requisition Status - if checked, Apply to Recruitment Requisition is available.
- Apply to Employee Medical Form: Apply to Employee Medical Form Status - if checked, Apply to Employee Medical Form is available.
- Language: Language used.
- Enter Description.
- Description: Provide a short description of the medical condition.
5. Click on the Save icon  at the bottom of the Medical Catalog to save your new Medical Catalog information. A window will appear to confirm.

Delete a Medical Catalog
The Medical Catalog specifies the possible Medical Conditions that an employee could experience during their employment career. To DELETE a Medical Catalog, follow the steps below:
Navigation 
By default, you will be in Search Mode.
- Find the Medical Catalog you want to Delete
- Enter the information to be used as retrieval criteria in the appropriate field(s). If you prefer to see all Medical Catalogs, leave all fields blank.
- Click Find

- Select the Medical Catalog you want to Delete
- Click on the Delete icon

- A window will appear asking you to confirm

- Click OK to confirm and delete the Medical Catalog.
- A window will be displayed confirming the Medical Catalog has been deleted

To Verify that the Medical Catalog has been Deleted:
- Click on the Search icon

- Enter the Medical Catalog information
- Click on the Find icon

- The window will appear

Modify a Medical Catalog
The Medical Catalog specifies the possible Medical Conditions that an employee could experience during their employment career. To MODIFY a Medical Catalog, follow the steps below:
Navigation 
By default, you will be in Search Mode.
- Enter the information to be used as retrieval criteria in the appropriate field(s).
If you prefer to see the list of all Medical Catalogs, leave all fields blank. - Click on the Find icon
 . The list of Medical Catalogs meeting the retrieval criteria will appear.
 - Click on the Medical Catalog you want to modify.
You will then be in Update/Delete Mode. - Make the necessary modification(s).
- Click on the Update icon
 at the bottom of the screen to save your modifications. A window will appear to confirm the modification. Click OK to confirm.
Standard Letters
Overview
This screen contains the standard templates used for generating personnel letters such as for appointments, probation, confirmation, entitlements, etc. Information to include on this screen are the identification code, the active status (if checked, the form is active), the language used to prepare the standard letter, and the description of the standard letter.
Navigation 
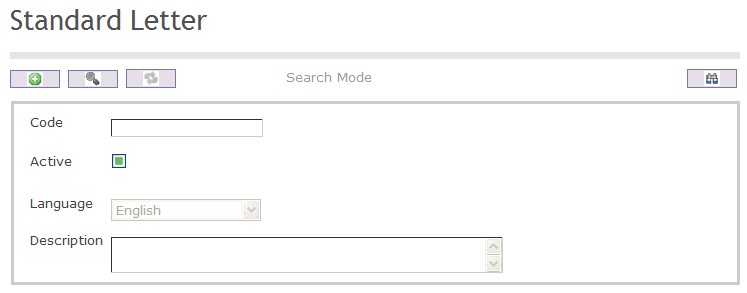
How to SEARCH:
- Enter the information to be used as retrieval criteria in the appropriate field (s). If you prefer to see a list of all Standard Letters, leave all fields blank.
- Click on the Find icon
 .
.
The Standard Letter screen includes the following fields:
| Report Fields | Description |
| Code | Unique identification code of the standard letter |
| Active | Active Status - if checked, Standard Letter is available |
| Language | Language used |
| Description | Short description of the standard letter |
Create a Standard Letter
Standard Letters contains the standard templates used for generating personnel letters such as for appointments, probation, confirmation, entitlements, etc. To CREATE a Standard Letter, follow the steps below:
Navigation 
By default, you will be in Search Mode.
- Click on the New icon
 (you will then be in Insert Mode).
 - Enter the new Standard Letter information. Fields with an asterisk
 are mandatory fields.
 - Enter the Code, click on the Active checkmark, and select the Language, as required.
- Code: Unique identification code of the standard letter.
- Active: Active Status - if checked, Standard Letter is available.
- Language: Language used.
- Enter Description.
- Description: Short description of the standard letter.
5. Click on the Save icon  at the bottom of the Standard Letter to save your new Standard Letter information. A window will appear to confirm.

Delete a Standard Letter
Standard Letters contains the standard templates used for generating personnel letters such as for appointments, probation, confirmation, entitlements, etc. To DELETE a Standard Letter, follow the steps below:
Navigation 
By default, you will be in Search Mode.
- Find the Standard Letter you want to Delete
- Enter the information to be used as retrieval criteria in the appropriate field(s). If you prefer to see all Standard Letters, leave all fields blank.
- Click Find

- Select the Standard Letter you want to Delete
- Click on the Delete icon

- A window will appear asking you to confirm
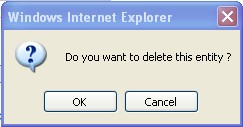
4. Click OK to confirm and delete the Standard Letter.
5. A window will be displayed confirming the Standard Letter has been deleted
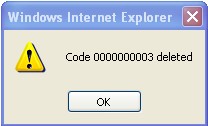 \
\
To Verify that the Standard Letter has been Deleted:
- Click on the Search icon

- Enter the Standard Letter information
- Click on the Find icon

- The window will appear

Modify a Standard Letter
Standard Letters contains the standard templates used for generating personnel letters such as for appointments, probation, confirmation, entitlements, etc. To MODIFY a Standard Letter, follow the steps below:
Navigation 
By default, you will be in Search Mode.
- Enter the information to be used as retrieval criteria in the appropriate field(s).
If you prefer to see the list of all Standard Letters, leave all fields blank. - Click on the Find icon
 . The list of Standard Letters meeting the retrieval criteria will appear.
 - Click on the Standard Letter you want to modify.
You will then be in Update/Delete Mode. - Make the necessary modification(s).
- Click on the Update icon
 at the bottom of the screen to save your modifications. A window will appear to confirm the modification. Click OK to confirm.
Note Types
Overview
This screen contains the different categories available for Note Types. It is a free form which allows the user to record personal information on an employee which can not be captured on any other forms available in the system.
Navigation 
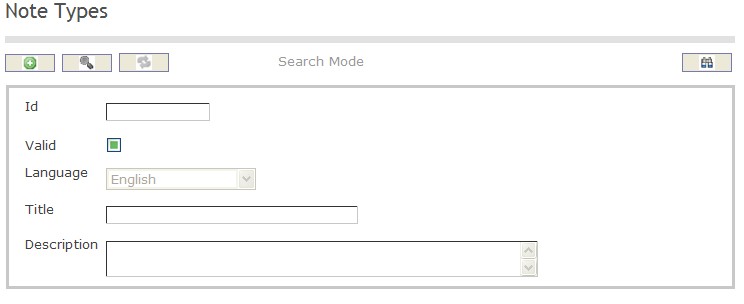
How to SEARCH:
- Enter the information to be used as retrieval criteria in the appropriate field (s). If you prefer to see a list of all Employee Note Types, leave all fields blank.
- Click on the Find icon
 .
.
The Employee Note Type screen includes the following fields:
| Report Fields | Description |
| ID | Unique identification code of the Employee Note Type |
| Valid | Valid Status - if checked, Employee Note Type is available |
| Language | Language used |
| Title | Title of the Employee Note Type |
| Description | Provide a short description of the Employee Note Type |
Create an Employee Note Type
Employee Note Type contains the different categories available for Employee Notes. To CREATE an Employee Note Type, follow the steps below:
Navigation 
By default, you will be in Search Mode.
- Click on the New icon
 (you will then be in Insert Mode).
 - Enter the new Employee Note Type information. Fields with an asterisk
 are mandatory fields.
 - Enter the ID, click on the Valid checkmark, and select the Language, as required.
- ID: Unique identification code of the Employee Note Type.
- Valid: Valid Status - if checked, Employee Note Type is available.
- Language: Language used.
- Enter Title.
- Title: Title of the Employee Note Type.
5. Enter Description.
- Description: Provide a short description of the Employee Note Type.
6. Click on the Save icon  at the bottom of the Employee Note Type to save your new Employee Note Type information. A window will appear to confirm.

Delete an Employee Note Type
Employee Note Type contains the different categories available for Employee Notes. To DELETE an Employee Note Type, follow the steps below:
Navigation 
By default, you will be in Search Mode.
- Find the Employee Note Type you want to Delete
- Enter the information to be used as retrieval criteria in the appropriate field(s). If you prefer to see all Employee Note Types, leave all fields blank.
- Click Find

- Select the Employee Note Type you want to Delete
- Click on the Delete icon

- A window will appear asking you to confirm

- Click OK to confirm and delete the Employee Note Type.
- A window will be displayed confirming the Employee Note Type has been deleted

To Verify that the Employee Note Type has been Deleted:
- Click on the Search icon

- Enter the Employee Note Type information
- Click on the Find icon

- The window will appear

Modify an Employee Note Type
Employee Note Type contains the different categories available for Employee Notes. To MODIFY an Employee Note Type, follow the steps below:
Navigation 
By default, you will be in Search Mode.
- Enter the information to be used as retrieval criteria in the appropriate field(s).
If you prefer to see the list of all Employee Note Types, leave all fields blank. - Click on the Find icon
 . The list of Employee Note Types meeting the retrieval criteria will appear.
 - Click on the Employee Note Type you want to modify.
You will then be in Update/Delete Mode. - Make the necessary modification(s).
- Click on the Update icon
 at the bottom of the screen to save your modifications. A window will appear to confirm the modification. Click OK to confirm.
Create A Major Education Field
To CREATE an Employee Major Education Field that describes the employee's major degrees, follow these steps:
Navigation 
By default, you will be in Search Mode.
- Click on the New icon
 . You will then be in Insert Mode.
 - Enter the new Major Education Field information. Fields with an asterisk
 are mandatory fields.
 - Enter the Code, and click on the Active. Select the Language from the drop down menu, and then specify the Major Education in the Name field.
- Code: Major Education Field unique identification code
- Active: Active Status - if checked, Major Education Field will become available.
- Language: Language used
- Name: Name of the Major Education Field
- Description: Description of the Major Education Field
4. Click on the Save icon  at the bottom to save your new Major Education Field information. A window will appear to confirm the new Major Education Field creation. Click OK to confirm.
Create A Scholastic Rank
To CREATE a Scholastic Rank that identify the employee's ranking according to their education level, follow these steps:
Navigation
By default, you will be in Search Mode.
- Click on the New icon
 . You will then be in Insert Mode.
 - Enter the new Scholastic Rank information. Fields with an asterisk
 are mandatory fields.
 - Enter the ID as required, and click on the Active. Select the Language, specify the Scholastic Rank Title in the Title field, and specify the Scholastic Rank Description in the Description Field,
- ID: Scholastic Rank unique identification number (Numbers only field)
- Active: Active Status - if checked, Scholastic Rank will become available.
- Language: Language used
- Name: Name of the Scholastic Rank
- Title: Provide a title describing the Scholastic Rank
- Description: Description of the Scholastic Rank
4. Click on the Save icon  at the bottom to save your new Scholastic Rank information. A window will appear to confirm the new Scholastic Rank creation. Click OK to confirm.
Create An Education
To CREATE an Education that describes the employee’s education levels, follow these steps:
Navigation 
By default, you will be in Search Mode.
1. Click on the New icon  . You will then be in Insert Mode.
2. Enter the new Educations information. Fields with an asterisk  are mandatory fields.
3. Enter the Code as required, and click on Active.
- Code: Educations unique identification code
- Active: Active Status - if checked, Scholastic Rank will become available.
4. Select the Degree from the drop down menu, and enter the graduation date in the Graduation Date field using the calendar button ![]() .
.
- Graduation Date: Year the employee graduated from the degree
5. Specify the Major Education Field from the drop down menu.
- Major Education Field: The field that the Education belong to
6. Choose the School Rank from the drop down menu.
- School Rank: Identifies the employee's ranking
7. Enter the School Start Year and End Year in the fields provided
- Start Year: Start year of Education
- End Year: End year of Education
8. Enter the School Degree in the field provided, school degree refers to the final degree score obtained
9. To enter the School, if required, click on the Lookup icon , click on Find icon
  to retrieve the School list, and then select the School. Refer to School for more information.
- School: The school attended to obtain the degree
10. Click on the Save icon  at the bottom to save your new Educations information. A window will appear to confirm the new Educations creation. Click OK to confirm.
Delete A Major Education Field
To DELETE an Employee Major Education Field that describes the employees major degrees , follow these steps:
Navigation 
By default, you will be in Search Mode.
- Find the Major Education Field you want to Delete
- Enter the information to be used as retrieval criteria in the appropriate field(s). If you prefer to see all Major Education Fields, leave all fields blank.
- Click Find
 .
. - Select the Major Education Field you want to Delete.
- Click on the Delete icon
 .
. - A window will appear asking you to confirm

- Click OK to confirm and delete the Major Education Field
- A window will be displayed confirming the Major Education Field has been deleted

To Verify that the Major Education Field has been Deleted:
- Click on the Search icon

- Enter the Major Education Field information in the appropriate field (s).
- Click on the Find icon

- This window will appear

Delete A Scholastic Rank
To DELETE a Scholastic Rank that identifies the employee's ranking according to their education level, follow these steps:
Navigation
By default, you will be in Search Mode.
- Find the Scholastic Rank you want to Delete
- Enter the information to be used as retrieval criteria in the appropriate field(s). If you prefer to see all Scholastic Rank, leave all fields blank.
- Click Find
 .
. - Select the Scholastic Rank you want to Delete.
- Click on the Delete icon
 .
. - A window will appear asking you to confirm

- Click OK to confirm and delete the Scholastic Rank
- A window will be displayed confirming the Scholastic Rank has been deleted

To Verify that the Scholastic Rank has been Deleted:
- Click on the Search icon

- Enter the Scholastic Rank information in the appropriate field (s).
- Click on the Find icon

- This window will appear

Delete An Education
To DELETE an Education that describes the employee’s education levels, follow these steps:
Navigation 
By default, you will be in Search Mode.
- Find the Educations you want to Delete
- Enter the information to be used as retrieval criteria in the appropriate field(s). If you prefer to see all Educations, leave all fields blank.
- Click Find
 .
. - Select the Educations you want to Delete.
- Click on the Delete icon
 .
. - A window will appear asking you to confirm

- Click OK to confirm and delete the Educations
- A window will be displayed confirming the Educations has been deleted

To Verify that the Educations has been Deleted:
- Click on the Search icon

- Enter the Educations information in the appropriate field (s).
- Click on the Find icon

- This window will appear

Modify A Scholastic Rank
To MODIFY a Scholastic Rank that identify the employee's ranking according to their education level, follow these steps:
Navigation
By default, you will be in Search Mode.
- Enter the information to be used as retrieval criteria in the appropriate field (s). If you prefer to see a list of all Scholastic Rank, leave all fields blank.
- Click on the Find icon
 .
. - Click on the Scholastic Rank you want to modify.
You will then be in Update/Delete Mode. - Make the necessary modifications.
- Click on the Update icon
 at the bottom of the screen to save your modifications. A window will appear to confirm the modification. Click OK to confirm.

Modify An Education
To MODIFY an Education that describes the employee’s education levels, follow these steps:
Navigation 
By default, you will be in Search Mode.
- Enter the information to be used as retrieval criteria in the appropriate field (s). If you prefer to see a list of all Educations, leave all fields blank.
- Click on the Find icon
 .
. - Click on the Educations Field you want to modify.
You will then be in Update/Delete Mode. - Make the necessary modifications. To add or remove a School, refer to School for more information.
- Click on the Update icon
 at the bottom of the screen to save your modifications. A window will appear to confirm the modification. Click OK to confirm.

Modify Major Education Field
To MODIFY an Employee Major Education Field that describes the employees major degrees , follow these steps:
Navigation 
By default, you will be in Search Mode.
- Enter the information to be used as retrieval criteria in the appropriate field (s). If you prefer to see a list of all Major Education Fields, leave all fields blank.
- Click on the Find icon
 .
. - Click on the Major Education Field you want to modify.
You will then be in Update/Delete Mode. - Make the necessary modifications.
- Click on the Update icon
 at the bottom of the screen to save your modifications. A window will appear to confirm the modification. Click OK to confirm.

Race
Overview
The Race screen provides information to the organization about each individual race.
Navigation 
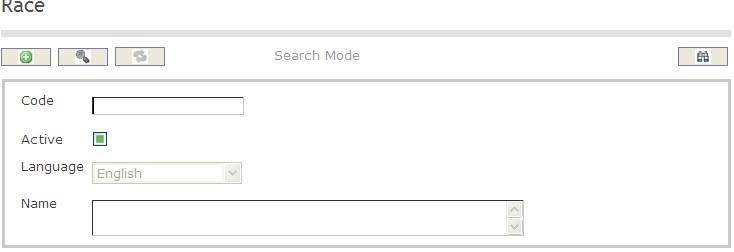
To SEARCH a Race
1. Enter the information to be used as retrieval criteria in the appropriate field(s). If you prefer to see the list of all Races, leave all fields blank.
2. Click on the Find icon  .
.
The screen Race includes the following fields:
| Field | Definition |
| Code | Unique code of identification |
| Active | Default |
| Language | Language of Use |
| Name | Name of Race |
Create A Race
Navigation 
By default, you will be in Search Mode.
- Click on the New icon
 (you will then be in Insert Mode).
 - Enter the new Race information. Fields with an asterisk
 are mandatory fields.
 - Enter the Code, click on the Active checkmark, as required, and select the Language, as required.
Code: Unique identification code of the religion.
Active: Active Status - if checked, Race is available.
4 . Enter Name.
Name: Name of the race.
Click on the Save icon  at the bottom of the Race to save your new Race information.
The following window will appear to confirm:
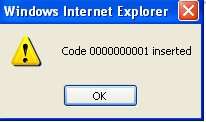
Delete A Race
Navigation 
By default, you will be in Search Mode.
- Find the Race you want to Delete
- Enter the information to be used as retrieval criteria in the appropriate field(s). If you prefer to see all Races, leave all fields blank.
- Click Find

- Select the Race you want to Delete
- Click on the Delete icon

- A window will appear asking you to confirm

- Click OK to confirm and delete the Race.
- A window will be displayed confirming the Race has been deleted

- Click on the Delete icon
To Verify that the Race has been Deleted:
- Click on the Search icon

- Enter the Race information
- Click on the Find icon

The window will appear 
Modify A Race
Navigation 
By default, you will be in Search Mode.
- Enter the information to be used as retrieval criteria in the appropriate field(s).
If you prefer to see the list of all Races, leave all fields blank. - Click on the Find icon
 . The list of Races meeting the retrieval criteria will appear.
 - Click on the Races you want to modify.
You will then be in Update/Delete Mode. - Make the necessary modification(s).
- Click on the Update icon
 at the bottom of the screen to save your modifications. A window will appear to confirm the modification. Click OK to confirm.
Religion
Overview
This screen represents a catalogue of possible religions.
Navigation 

To SEARCH a Religion
1. Enter the information to be used as retrieval criteria in the appropriate field(s). If you prefer to see the list of all Religion, leave all fields blank.
2. Click on the Find icon  .
.
The Religion screen includes the following fields:
| Field | Definition |
| Code | Unique identification code |
| Active | If checked, then the religion is available |
| Language | Language of use |
| Name | Name of Religion |
Create A Religion
Navigation 
By default, you will be in Search Mode.
- Click on the New icon
 (you will then be in Insert Mode).
 - Enter the new Religion information. Fields with an asterisk
 are mandatory fields.
 - Enter the Code, click on the Active checkmark, as required, and select the Language, as required.
Code: Unique identification code of the religion.
Active: Active Status - if checked, Religion is available.
4 . Enter Name.
Name: Name of the religion.
Click on the Save icon  at the bottom of the Religion to save your new Religion information.
The following window will appear to confirm:
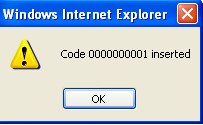
Delete a Religion
Navigation 
By default, you will be in Search Mode.
- Find the Religion you want to Delete
- Enter the information to be used as retrieval criteria in the appropriate field(s). If you prefer to see all Religions, leave all fields blank.
- Click Find

- Select the Religion you want to Delete
- Click on the Delete icon

- A window will appear asking you to confirm

- Click OK to confirm and delete the Religion.
- A window will be displayed confirming the Religion has been deleted

- Click on the Delete icon
To Verify that the Religion has been Deleted:
- Click on the Search icon

- Enter the Religion information
- Click on the Find icon

The window will appear 
Modify A Religion
Navigation 
By default, you will be in Search Mode.
- Enter the information to be used as retrieval criteria in the appropriate field(s).
If you prefer to see the list of all Religions, leave all fields blank. - Click on the Find icon
 . The list of Religons meeting the retrieval criteria will appear.
 - Click on the Religion you want to modify.
You will then be in Update/Delete Mode. - Make the necessary modification(s).
- Click on the Update icon
 at the bottom of the screen to save your modifications. A window will appear to confirm the modification. Click OK to confirm.
Tribe
Overview
This screen represents a catalogue of Tribes. Normally most countries will not have a "tribes" as a mandatory information component of their HR system. The Tribes entity is available for those countries that require it.
Navigation 
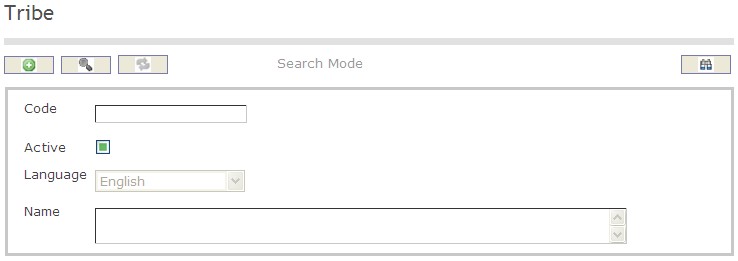
To SEARCH a Tribe:
- Enter the information to be used as retrieval criteria in the appropriate field(s).
If you prefer to see the list of all Tribes, leave all fields blank. - Click on the Find icon
 .
.
The Religion screen includes the following fields:
| Field | Definition |
| Code | Unique code of identification |
| Active | if checked, then the tribe is available |
| Language | Language of use |
| Name | Name of tribe |
Create A Tribe
Navigation 
By default, you will be in Search Mode.
- Click on the New icon
 (you will then be in Insert Mode).
 - Enter the new Tribe information. Fields with an asterisk
 are mandatory fields.
 - Enter the Code, click on the Active checkmark, as required, and select the Language, as required.
Code: Unique identification code of the tribe.
Active: Active Status - if checked, Tribe is available.
4 . Enter Name.
Name: Name of the Tribe.
Click on the Save icon  at the bottom of the Tribe to save your new Tribe information.
The following window will appear to confirm:

| Attachment | Size |
|---|---|
| Tribenavigation.jpg | 4.76 KB |
Delete A Tribe
Navigation 
By default, you will be in Search Mode.
- Find the Tribe you want to Delete
- Enter the information to be used as retrieval criteria in the appropriate field(s). If you prefer to see all Tribe, leave all fields blank.
- Click Find

- Select the Tribe you want to Delete
- Click on the Delete icon

- A window will appear asking you to confirm

- Click OK to confirm and delete the Tribe.
- A window will be displayed confirming the Tribe has been deleted

- Click on the Delete icon
To Verify that the Tribe has been Deleted:
- Click on the Search icon

- Enter the Tribe information
- Click on the Find icon

The window will appear

Modify A Tribe
Navigation 
By default, you will be in Search Mode.
- Enter the information to be used as retrieval criteria in the appropriate field(s).
If you prefer to see the list of all Tribes, leave all fields blank. - Click on the Find icon
 . The list of Tribes meeting the retrieval criteria will appear.
 - Click on the Tribe you want to modify.
You will then be in Update/Delete Mode. - Make the necessary modification(s).
- Click on the Update icon
 at the bottom of the screen to save your modifications. A window will appear to confirm the modification. Click OK to confirm.
Required Document List
Overview
This entity is a catalogue of documents that are necessary for certain processes. Needs UI to create,update catalogue entries.
Navigation
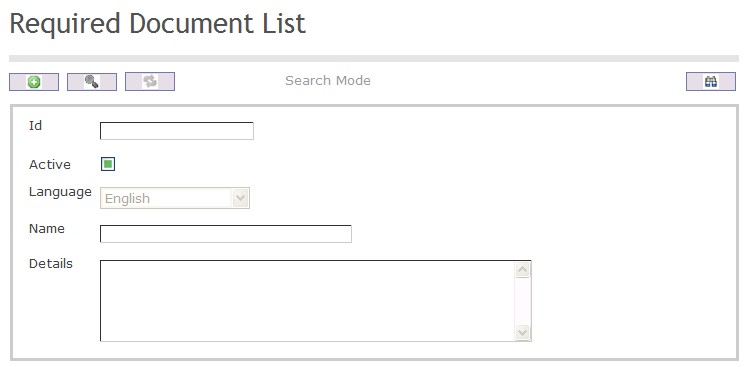
How to SEARCH:
- Enter the information to be used as retrieval criteria in the appropriate field (s). If you prefer to see a list of all Required Document Lists, leave all fields blank.
- Click on the Find icon
 .
.
The Required Document List screen includes the following fields:
| Report Fields | Description |
| ID | Unique identification code of the Required Document List |
| Active | Active Status - if checked, Required Document List is available |
| Language | Language used |
| Name | Name of the individual |
| Description | Provide a short description of the Required Document List |
Create a Required Document List
This entity is a catalogue of documents that are necessary for certain processes. Needs UI to create,update catalogue entries. To CREATE a Required Document List, follow the steps below:
Navigation
By default, you will be in Search Mode.
- Click on the New icon
 (you will then be in Insert Mode).
 - Enter the new Required Document List information. Fields with an asterisk
 are mandatory fields.
 - Enter the ID and Name, click on the Active, and select the Language, as required.
- ID: Unique identification code of the Required Document List
- Active: Active Status - if checked, Required Document List is available
- Name: Name of the individual
- Language: Language used
- Enter Description.
- Description: Provide a short description of the Required Document List.
5. Click on the Save icon  at the bottom of the Required Document List to save your new Required Document List information. A window will appear to confirm.

Delete a Required Document List
This entity is a catalogue of documents that are necessary for certain processes. Needs UI to create,update catalogue entries. To DELETE a Required Document List, follow the steps below:
Navigation
By default, you will be in Search Mode.
- Find the Required Document List you want to Delete
- Enter the information to be used as retrieval criteria in the appropriate field(s). If you prefer to see all Required Document List, leave all fields blank.
- Click Find

- Select the Required Document List you want to Delete
- Click on the Delete icon

- A window will appear asking you to confirm

- Click OK to confirm and delete the Required Document List.
- A window will be displayed confirming the Required Document List has been deleted

To Verify that the Required Document List has been Deleted:
- Click on the Search icon

- Enter the Required Document List information
- Click on the Find icon

- The window will appear

Modify a Required Document List
This entity is a catalogue of documents that are necessary for certain processes. Needs UI to create,update catalogue entries. To Modify a Required Document List, follow the steps below:
Navigation
By default, you will be in Search Mode.
- Enter the information to be used as retrieval criteria in the appropriate field(s).
If you prefer to see the list of all Required Document List , leave all fields blank. - Click on the Find icon
 . The list of Required Document List meeting the retrieval criteria will appear.
 - Click on the Required Document List you want to modify.
You will then be in Update/Delete Mode. - Make the necessary modification(s).
- Click on the Update icon
 at the bottom of the screen to save your modifications. A window will appear to confirm the modification. Click OK to confirm.

Promotion Management
Promotion Reason
Overview
This screen holds the promotion rationales (reasons).
Navigation 
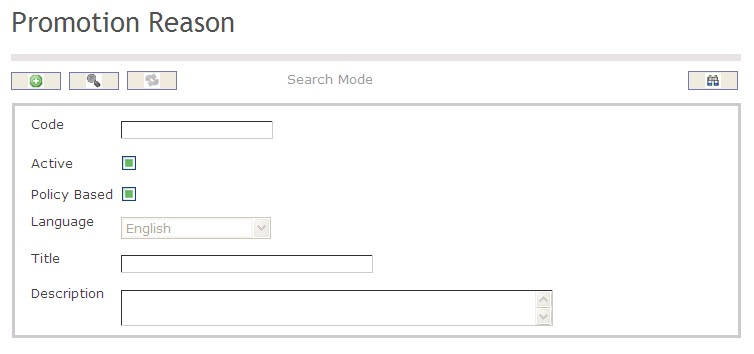
How to SEARCH:
- Enter the information to be used as retrieval criteria in the appropriate field (s). If you prefer to see a list of all Promotion Reasons, leave all fields blank.
- Click on the Find icon
 .
.
The Promotion Reason screen includes the following fields:
| Report Fields | Description |
| Code | Unique identification code of the Promotion Reason |
| Active | By default, this field is true (ie. checkmarked). When false (unchecked), this rationale is not available for usage anymore |
| Policy Based | By default, this field is false (unchecked). User will checkmark this field when creating a reason for the automatic promotions |
| Language | Language used |
| Title | Name of the rationale (e.g. Temporary replacement, Seniority based promotion, etc.). A reserved value will be "Policy Based Promotion" |
| Description | Description of the rationale, if required |
Create a Promotion Reason
The Promotion Reason screen holds the promotion rationales (reasons).
To CREATE a Promotion Reason, follow the steps below:
Navigation 
By default, you will be in Search Mode.
- Click on the New icon
 (you will then be in Insert Mode).
 - Enter the new Promotion Reason information. Fields with an asterisk
 are mandatory fields.
 - Enter the Code, as required.
- Code: Unique identification code of the Promotion Reason
4. Click the Active and Policy Based checkboxes, as required.
- Active: By default, this field is true (ie. checkmarked). When false (unchecked), this rationale is not available for usage anymore
- Policy Based: By default, this field is false (unchecked). User will checkmark this field when creating a reason for the automatic promotions
5. Select the Language from the drop-down menu.
- Language: Language used
6. Enter the Title.
- Title: Name of the rationale (e.g. Temporary replacement, Seniority based promotion, etc.). A reserved value will be "Policy Based Promotion"
7. Enter the Description.
- Description: Description of the rationale, if required
8. Click on the Save icon  at the bottom of the Promotion Reason to save your new Promotion Reason information. A window will appear to confirm.

Delete a Promotion Reason
The Promotion Reason screen holds the promotion rationales (reasons).
To DELETE a Promotion Reason, follow the steps below:
Navigation 
By default, you will be in Search Mode.
- Find the Promotion Reason you want to Delete
- Enter the information to be used as retrieval criteria in the appropriate field(s). If you prefer to see all Promotion Reasons, leave all fields blank.
- Click Find

- Select the Promotion Reason you want to Delete
- Click on the Delete icon

- A window will appear asking you to confirm

4. Click OK to confirm and delete the Promotion Reason.
5. A window will be displayed confirming the Promotion Reason has been deleted

To Verify that the Promotion Reason has been Deleted:
- Click on the Search icon

- Enter the Promotion Reason information
- Click on the Find icon

- The window will appear

Modify a Promotion Reason
The Promotion Reason screen holds the promotion rationales (reasons).
To MODIFY a Promotion Reason, follow the steps below:
Navigation 
By default, you will be in Search Mode.
- Enter the information to be used as retrieval criteria in the appropriate field(s).
If you prefer to see the list of all Promotion Reasons, leave all fields blank. - Click on the Find icon
 . The list of Promotion Reasons meeting the retrieval criteria will appear.
 - Click on the Promotion Reason you want to modify.
You will then be in Update/Delete Mode. - Make the necessary modification(s).
- Click on the Update icon
 at the bottom of the screen to save your modifications. A window will appear to confirm the modification. Click OK to confirm.
Performance Appraisal Management
Performance Appraisal Schedule Period
Overview
A reasonable time frame must be set for performance appraisals. The length of time depends on the job. This is because the employees must have an adequate amount of time to improve their job performance. The performance appraisal schedule periods contain sets of dates that range from start to end dates that can be used by different performance appraisal schedules. For example if the employee is supposed to get evaluated every February the schedule period would start sometime in February and end after the required number of days had passed. This is basically where management specifies the exact dates and length of the performance appraisal.
Once set up, the periods are available to organizations to set up their appraisals.
Navigation 
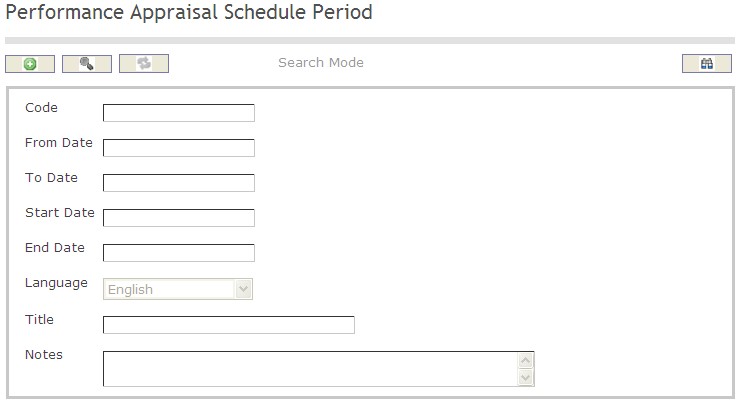
How to SEARCH:
- Enter the information to be used as retrieval criteria in the appropriate field (s). If you prefer to see a list of all performance appraisal schedule period leave all fields blank.
- Click on the Find icon
 .
.
The Performance Appraisal Schedule Period screen includes the following fields:
| Field | Definition |
| Code | Unique identification code of the Performance Appraisal Schedule Period |
| From Date | Employee starting date. |
| To Date | Employee ending date. |
| Start Date | Date at which the appraisal starts. |
| End Date | Date at which the appraisal should end. |
| Language | Language used |
| Title | Name of the Performance Appraisal Schedule Period |
| Description | Description of the Performance Appraisal Schedule Period |
Create a Performance Appraisal Schedule Period
Performance appraisal schedule periods contains the start to end dates of the different performance appraisal schedules.
To CREATE performance appraisal schedule periods follow the steps below:
Navigation 
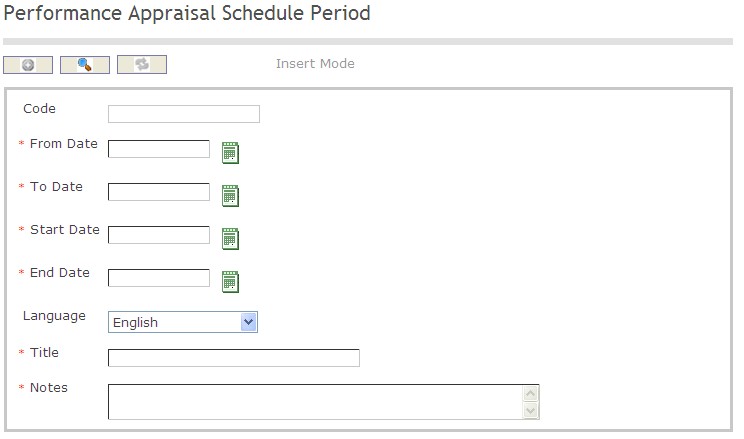
By default, you will be in Search Mode.
- Click on the New icon
 (you will then be in Insert Mode).
 - Enter the new Performance Appraisal Schedule Period information. Fields with an asterisk
 are mandatory fields.
 - Enter the Code, if required.
- Code: Unique identification code of the Performance Appraisal Schedule Period
- Enter the From Date, To Date, Start Date and End Day.
- From Date: This is the date that the appraisal should be evaluated from. Employees should be evaluated based on their performance starting from this date. To enter the date, click on the Calendar icon
 and select the date.
 - To Date: This is the appraisal coverage end date. Employees should be evaluated based on their performance up to this date. To enter the date, click on the Calendar icon
 and select the date.
 - Start Date: Date at which the appraisal process formally starts. To enter the date, click on the Calendar icon
 and select the date.
 - End Date: Date at which the appraisal process should end. To enter the date, click on the Calendar icon
 and select the date.
5. Select Language from a drop down menu.
- Language: Language used
6. Enter Title and Description of Performance Appraisal Schedule Period
- Title: Name of the Performance Appraisal Schedule Period
- Description: Description of the Performance Appraisal Schedule Period
Click on the Save icon  at the bottom of the Performance Appraisal Schedule Period screen to save your new Performance Appraisal Schedule Period information. A window will appear to confirm.
Delete a Performance Appraisal Schedule Period
Performance appraisal schedule periods contain sets of dates that range from start to end dates that can be used by different performance appraisal schedules.
Note: If there are any performance appraisals being scheduled or is using the
To DELETE performance appraisal schedule periods follow the steps below:
Note: If there are any performance appraisals being scheduled or is using the Schedule Period, the system will not allow the specified Schedule Period to be deleted.
Navigation 
By default, you will be in Search Mode.
- Find the Performance Appraisal Schedule Period you want to Delete
- Enter the information to be used as retrieval criteria in the appropriate field(s). If you prefer to see all Performance Appraisal Schedule Periods, leave all fields blank.
- Click Find
 .
. - Select the Performance Appraisal Schedule Period you want to Delete.
- Click on the Delete icon
 .
. - A window will appear asking you to confirm

- Click OK to confirm and delete the Performance Appraisal Schedule Period
- A window will be displayed confirming the Performance Appraisal Schedule Period has been deleted

To Verify that the Performance Appraisal Schedule Period has been Deleted:
- Click on the Search icon

- Enter the Performance Appraisal Schedule Period information in the appropriate field (s).
- Click on the Find icon

- This window will appear

Modify a Performance Appraisal Schedule Period
Navigation 
By default, you will be in Search Mode.
- Enter the information to be used as retrieval criteria in the appropriate field(s).
If you prefer to see the list of all Performance Appraisal Schedule Period, leave all fields blank. - Click on the Find icon
 . The list of Performance Appraisal Schedule Periods meeting the retrieval criteria will appear.
 - Click on the Performance Appraisal Schedule Period you want to modify.
You will then be in Update/Delete Mode. - Make the necessary modification(s).
- Click on the Update icon
 at the bottom of the screen to save your modifications. A window will appear to confirm the modification. Click OK to confirm.
Performance Appraisal Schedule
Overview
The frequency and length of a performance appraisal depends on the job. For example, an administrator may be evaluated every 6 months because it is assumed that they will be able to improve their performance in that time frame and can be evaluated as such. A manager may only get evaluated every year because it takes them longer to show measurable improvements in management.
In this application the performance appraisal schedules contains the list of planned schedules by date. This is where management will decide how often a performance appraisal will be conducted. For example, common schedules could be quarterly, Semi-Annual, etc.
Navigation 
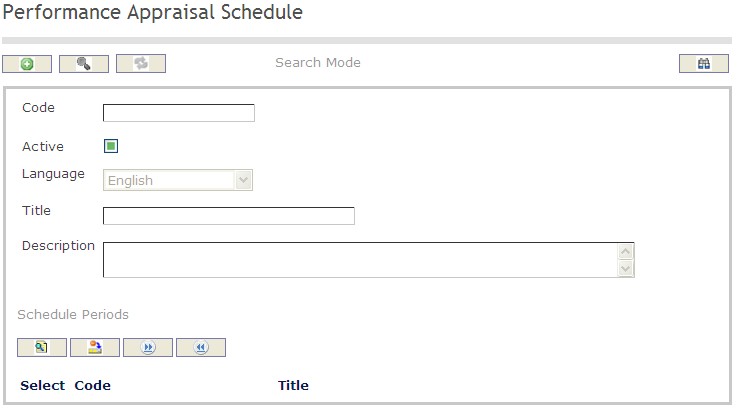
How to SEARCH:
- Enter the information to be used as retrieval criteria in the appropriate field (s). If you prefer to see a list of all performance appraisal schedule leave all fields blank.
- Click on the Find icon
 .
.
The Performance Appraisal Schedule screen includes the following fields:
| Field | Definition |
| Code | Unique identification code of the Performance Appraisal Schedule. |
| Active | Active Status - if checked, Performance Appraisal Schedule is available. |
| Language | language used |
| Title | Name of the Performance Appraisal Schedule |
| Description | Description of the Performance Appraisal Schedule |
Create a Performance Appraisal Schedule
Performance appraisal schedules contains the list of planned schedules. This is where management will decide how often a performance appraisal will be conducted.
To CREATE performance appraisal schedules follow the steps below:
Navigation 
- Click on the New icon
 (you will then be in Insert Mode).
 - Enter the new Performance Appraisal Schedule information. Fields with an asterisk
 are mandatory fields.
 - Enter the Code, click on the Active checkmark, and select the Language, as required.
- Code: Unique identification code of the Performance Appraisal Schedule.
- Active: Active Status - if checked, Performance Appraisal Schedule is available.
- Language: language used
4. Enter Title and Description of Performance Appraisal Schedule
- Title: Name of the Performance Appraisal Schedule
- Description: Description of the Performance Appraisal Schedule
To ADD Performance Appraisal Schedule Periods to the Performance Appraisal Schedules, if required:
- Click on Lookup icon
 , and enter the Performance Appraisal Schedule Period information, or leave the Performance Appraisal Schedule Period information blank to retrieve all Performance Appraisal Schedule Periods.
 - Click Find icon

- Click the individual Select Checkbox (es) to select and de-select the Performance Appraisal Schedule Periods, as required.
- Repeat steps 1, 2 and 3 for all required Performance Appraisal Schedule Periods.
- Click the Return icon
 to return to the Performance Appraisal Schedule screen, or click the Discard button
  to discard the selection entry and return to Performance Appraisal Schedule screen.
 - Click the individual Select Checkbox (es) to select and de-select the Performance Appraisals Schedule Period(s), as required, or click the Select All icon
 or Unselect All
  icon, to select all Performance Appraisal Schedule Periods or de-select all Performance Appraisal Schedule Periods, if required.
 - Click the Remove icon to remove the selected Performance Appraisal Schedule Period information, if required.
To ADD new Performance Appraisal Schedule Period, refer to Performance Appraisal Schedule Periods.
Click on the Save icon  at the bottom of the Performance Appraisal Schedule page to save your new Performance Appraisal Schedule information. A window will appear to confirm.

Delete a Performance Appraisal Schedule
Performance appraisal schedules contains the list of planned schedules.
To DELETE performance appraisal schedules follow the steps below:
Note: The system will not allow schedules that are being utilized in an appraisal process to be deleted.
Navigation 
By default, you will be in Search Mode.
- Find the Performance Appraisal Schedule you want to Delete
- Enter the information to be used as retrieval criteria in the appropriate field(s). If you prefer to see all Performance Appraisal Schedules, leave all fields blank.
- Click Find
 .
. - Select the Performance Appraisal Schedule you want to Delete.
- Click on the Delete icon
 .
. - A window will appear asking you to confirm

- Click OK to confirm and delete the Performance Appraisal Schedule
- A window will be displayed confirming the Performance Appraisal Schedule has been deleted

To Verify that the Performance Appraisal Schedule has been Deleted:
- Click on the Search icon

- Enter the Performance Appraisal Schedule information in the appropriate field (s).
- Click on the Find icon

- This window will appear

Modify a Performance Appraisal Schedule
Performance appraisal schedules contains the list of planned schedules. This is where management will decide how often a performance appraisal will be conducted.
To MODIFY performance appraisal schedules follow the steps below:
Navigation 
By default, you will be in Search Mode.
- Enter the information to be used as retrieval criteria in the appropriate field(s).
If you prefer to see the list of all Performance Appraisal Schedule, leave all fields blank. - Click on the Find icon
 . The list of Performance Appraisal Schedules meeting the retrieval criteria will appear.
 - Click on the Performance Appraisal Schedule you want to modify.
You will then be in Update/Delete Mode. - Make the necessary modification(s).
- Click on the Update icon
 at the bottom of the screen to save your modifications. A window will appear to confirm the modification. Click OK to confirm.
Performance Appraisal Score Rate
Overview
Performance appraisal score rates are details about how the employees will be evaluated. For example the following would be considered score rates: (A 100-80) (B 70-80) (C 60-70) (D 50-60) (F 0-50). The letter would be considered the Code and the numbers would be the minimum and maximum values. The score rates are used to make up the score rate scales.
Navigation 
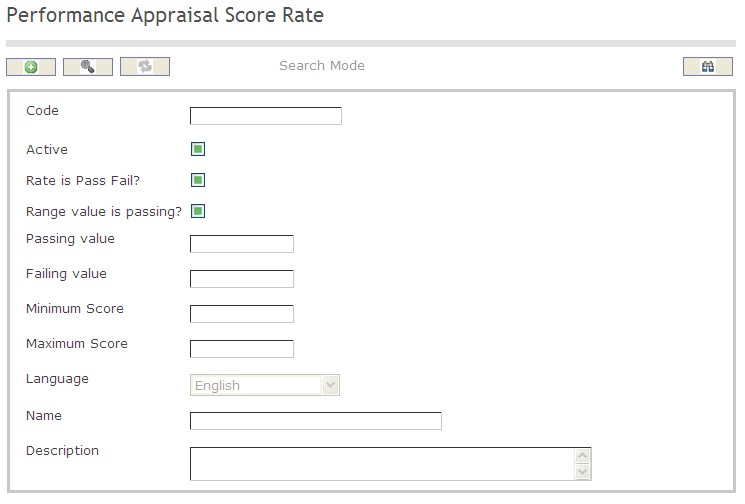
How to SEARCH:
- Enter the information to be used as retrieval criteria in the appropriate field (s). If you prefer to see a list of all performance appraisal score rates leave all fields blank.
- Click on the Find icon
 .
.
The Performance Appraisal Score Rates screen includes the following fields:
| Field | Definition |
| Code | Unique identification code of the Performance Appraisal Score Rate. |
| Active | Active Status - if checked, Performance Appraisal Score Rate is available. |
| Rate is Pass Fail? | If checked, the passing and failing scores will apply. If not checked, the minimum and maximum scores will apply. |
| Range Value is Passing | If checked, the score is within the passing value range. |
| Passing Value | Value required to pass. |
| Failing Value | By default the failing value is 0 but can be over-written to have a different lower boundary for failing. |
| Minimum Score | the lowest score possible for this rate. |
| Maximum Score | the highest score possible for this rate. |
| Language | Language used. |
| Title | Name of the Performance Appraisal Score Rate. |
| Description | Description of the Performance Appraisal Score Rate. |
Create a Performance Appraisal Score Rate
Performance appraisal score rates are details about how the employees will be evaluated.
To CREATE performance appraisal score rates follow the steps below:
Navigation 
By default, you will be in Search Mode.
- Click on the New icon
 (you will then be in Insert Mode).
 - Enter the new Performance Appraisal Score Rate information. Fields with an asterisk
 are mandatory fields.
 - Enter the Code, click on the Active, Rate is Pass Fail, and Range Value is Passing checkmark, as required.
- Code: Unique identification code of the Performance Appraisal Score Rate.
- Active: Active Status - if checked, Performance Appraisal Score Rate is available
- Rate is Pass Fail: If checked, the passing and failing scores will apply. If not checked, the minimum and maximum scores will apply.
- Range Value is Passing: If checked, indicates that the score is within the passing value range
4. Enter Passing Value and Failing Value if required
- Passing Value: Value required to pass
- Failing Value: By default the failing value is 0 but can be over-written to have a different lower boundary for failing.
5. Enter Minimum Score and Maximum Score
- Minimum Score: Lowest score possible possible for this rate
- Maximum Score: Highest score possible for this rate
6. Select the Language, as required.
- Language: Language used
7. Enter Title and Description of the Performance Appraisal Score Rate.
- Title: Name of the Performance Appraisal Score Rate
- Description: Description of the Performance Appraisal Score Rate
Click on the Save icon  at the bottom of the Performance Appraisal Score Rate page to save your new Performance Appraisal Score Rate information. A window will appear to confirm.
Delete a Performance Appraisal Score Rate
Performance appraisal score rates are details about how the employees will be evaluated.
To DELETE performance appraisal score rates follow the steps below:
Navigation 
By default, you will be in Search Mode.
- Find the Performance Appraisal Score Rate you want to Delete
- Enter the information to be used as retrieval criteria in the appropriate field(s). If you prefer to see all Performance Appraisal Score Rate, leave all fields blank.
- Click Find

- Select the Performance Appraisal Score Rate you want to Delete
- Click on the Delete icon

- A window will appear asking you to confirm

- Click OK to confirm and delete the Performance Appraisal Score Rate.
- A window will be displayed confirming the Performance Appraisal Score Rate has been deleted

To Verify that the Performance Appraisal Score Rate has been Deleted:
- Click on the Search icon

- Enter the Performance Appraisal Score Rate information
- Click on the Find icon

- The window will appear

Modify Performance Appraisal Score Rate
Performance appraisal score rates are details about how the employees will be evaluated.
To MODIFY performance appraisal score rates follow the steps below:
Navigation 
By default, you will be in Search Mode.
- Enter the information to be used as retrieval criteria in the appropriate field(s).
If you prefer to see the list of all Performance Appraisal Score Rates, leave all fields blank. - Click on the Find icon
 . The list of Performance Appraisal Score Rate meeting the retrieval criteria will appear.
 - Click on the Performance Appraisal Score Rate you want to modify.
You will then be in Update/Delete Mode. - Make the necessary modification(s).
Click on the Update icon
 at the bottom of the screen to save your modifications. A window will appear to confirm the modification. Click OK to confirm.
Performance Appraisal Score Rate Scale
Overview
Reviewers need to select the appropriate method to score performance appraisals. The reviewer can choose to score the performance appraisal using letters (A, B, C), words (good, bad, excellent) or pass/fail etc. In the application the score rate scales are groups of score rates. For example: The score rate scale may include the following score rates (A 100-80)(B 70-80)(C 60-70)(D 50-60)(F 50-0) and be titled Standard.
Navigation 
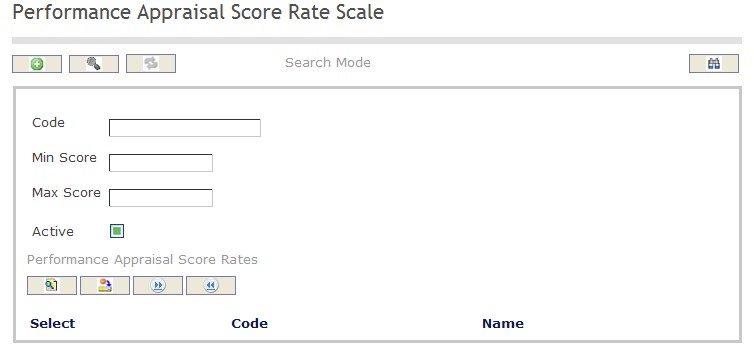
How to SEARCH:
- Enter the information to be used as retrieval criteria in the appropriate field (s). If you prefer to see a list of all performance appraisal score rates scales leave all fields blank.
- Click on the Find icon
 .
.
The Performance Appraisal Score Rates Scale screen includes the following fields:
| Field | Definition |
| Code | Unique identification code of the Performance Appraisal Score Rate Scale. |
| Active | Active Status - if checked, Performance Appraisal Score Rate Scale is available. |
| Min Score | Lowest score possible for this rate scale |
| Max Score | Highest score possible for this rate scale |
Create a Performance Appraisal Score Rate Scale
Performance appraisal score rate scales are groups of score rates.
To CREATE performance appraisal score rate scales follow the steps below:
Navigation 
By default, you will be in Search Mode.
- Click on the New icon
 (you will then be in Insert Mode).
 - Enter the new Performance Appraisal Score Rate Scale information. Fields with an asterisk
 are mandatory fields.
 - Enter the Code, click on the Active checkmark, as required.
- Code: Unique identification code of the Performance Appraisal Score Rate Scale.
- Active: Active Status - if checked, Performance Appraisal Score Rate Scale is avaiable.
To ADD Performance Appraisal Score Rates to Performance Appraisal Score Rate Scales, if required:
- Click on Lookup icon
 , and enter the Performance Appraisal Score Rate Scale information, or leave the Performance Appraisal Score Rate Scale information blank to retrieve all Performance Appraisal Score Rate Scales.
 - Click Find icon

- Click the individual Select Checkbox (es) to select and de-select the Performance Appraisal Score Rate Scale (s), as required.
- Repeat steps 1, 2 and 3 for all required Performance Appraisal Score Rates.
- Click the Return icon
 to return to the Performance Appraisal Score Rate Scale screen, or click the Discard button
  to discard the selection entry and return to Performance Appraisal Score Rate Scales.
 - Click the individual Select Checkbox (es) to select and de-select the Performance Appraisals Score Rate Scale (s), as required, or click the Select All icon
 or Unselect All
  icon, to select all Performance Appraisal Score Rate Scales or de-select all Performance Appraisal Score Rate Scales, if required.
 - Click the Remove icon to remove the selected Performance Appraisal Score Rates information, if required.
To ADD new Performance Appraisal Score Rate Scales, refer to Performance Appraisal Score Rate Scale
Click on the Save icon  at the bottom of the Performance Appraisal Score Rate Scale page to save your new Performance Appraisal Score Rate Scale information. A window will appear to confirm.

Delete a Performance Appraisal Score Rate Scale
Performance appraisal score rate scales are groups of score rates.
To DELETE performance appraisal score rate scales follow the steps below:
Note: The system will prevent the scale from being deleted if it is currently being used in one or more performance appraisals.
Navigation 
- Find the Performance Appraisal Score Rate you want to Delete
- Enter the Performance Appraisal Score Rate Scale information to be used as retrieval criteria in the appropriate field(s). If you prefer to see all Performance Appraisal Score Rate Scales, leave all fields blank.
- Click Find

- Select the Performance Appraisal Score Rate Scale you want to Delete
- Click on the Delete icon

- A window will appear asking you to confirm

- Click OK to confirm and delete the Performance Appraisal Score Rate Scale.
- A window will be displayed confirming the Performance Appraisal Score Rate Scale has been deleted

To Verify that the Performance Appraisal Score Rate Scale has been Deleted:
- Click on the Search icon
- Enter the Performance Appraisal Score Rate Scale information
- Click on the Find icon

- The window will appear

Modify a Performance Appraisal Score Rate Scale
Performance appraisal score rate scales are groups of score rates.
To MODIFY performance appraisal score rate scales follow the steps below:
Navigation 
By default, you will be in Search Mode.
- Enter the information to be used as retrieval criteria in the appropriate field(s).
If you prefer to see the list of all Performance Appraisal Score Rate Scale, leave all fields blank. - Click on the Find icon
 . The list of Performance Appraisal Score Rate Scales meeting the retrieval criteria will appear.
 - Click on the Performance Appraisal Score Rate Scale you want to modify.
You will then be in Update/Delete Mode. - Make the necessary modification(s).
Click on the Update icon
 at the bottom of the screen to save your modifications. A window will appear to confirm the modification. Click OK to confirm.
Performance Appraisal Criteria Group
Overview
In order to provide an accurate picture of an employees job performance, standards must be established. These standards are then grouped together based on what best determines successful job performance specific to an employee's position. The Performance Appraisal Criteria Groups are used to group together different performance appraisal feedback and scoring criteria. This is based on user defined grouping conditions. For example, an Information Technology and an Administrative performance appraisal criteria group may reference a common typewriting scoring criteria.
Navigation 

- Enter the information to be used as retrieval criteria in the appropriate field (s). If you prefer to see a list of all performance appraisals criteria group, leave all fields blank.
- Click on the Find icon
 .
.
The Performance Appraisal Criteria Group includes the following fields:
| Field | Definition |
| Code | Unique identification code of the Performance Appraisal Criteria Group. |
| Active | Active Status - if checked, Performance Appraisal Criteria Group is available. |
Language | Language used |
| Name | Name of the Performance Appraisal Criteria Group |
Create a Performance Appraisal Criteria Group
To CREATE a performance appraisal criteria group that is used to group together different performance feedback and scoring criteria follow the steps below.
Navigation 
By default, you will be in Search Mode.
- Click on the New icon
 (you will then be in Insert Mode).
 - Enter the new Performance Appraisal Criteria Group information. Fields with an asterisk
 are mandatory fields.
 - Enter the Code, click on the Active checkmark, and select the Language, as required.
- Code: Unique identification code of the Performance Appraisal Criteria Group.
- Active:Active Status - if checked, Performance Appraisal Criteria Group is available.
- Language:Language used
4. Enter Name.
- Name: Name of the Performance Appraisal Criteria Group
To ADD Performance Appraisal Scoring Criteria to the Performance Appraisal Criteria Group, if required:
1. Click on the  tab and then click on the Lookup icon
 , and enter the Performance Appraisal Scoring Criteria information, or leave the Performance Appraisal Scoring Criteria information blank to retrieve all Performance Appraisal Scoring Criteria.
2. Click Find icon 
3. Click the individual Select Checkbox (es) to select and de-select the Performance Appraisal Scoring Criteria(s), as required.
4. Repeat steps 1, 2 and 3 for all required Performance Appraisal Scoring Criteria.
5. Click the Return icon  to return to the Performance Appraisal Criteria Group screen, or click the Discard button
  to discard the selection entry and return to Performance Appraisal Criteria Group.
6. Click the individual Select Checkbox (es) to select and de-select the Performance Appraisal Scoring Criteria(s), as required, or click the Select All icon  or Unselect All
  icon, to select all Performance Appraisal Scoring Criteria or de-select all Performance Appraisal Scoring Criteria, if required.
7. Click the Remove icon to remove the selected Performance Appraisal Scoring Criteria information, if required.
To ADD new Performance Appraisal Scoring Criteria, refer to Performance Appraisal Scoring Criteria.[179]
To ADD Performance Appraisal Feedback Criteria to the Performance Appraisal Criteria Group, if required:
1. Click on the  tab and then click on the Lookup icon
 , and enter the Performance Appraisal Feedback Criteria information, or leave the Performance Appraisal Feedback Criteria information blank to retrieve all Performance Appraisal Feedback Criteria.
2. Repeat steps 2 to 7 which were used above for the tab.
tab.
To ADD new Performance Appraisal Feedback Criteria, refer to Performance Appraisal Feedback Criteria.[180]
Click on the Save icon  at the bottom of the Performance Appraisal Criteria Group page to save your new Performance Appraisal Criteria Group information. A window will appear to confirm.

Delete a Performance Appraisal Criteria Group
To DELETE a performance appraisal criteria group that is used to group together different performance feedback and scoring criteria follow the steps below.
Note: Performance Appraisal Criteria Groups cannot be deleted if used within.
Navigation 
By default, you will be in Search Mode.
- Find the Performance Appraisal Criteria Group you want to Delete
- Enter the information to be used as retrieval criteria in the appropriate field(s). If you prefer to see all Performance Appraisal Criteria Groups, leave all fields blank.
- Click Find
 .
. - Select the Performance Appraisal Criteria Group you want to Delete.
2. Click on the Delete icon .
.
3. A window will appear asking you to confirm 
4. Click OK to confirm and delete the Performance Appraisal Criteria Group
5. A window will be displayed confirming the Performance Appraisal Criteria Group has been deleted 
To Verify that the Performance Appraisal Criteria Group has been Deleted:
- Click on the Search icon

- Enter the Performance Appraisal Criteria Group information in the appropriate field (s).
- Click on the Find icon

- This window will appear

Modify a Performance Appraisal Criteria Group
To MODIFY a performance appraisal criteria group that is used to group together different performance feedback and scoring criteria follow the steps below.
Navigation
By default, you will be in Search Mode.
- Enter the information to be used as retrieval criteria in the appropriate field (s). If you prefer to see a list of all Performance Appraisal Criteria Groups, leave all fields blank.
- Click on the Find icon
 .
. - Click on the Performance Appraisal Criteria Group you want to modify.
You will then be in Update/Delete Mode. - Make the necessary modification(s).
- Click on the Update icon
 at the bottom of the screen to save your modifications. A window will appear to confirm the modification. Click OK to confirm.

Performance Appraisal Feedback Criteria
Overview
A key element in a performance appraisal is its performance standards. This is the criteria against which job performance is measured. In this application there are two different types of performance standards: feedback and scoring. Performance Appraisal Feedback Criteria are the performance standards that the reviewer will provide comments on during the performance appraisal session but which are not used in scoring and ranking the appraisal. For example a feedback criteria that can be evaluated during a performance appraisal is “Initiative”. The reviewer will be able to provide written feedback on the degree of initiative demonstrated by the employee.
Navigation

How to SEARCH:
- Enter the information to be used as retrieval criteria in the appropriate field (s). If you prefer to see a list of all performance appraisal feedback criteria, leave all fields blank.
- Click on the Find icon
 .
.
The Performance Appraisal Feedback Criteria includes the following fields:
| Field | Definition |
| Code | Unique identification code of the Performance Appraisal Feedback Criteria. |
| Active | Active Status - if checked, Performance Appraisal Feedback Criteria is available. |
| Language | Language used |
| Title | Name of the Performance Appraisal Feedback Criteria |
| Description | Description of the Performance Appraisal Feedback Criteria |
Create a Performance Appraisal Feedback Criteria
To CREATE Performance Appraisal Feedback Criteria which are the performance standards that the reviewer will provide comments on during the performance appraisal session follow the steps below.
By default, you will be in Search Mode.
- Click on the New icon
 (you will then be in Insert Mode).
 - Enter the new Performance Appraisal Feedback Criteria information. Fields with an asterisk
 are mandatory fields.
 - Enter the Code, click on the Active and Need Text Input checkmark, and select the Language, as required.
- Code: Unique identification code of the Performance Appraisal Feedback Criteria.
- Active: Active Status - if checked, Performance Appraisal Feedback Criteria is available.
- Language: Language used
4. Enter Title and Description of the Performance Appraisal Feedback Criteria.
- Title: Name of the Performance Appraisal Feedback Criteria
- Description: Description of the Performance Appraisal Feedback Criteria
5. Click on the Save icon  at the bottom of the Performance Appraisal Feedback Criteria page to save your new Performance Appraisal Feedback Criteria information. A window will appear to confirm.
Delete a Performance Appraisal Feedback Criteria
To DELETE Performance Appraisal Feedback Criteria which are the performance standards that the reviewer will provide comments on during the performance appraisal session follow the steps below.
Note: Feedback Criteria cannot be deleted if it is utilized by an appraisal schedule.
Navigation 
By default, you will be in Search Mode.
- Find the Performance Appraisal Feedback Criteria you want to Delete
- Enter the information to be used as retrieval criteria in the appropriate field(s). If you prefer to see all Performance Appraisal Feedback Criteria, leave all fields blank.
- Click Find

- Select the Performance Appraisal Feedback Criteria you want to Delete
2. Click on the Delete icon 
3. A window will appear asking you to confirm
4. Click OK to confirm and delete the Performance Appraisal Feedback Criteria.
5. A window will be displayed confirming the Performance Appraisal Feedback Criteria has been deleted
To Verify that the Performance Appraisal Feedback Criteria has been Deleted:
- Click on the Search icon

- Enter the Performance Appraisal Feedback Criteria information
- Click on the Find icon

- The window will appear

Modify a Performance Appraisal Feedback Criteria
To MODIFY Performance Appraisal Feedback Criteria which are the performance standards that the reviewer will provide comments on during the performance appraisal session follow the steps below.
Navigation 
- Enter the information to be used as retrieval criteria in the appropriate field(s).
If you prefer to see the list of all Performance Appraisal Feedback Criteria, leave all fields blank. - Click on the Find icon
 . The list of Performance Appraisal Feedback Criteria meeting the retrieval criteria will appear.
 - Click on the Performance Appraisal Feedback Criteria you want to modify.
You will then be in Update/Delete Mode. - Make the necessary modification(s).
- Click on the Update icon
 at the bottom of the screen to save your modifications. A window will appear to confirm the modification. Click OK to confirm.

Performance Appraisal Scoring Criteria
Overview
A key element in a performance appraisal is its performance standards. This is the criteria against which job performance is measured. In this application there are two different types of performance standards: feedback and scoring. Performance appraisal scoring criteria are the performance standards that the reviewer will provide scores on during the performance appraisal session. For example a scoring criteria that can be evaluated during a performance appraisal session is "words per minute”. The reviewer will be able to provide a score on how many words the employee can type per minute.
Navigation 

How to SEARCH:
- Enter the information to be used as retrieval criteria in the appropriate field (s). If you prefer to see a list of all performance appraisal scoring criteria leave all fields blank.
- Click on the Find icon
 .
.
The Performance Appraisal Scoring Criteria screen includes the following fields:
| Field | Definition |
| Code | Unique identification code of the performance appraisal scoring criteria |
| Active | Active Status - if checked, Performance Appraisal Scoring Criteria is available. |
| Assessed | Assessed Status - if checked, Performance Appraisal Scoring Criteria has been assessed and used for scoring calculation. If not checked, the Scoring Criteria is not used for scoring calculation. |
| Need Text Input? | If true, text input is required for this criteria. Default value: False. |
| Weight | Weight of each Performance Appraisal Scoring Criteria. |
| Language | Language used |
| Title | Name of the Performance Appraisal Scoring Criteria |
| Description | Description of the Performance Appraisal Scoring Criteria |
Create a Performance Appraisal Scoring Criteria
Performance appraisal scoring criteria are the performance standards that the reviewer will provide scores on during the performance appraisal session.
To CREATE performance appraisal scoring criteria follow the steps below:
Navigation 
By default, you will be in Search Mode.
- Click on the New icon
 (you will then be in Insert Mode).
 - Enter the new Performance Appraisal Scoring Criteria information. Fields with an asterisk
 are mandatory fields.
 - Enter the Code, click on the Active and Assessed checkmark, as required.
- Code: Unique identification code of the skill.
- Active: Active Status - if checked, Performance Appraisal Scoring Criteria is available.
- Assessed: Assessed Status - if checked, Performance Appraisal Scoring Criteria has been assessed and used for scoring calculation. If not checked, the Scoring Criteria is not used for scoring calculation.
- Need Text Input: Either true or false. If true, text input is required for this criteria.
4. Enter Weight
- Weight: Weight of each Performance Appraisal Scoring Criteria.
5. Choose Score Rate Scale from dropdown menu.
6. Select the Language as required.
- Language: Language used
7. Enter the Title and the Description of the Performance Appraisal Scoring Criteria.
- Title: Name of the Performance Appraisal Scoring Criteria
- Description: Description of the Performance Appraisal Scoring Criteria
Click on the Save icon  at the bottom of the Performance Appraisal Scoring Criteria page to save your new Performance Appraisal Scoring Criteria information. A window will appear to confirm.
Delete a Performance Appraisal Scoring Criteria
Performance appraisal scoring criteria are the performance standards that the reviewer will provide scores on during the performance appraisal session.
To DELETE performance appraisal scoring criteria follow the steps below:
Navigation 
By default, you will be in Search Mode.
- Find the Performance Appraisal Scoring Criteria you want to Delete
- Enter the information to be used as retrieval criteria in the appropriate field(s). If you prefer to see all Performance Appraisal Scoring Criteria, leave all fields blank.
- Click Find

- Select the Performance Appraisal Scoring Criteria you want to Delete
2. Click on the Delete icon 
3. A window will appear asking you to confirm
4. Click OK to confirm and delete the Performance Appraisal Scoring Criteria.
5. A window will be displayed confirming the Performance Appraisal Scoring Criteria has been deleted
To Verify that the Performance Appraisal Scoring Criteria has been Deleted:
- Click on the Search icon

- Enter the Performance Appraisal Scoring Criteria information
- Click on the Find icon

- The window will appear

Modify a Performance Appraisal Scoring Criteria
Performance appraisal scoring criteria are the performance standards that the reviewer will provide scores on during the performance appraisal session.
To MODIFY performance appraisal scoring criteria follow the steps below:
Navigation 
By default, you will be in Search Mode.
- Enter the information to be used as retrieval criteria in the appropriate field(s).
If you prefer to see the list of all Performance Appraisal Scoring Criteria, leave all fields blank. - Click on the Find icon
 . The list of Performance Appraisal Scoring Criteria meeting the retrieval criteria will appear.
 - Click on the Performance Appraisal Scoring Criteria you want to modify.
You will then be in Update/Delete Mode. - Make the necessary modification(s).
Click on the Update icon
 at the bottom of the screen to save your modifications. A window will appear to confirm the modification. Click OK to confirm.
.
Performance Appraisal Templates
Overview
Performance Appraisal templates are documents that provides the structure and content for conducting a performance appraisal. They contain the information that the employee will be evaluated on. The templates include the scoring and feedback criteria for the specific performance appraisal. Different templates can be designed and created to reflect the appraisal needs for different groups of civil servants. This is where the reviewer will define and format the files specifically for the different types of performance appraisals. For example the administrators will be evaluated on different criteria than the accountants and therefore will require a different performance appraisal templates.
Navigation 

How to SEARCH:
- Enter the information to be used as retrieval criteria in the appropriate field (s). If you prefer to see a list of all performance appraisals templates, leave all fields blank.
- Click on the Find icon
 .
.
The Performance Appraisal Templates screen includes the following fields:
| Field | Definition |
Code | Unique identification code of the Performance Appraisal Template. |
| Active | Active Status - if checked, Performance Appraisal Template is available and can be used. If not checked, the Template cannot be used. |
| Use Personal Learning Plan | If checked, an employee Personal Learning Plan is required. |
| Lowest Possible Template Score | Lowest score of all the Performance Appraisal Score Rate of the Performance Appraisal Score Rate Scales referenced in the Performance Appraisal Template. |
| Highest Possible Template Score | Highest score of all Performance Appraisal Score Rate of the Performance Appraisal Score Rate Scales referenced in the Performance Appraisal Template. |
| Template Status | Template issued/not-issued status. If set to Issued, the Performance Appraisal Template can be used. If set to Not-Issued, the Template cannot be used for conducting appraisals. |
| Score Rate Scale | Rating scale for this Performance Appraisal Template. |
| Organization Unit | Organization Unit(s) in which the Performance Appraisal Template is referenced. |
| Language | Language Used. |
| Name | Name of the Performance Appraisal Template. |
| Description | Description of the Performance Appraisal Template. |
Create a Performance Appraisal Template
Performance appraisal templates include all the required scoring criteria and feedback criteria for the specific performance appraisal.
To CREATE performance appraisal templates follow the steps below:
Navigation 
By default, you will be in Search Mode.
- Click on the New icon
 (you will then be in Insert Mode).
 - Enter the new Performance Appraisal Template information. Fields with an asterisk
 are mandatory fields.
 - Enter the Code, and click on Active, or Use Personal Learning Plan, as required.
- Code: Unique identification code of the Performance Appraisal Template.
- Active: Active Status - if checked, Performance Appraisal Template is available and can be used. If not checked, the Template cannot be used anymore.
- Use Personal Learning Plan: If checked, a Personal Learning Plan is required.
4. Lowest Possible Template Score and Highest Possible Template Score will be generated automatically.
- Lowest Possible Template Score: Lowest score of all the Performance Appraisal Score Rate of the Performance Appraisal Score Rate Scales referenced in the Performance Appraisal Template.
- Highest Possible Template Score: Highest score of all the Performance Appraisal Score Rate of the Performance Appraisal Score Rate Scales referenced in the Performance Appraisal Template.
5. Choose Template Status and Score Rate Scale.
- Template Status: Template issued/not-issued status. If set to Issued, the Performance Appraisal template can be used. If set to Not-Issued, the Performance Appraisal Template is in preparation.
- Score Rate Scale: Rating scale applicable to this Performance Appraisal Template.
6. Select Language and enter Name and Description
- Language: Language Used
- Name: Name of the Performance Appraisal Template
- Description: Description of the Performance Appraisal Template
7. Click on the New icon  under
under  to enter the Attachments (refer to Attachments for more information).
8. Click on the Save and Return icon  to save the Attachments information and return to the Performance Appraisal Template screen, or click on the Discard icon
  to discard the Attachments entry and return to the Performance Appraisal Template .
9. Click the individual Select Checkbox (es), under  to select and de-select the Attachment (s), as required, or click the Select All icon
  or Unselect All
  icon, to select or de-select all Attachments, if required.
10. Click the Remove icon  to remove the selected Attachments, if required
11. Repeat steps 7 to 10 for all required Attachments.
To ADD Template Scoring Criteria to Performance Appraisal Template, if required:
1. Click on  tab and then click on the Lookup icon
  , and enter the Performance Appraisal Scoring Criteria information, or leave the Performance Appraisal Scoring Criteria information blank to retrieve all Performance Appraisal Scoring Criteria.
2. Click Find icon 
3. Click the individual Select Checkbox (es) to select and de-select the Performance Appraisal Scoring Criteria(s), as required.
4. Repeat steps 1, 2 and 3 for all required Performance Appraisal Scoring Criteria.
5. Click the Return icon  to return to the Performance Appraisal Template screen, or click the Discard button
  to discard the selection entry and return to Performance Appraisal Template.
6. Click the individual Select Checkbox (es) to select and de-select the Performance Appraisals Scoring Criteria, as required, or click the Select All icon  or Unselect All
  icon, to select all Performance Appraisal Scoring Criteria or de-select all Performance Appraisal Scoring Criteria, if required.
7. Click the Remove icon to remove the selected Performance Appraisal Scoring Criteria information, if required.
To ADD new Performance Appraisal Scoring Criteria, refer to Performance Appraisal Scoring Criteria
To ADD Performance Appraisal Feedback Criteria to the Performance Appraisal Criteria Group, if required:
1. Click the  tab and then click on the Lookup icon
  , and enter the Performance Appraisal Feedback Criteria information, or leave the Performance Appraisal Feedback Criteria information blank to retrieve all Performance Appraisal Feedback Criteria.
2. Repeat steps 2 to7 which were used above for the  tab.
tab.
To ADD new Performance Appraisal Feedback Criteria, refer to Performance Appraisal Feedback Criteria
Click on the Save icon  at the bottom of the Performance Appraisal Criteria Group page to save your new Performance Appraisal Criteria Group information. A window will appear to confirm.

Delete a Performance Appraisal Template
Performance appraisal templates include all the required scoring criteria and feedback criteria for the specific performance appraisal.
To DELETE performance appraisal templates follow the steps below:
Note: A template cannot be deleted if it is in use.
Navigation 
By default, you will be in Search Mode.
- Find the Performance Appraisal Template you want to Delete
- Enter the information to be used as retrieval criteria in the appropriate field(s). If you prefer to see all Performance Appraisal Templates, leave all fields blank.
- Click Find
 .
. - Select the Performance Appraisal Template you want to Delete.
- Click on the Delete icon
 .
. - A window will appear asking you to confirm

- Click OK to confirm and delete the Performance Appraisal Template
- A window will be displayed confirming the Performance Appraisal Template has been deleted

To Verify that the Performance Appraisal Template has been Deleted:
- Click on the Search icon

- Enter the Performance Appraisal Template information in the appropriate field (s).
- Click on the Find icon

- This window will appear

Modify a Performance Appraisal Template
Performance appraisal templates include all the required scoring criteria and feedback criteria for the specific performance appraisal.
To MODIFY performance appraisal templates follow the steps below:
Navigation 
By default, you will be in Search Mode.
- Enter the Performance Appraisal Template information to be used as retrieval criteria in the appropriate field (s). If you prefer to see a list of all Performance Appraisal Template, leave all fields blank.
- Click on the Find icon
 .
. - Click on the Performance Appraisal Template you want to modify. You will then be in Update/Delete Mode.
- Make the necessary modifications. To add or remove Attachments, refer to Attachments.
- Click on the Update icon
 at the bottom of the screen to save your modifications. A window will appear to confirm the modification. Click OK to confirm.

Performance Appraisal Organizational Control
Overview
The Organizational Control managed the appraisal process and provides a forum for all participants to know the kay dates for conducting appraisals. The employee must know when the performance appraisal is to start as well as the performance standards that they will be evaluated on. In the application performance appraisal organizational controls are settings that are used to manage performance appraisals within an organization. These settings will be used to determine when to notify employees and when to conduct the performance appraisal. The performance appraisal will become available to reviewers on the dates specified in the organizational controls.
Navigation 

How to SEARCH:
- Enter the information to be used as retrieval criteria in the appropriate field (s). If you prefer to see a list of all performance appraisal organization control leave all fields blank.
- Click on the Find icon
 .
.
The Performance Appraisal Organization Control screen includes the following fields:
| Field | Definition |
| Code | Unique identification code of the Performance Appraisal Organization Control. |
| Active | Active Status - if checked, Performance Appraisal Organization Control is available. |
| Use Notification Offset | If checked, use the notification offset for standard offset and probation offset. |
| Requires Personal Learning Plan | If checked, Performance Appraisal requires a Personal Learning Plan. |
| Schedule | Performance Appraisal schedule selected from the defined list of schedules. Common schedules would be Quarterly, Semi-Annual, etc |
| Probation Offset | Number of days prior to the end of the probation period used for notification |
| Language | Language used |
| Exception Notes | Explanation for using the selected Performance Organization Control |
Create a Performance Appraisal Organizational Control
Performance appraisal organizational controls are settings that are used to manage performance appraisals within an organization.
To CREATE performance appraisal organizational controls follow the steps below:
Navigation 
By default, you will be in Search Mode.
- Click on the New icon
 (you will then be in Insert Mode).
 - Enter the new Performance Appraisal Organizational Control information. Fields with an asterisk
 are mandatory fields.
 - Enter the Code, click on the Active, Use Notification Offset and Use Personal Learning Plan checkmark, as required.
- Code: Unique identification code of the Performance Appraisal Template.
- Active: Active Status - if checked, Performance Appraisal Organization Unit is available.
- Use Notification Offset: If checked, use the notification offset for standard offset and probation offset.
- Use Personal Learning Plan: If checked, the Performance Appraisal Template requires a Personal Learning Plan.
4. To enter theSchedule, click on the Lookup icon , click on Find icon
  to retrieve the Performance Appraisal Schedule list, and then select the Performance Appraisal Schedule.
- Schedule: Performance Appraisal Schedule selected from the list of defined schedules. Common schedules would be Quarterly, Semi-Annual, etc
5. Enter the Standard Offset and the Probation Offset
- Standard Offset: the number of days between each performance appraisal
- Probation Offset:the number of days in the probation period.
6. Select the language from the drop down menu
- Language: language used
7. Enter Exception Notes, if required.
- Exception Notes: explanation for using the selected Performance Appraisal Schedule.
8. Click on the New icon  under
under  to enter the Performance Appraisal Organization Template (refer to Performance Appraisal Organization Template for more information).
9. Click on the Save and Return icon  to save the Performance Appraisal Organization Template information and return to the Performance Appraisal Organizational Control, or click on the Discard icon
  to discard the Performance Appraisal Organization Template entry and return to the Performance Appraisal Organizational Control.
10. Click the individual Select Checkbox (es), under  to select and de-select the Performance Appraisal Organization Template (s), as required, or click the Select All icon
  or Unselect All
  icon, to select or de-select all Performance Appraisal Organization Template, if required.
11. Click the Remove icon  to remove the selected Performance Appraisal Organization Template, if required
12. Repeat steps 9 to 12 for all required Performance Appraisal Organization Templates.
13. Click on the Save icon  at the bottom of the Performance Appraisal Organizational Control page to save your new Performance Appraisal Organizational Control information. A window will appear to confirm.

Performance Appraisal Template
Navigation (From  click the New Icon
 under
under  )
)
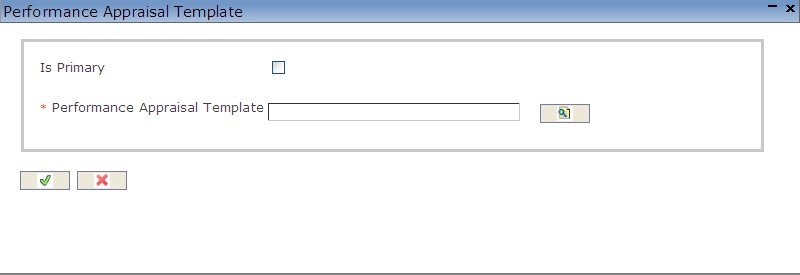
Create a Performance Appraisal Template
Navigation (From  click the New Icon
 under
under  )
)
1. Enter the new Performance Appraisal Template information. Fields with an asterisk  are mandatory fields.
2. Click on the Is Primary checkbox, as required.
- Is Primary: if checked, then this is the primary Performance Appraisal Template.
3. To enter the Performance Appraisal Template if required, click on the Lookup icon  , click on Find icon
  to retrieve the Performance Appraisal Template list, then select the Performance Appraisal Template.
4. Click on the Save and Return icon  to save the Performance Appraisal Template information and return to the Performance Appraisal Organizational Control, or click on the Discard icon
  to discard the Performance Appraisal Template entry and return to the Performance Appraisal Organizational Control.
5. Click the individual Select Checkbox (es), to select and de-select the Performance Appraisal Template, as required, or click the Select All icon  or Unselect All
  icon, to select or de-select all Performance Appraisal Template, if required.
6. Click the Remove icon  to remove the selected Performance Appraisal Template, if required
Delete a Performance Appraisal Organizational Control
Performance appraisal organizational controls are settings that are used to manage performance appraisals within an organization.
To DELETE performance appraisal organizational controls follow the steps below:
Navigation 
By default, you will be in Search Mode.
- Find the Performance Appraisal Organizational Control you want to Delete
- Enter the information to be used as retrieval criteria in the appropriate field(s). If you prefer to see all Performance Organizational Control, leave all fields blank.
- Click Find
 .
. - Select the Performance Appraisal Organizational Control you want to Delete.
- Click on the Delete icon
 .
. - A window will appear asking you to confirm

- Click OK to confirm and delete the Performance Organizational Control
- A window will be displayed confirming the Performance Organizational Control has been deleted

To Verify that the Performance Appraisal Organizational Control has been Deleted:
- Click on the Search icon

- Enter the Performance Appraisal Organizational Control information in the appropriate field (s).
- Click on the Find icon

- This window will appear

Modify a Performance Appraisal Organizational Control
Performance appraisal organizational controls are settings that are used to manage performance appraisals within an organization.
To MODIFY performance appraisal organizational controls follow the steps below:
Navigation 
By default, you will be in Search Mode.
- Enter the information to be used as retrieval criteria in the appropriate field (s). If you prefer to see a list of all Performance Appraisal Organizational Control, leave all fields blank.
- Click on the Find icon
 .
. - Click on the Performance Appraisal Organizational Control you want to modify. You will then be in Update/Delete Mode.
- Make the necessary modifications. To add or remove a Performance Appraisal Template, refer to Performance Appraisal Template.
- Click on the Update icon
 at the bottom of the screen to save your modifications. A window will appear to confirm the modification. Click OK to confirm.

Performance Appraisal Result
Overview
A performance appraisal allows an organization to analyze the performance of its employees. From this evaluation, decisions on the future of these employees can be determined. This decision will be the result of the appraisal. The Performance Appraisal Result screen contains all of the information on the possible results that can be selected once the Performance Appraisal has been completed.
Navigation
Human Resources ► Support Entities ► Performance Appraisal Management ► Performance Appraisal Result
Performance Appraisal Result Screen Fields
| Fields | Descriptions |
Code | The unique identification code generated by the system or by the user, it depends on the system parameter setting for this entity. |
Active | By default, it is marked as checked which means it is available to use. If it is unchecked then it would be not available anymore. |
Is Promotion | By default, it is marked as unchecked. If it is checked it would be available to a promotion. |
Is Salary Increase | By default, it is marked as unchecked. If it is checked it would be available to a salary increase. |
Is Training | By default, it is marked as unchecked. If it is checked it would be available to a Training. |
Is Termination | By default, it is marked as unchecked. If it is checked it would be available to a Termination. |
Language | It allows the user to select the language to write the description. The default language is English. |
Name | Performance Appraisal short description. |
| Description | Detail description of the definition of this performance appraisal result |
Retirement Management
Retirement Type
Overview
This screen is a catalogue of the different Retirement Types available for a particular implementation. Information includes the type of retirement (voluntary, mandatory, retirement by death), the mandatory retirement age, the minimum months in service required to apply to a retirement type, the minimum periods in consecutive service to apply to a retirement type, and the name of the retirement type.
Navigation 
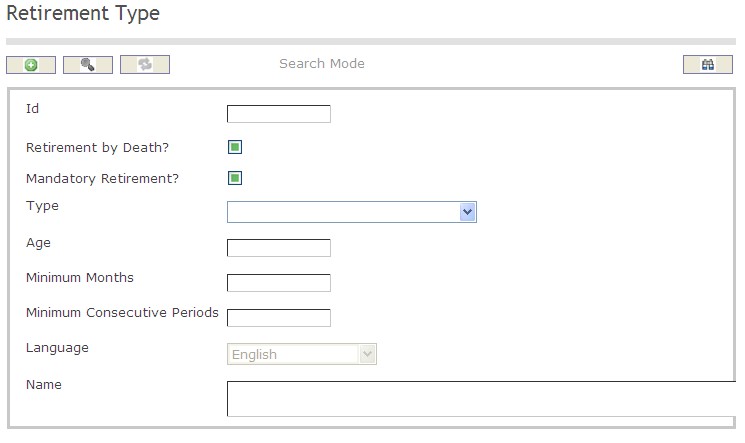
How to SEARCH:
- Enter the information to be used as retrieval criteria in the appropriate field (s). If you prefer to see a list of all Retirement Types, leave all fields blank.
- Click on the Find icon
 .
.
The Retirement Type screen includes the following fields:
| Report Fields | Description |
| ID | Unique identification code of the Retirement Type |
| Retirement by Death | Retirement by Death Status - if checked, indicates that the Retirement Type is only applicable when the employee is deceased |
| Mandatory Retirement | Mandatory Retirement Status - if checked, indicates that the Retirement is mandatory |
| Type | Either Mandatory Retirement, Retirement by Death, or Voluntary, from the drop-down menu |
| Age | Mandatory Retirement Age of the employee |
| Minimum Months | The minimum months in service required to apply to this retirement type |
| Minimum Consecutive Periods | The minimum periods required in consecutive service to apply to this retirement type |
| Language | Language used |
| Name | Name of the retirement type |
Create a Retirement Type
Retirement Type is a catalogue of the different Retirement Types available for a particular implementation. To CREATE a Retirement Type, follow the steps below:
Navigation 
By default, you will be in Search Mode.
- Click on the New icon
 (you will then be in Insert Mode).
 - Enter the new Retirement Type information. Fields with an asterisk
 are mandatory fields.
 - Enter the ID, click on the Retirement by Death and Mandatory Retirement checkmarks, as required.
- ID: Unique identification code of the Retirement Type.
- Retirement by Death: Retirement by Death Status - if checked, indicates that the Retirement Type is only applicable when the employee is deceased.
- Mandatory Retirement: Mandatory Retirement Status - if checked, indicates that the Retirement is Mandatory .
4. Select a Type.
- Type: Either Mandatory Retirement, Retirement by Death, or Voluntary, from the drop-down menu.
5. Enter Age.
- Age: Mandatory Retirement Age.
6. Enter the Minimum Months.
- Minimum Months: The minimum months in service required to apply to this retirement type.
7. Enter the Minimum Consecutive Periods.
- Minimum Consecutive Periods: The minimum periods required in consecutive service to apply to this retirement type.
8. Select the Language, as required.
- Language: Language used.
9. Enter Name.
- Name: Name of the retirement type.
10. Click on the Save icon  at the bottom of the Retirement Type page to save your new Retirement Type information. A window will appear to confirm.

Delete a Retirement Type
Retirement Type is a catalogue of the different Retirement Types available for a particular implementation. To DELETE a Retirement Type, follow the steps below:
Navigation 
By default, you will be in Search Mode.
- Find the Retirement Type you want to Delete
- Enter the information to be used as retrieval criteria in the appropriate field(s). If you prefer to see all Retirement Types, leave all fields blank.
- Click Find

- Select the Retirement Type you want to Delete
- Click on the Delete icon

- A window will appear asking you to confirm

- Click OK to confirm and delete the Retirement Type.
- A window will be displayed confirming the Retirement Type has been deleted

To Verify that the Retirement Type has been Deleted:
- Click on the Search icon

- Enter the Retirement Type information
- Click on the Find icon

- The window will appear

Modify a Retirement Type
Retirement Type is a catalogue of the different Retirement Types available for a particular implementation. To MODIFY a Retirement Type, follow the steps below:
Navigation 
By default, you will be in Search Mode.
- Enter the information to be used as retrieval criteria in the appropriate field(s).
If you prefer to see the list of all Retirement Types, leave all fields blank. - Click on the Find icon
 . The list of Retirement Types meeting the retrieval criteria will appear.
 - Click on the Retirement Types you want to modify.
You will then be in Update/Delete Mode. - Make the necessary modification(s).
- Click on the Update icon
 at the bottom of the screen to save your modifications. A window will appear to confirm the modification. Click OK to confirm.
Retirement Benefit Type
Overview
Requires the user to define the different Retirement Benefit Types. Information to be entered includes the name of the retirement benefit type, as well as a detailed description of the retirement benefit type.
Navigation 
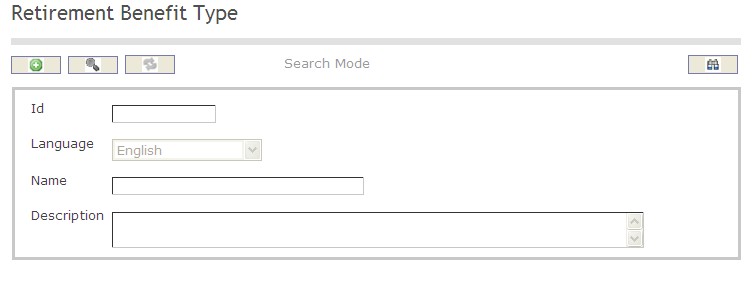
How to SEARCH:
- Enter the information to be used as retrieval criteria in the appropriate field (s). If you prefer to see a list of all Retirement Benefit Types, leave all fields blank.
- Click on the Find icon
 .
.
The Retirement Benefit Type screen includes the following fields:
| Report Fields | Description |
| ID | Unique identification code of the Retirement Benefit Type |
| Language | Language used |
| Name | Name of the Retirement Benefit Type |
| Description | List a short description of the Retirement Benefit Type |
Create a Retirement Benefit Type
Retirement Benefit Type requires the user to define the different Retirement Benefit Types. To CREATE a Retirement Benefit Type, follow the steps below:
Navigation 
By default, you will be in Search Mode.
- Click on the New icon
 (you will then be in Insert Mode).
 - Enter the new Retirement Benefit Type information. Fields with an asterisk
 are mandatory fields.
 - Enter the ID and select the Language, as required.
- ID: Unique identification code of the Retirement Benefit Type.
- Language: Language used.
- Enter Name.
- Name: Name of the Retirement Benefit Type.
5. Enter Description.
- Description: List a short description of the Retirement Benefit Type.
6. Click on the Save icon  at the bottom of the Retirement Benefit Type page to save your new Retirement Benefit Type information. A window will appear to confirm.

Delete a Retirement Benefit Type
Retirement Benefit Type requires the user to define the different Retirement Benefit Types. To DELETE a Retirement Benefit Type, follow the steps below:
Navigation 
By default, you will be in Search Mode.
- Find the Retirement Benefit Type you want to Delete
- Enter the information to be used as retrieval criteria in the appropriate field(s). If you prefer to see all Retirement Benefit Types, leave all fields blank.
- Click Find

- Select the Retirement Benefit Type you want to Delete
- Click on the Delete icon

- A window will appear asking you to confirm

- Click OK to confirm and delete the Retirement Benefit Type.
- A window will be displayed confirming the Retirement Benefit Type has been deleted

To Verify that the Retirement Benefit Type has been Deleted:
- Click on the Search icon

- Enter the Retirement Benefit Type information
- Click on the Find icon

- The window will appear

Modify a Retirement Benefit Type
Retirement Benefit Type requires the user to define the different Retirement Benefit Types. To MODIFY a Retirement Benefit Type, follow the steps below:
Navigation 
By default, you will be in Search Mode.
- Enter the information to be used as retrieval criteria in the appropriate field(s).
If you prefer to see the list of all Retirement Benefit Types, leave all fields blank. - Click on the Find icon
 . The list of Retirement Benefit Types meeting the retrieval criteria will appear.
 - Click on the Retirement Benefit Type you want to modify.
You will then be in Update/Delete Mode. - Make the necessary modification(s).
- Click on the Update icon
 at the bottom of the screen to save your modifications. A window will appear to confirm the modification. Click OK to confirm.
Retirement Benefit Plan
Overview
This screen represents a collection of retirement benefits included as part of the Retirement Benefits Plan for one or more employees. This screen requires the user to define a catalog of different retirement plans available. This will require a tab at the bottom to associate the different possible Retirement Benefits available for this plan. Different plans may have the same benefits.
Navigation 
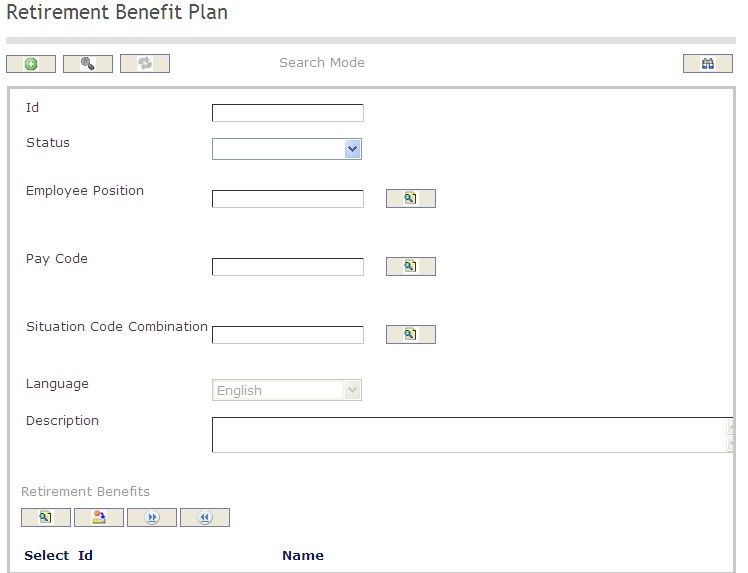
How to SEARCH:
- Enter the information to be used as retrieval criteria in the appropriate field (s). If you prefer to see a list of all Retirement Benefit Plans, leave all fields blank.
- Click on the Find icon
 .
.
The Retirement Benefit Plan screen includes the following fields:
| Report Fields | Description |
| ID | Unique identification code of the Retirement Benefit Plan |
| Status | This attribute can take one of the following values: Approved, Cancelled, Created, Rejected, and Requested for Approval |
| Employee Position | Employee Position to be included in the assignment that will be created |
| Pay Code | Pay code to be included in the assignment that will be created |
| Situation Code Combination | The situation code to be included in the assignment that will be created |
| Language | Language used |
| Description | Enter a detailed description of the Retirement Benefit Plan |
Create a Retirement Benefit Plan
Retirement Benefit Plan represents a collection of retirement benefits for one or more employees. To CREATE a Retirement Benefit Plan, follow the steps below:
Navigation 
By default, you will be in Search Mode.
- Click on the New icon
 (you will then be in Insert Mode).
 - Enter the new Retirement Benefit Plan information. Fields with an asterisk
 are mandatory fields.
 - Enter the ID, as required.
- ID: Unique identification code of the Retirement Benefit Plan.
4. Enter the Status.
- Status: This attribute can take one of the following values: Approved, Cancelled, Created, Rejected, and Requested for Approval.
5. To enter the Employee Position data, if required, click on the Lookup icon  , click on the Find icon
  to retrieve the Employee Position list, then select the Employee Position.
- Employee Position: This is the employee position to be included in the assignment that will be created.
6. To enter the Pay Code information, if required, click on the Lookup icon  , click on the Find icon
  to retrieve the Pay Code list, then select the Pay Code.
Pay Code: The pay code to be included in the assignment to be created .
7. To enter the Situation Code Combination, if required, click on the Lookup icon  , click on Find icon
  to retrieve the Situation Code Combination list, then select the Situation Code Combination.
- Situation Code Combination: The situation code to be included in the assignment that will be created.
8. Enter the Language.
- Language: Language used.
9. Enter the Description.
- Description: Enter a detailed description of the Retirement Benefit Plan.
To ADD Retirement Benefits to the Retirement Benefit Plan list:
- Click on the Lookup icon
 , and enter the Retirement Benefits information, or leave the Retirement Benefits information blank to retrieve all Retirement Benefits.
 - Click the Remove icon
 to remove the selected Retirement Benefits, if required.
 - Click the individual Select Checkbox (es) to select and de-select the Retirement Benefit (s), as required, or click the Select All icon
 or Unselect All
  icon, to select all Retirement Benefits or de-select all Retirement Benefits, if required.
Click on the Save icon  at the bottom of the Retirement Benefit Plan page to save your new Retirement Benefit Plan information. A window will appear to confirm.

Delete a Retirement Benefit Plan
Retirement Benefit Plan represents a collection of retirement benefits included as part of the Retirement Benefits Plan for one or more employees. To DELETE a Retirement Benefit Plan, follow the steps below:
Navigation 
By default, you will be in Search Mode.
- Find the Retirement Benefit Plan you want to Delete
- Enter the information to be used as retrieval criteria in the appropriate field(s). If you prefer to see all Retirement Benefit Plans, leave all fields blank.
- Click Find

- Select the Retirement Benefit Plan you want to Delete
- Click on the Delete icon

- A window will appear asking you to confirm

- Click OK to confirm and delete the Retirement Benefit Plan.
- A window will be displayed confirming the Retirement Benefit Plan has been deleted

To Verify that the Retirement Benefit Plan has been Deleted:
- Click on the Search icon

- Enter the Retirement Benefit Plan information
- Click on the Find icon

- The window will appear

Modify a Retirement Benefit Plan
Retirement Benefit Plan represents a collection of retirement benefits included as part of the Retirement Benefits Plan for one or more employees. To MODIFY a Retirement Benefit Plan, follow the steps below:
Navigation 
By default, you will be in Search Mode.
- Enter the information to be used as retrieval criteria in the appropriate field(s).
If you prefer to see the list of all Retirement Benefit Plans, leave all fields blank. - Click on the Find icon
 . The list of Retirement Benefit Plans meeting the retrieval criteria will appear.
 - Click on the Retirement Benefit Plan you want to modify.
You will then be in Update/Delete Mode. - Make the necessary modification(s).
- Click on the Update icon
 at the bottom of the screen to save your modifications. A window will appear to confirm the modification. Click OK to confirm.
Retirement Benefit
Overview
Requires a user to define benefits paid to an employee upon the employee's retirement. This screen will have tabs at the bottom of the form to define Prerequisite Benefits, Retirement Type, Restriction per Beneficiary Collection and the Formula Builder.
Navigation 
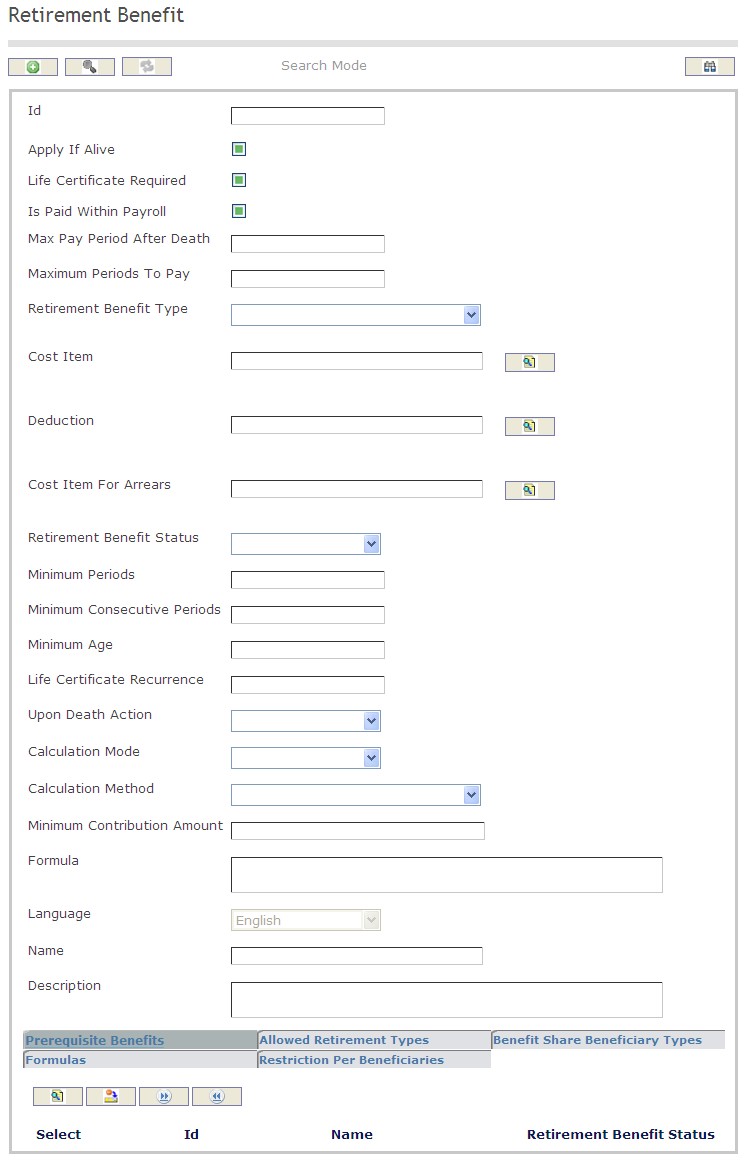
How to SEARCH:
- Enter the information to be used as retrieval criteria in the appropriate field (s). If you prefer to see a list of all Retirement Benefits, leave all fields blank.
- Click on the Find icon
 .
.
The Retirement Benefit screen includes the following fields:
| Report Fields | Description |
| ID | Unique identification code of the Retirement Benefit |
| Apply If Alive | Apply If Alive Status - if checked, Retirement Benefits are applied during employee's retirement, when the employee is alive. |
| Life Certificate Required | Life Certificate Required Status - if checked, it specifies if this Retirement Benefit must require a life certificate in order to keep receiving the emoluments granted by this benefit |
| Is Paid Within Payroll | Is Paid Within Payroll Status - if checked, employee is on the payroll of the organization |
| Max Pay Period After Death | The maximum number of pay periods that the beneficiaries are entitled to receive from this particular retirement benefit after the death of the employee |
| Maximum Periods To Pay | Maximum number of periods to pay Retirement Benefits to a retired employee. If set to null, the benefit will be recurrently paid until the death of the employee |
| Retirement Benefit Type | Retirement Benefit Type to be selected from the drop-down menu |
| Cost Item | The cost item associated to this benefit if the retirement benefit is for an Employee |
| Deduction | The deduction associated to this benefit if the retirement benefit depends on a deduction |
| Cost Item For Arrears | The cost item associated to this benefit specifically to be used for arrears. The default value is as specified under Cost Item above |
| Retirement Benefit Status | Retirement Benefit Status (Approved, Cancelled, or Created ) from the drop-down menu |
| Minimum Periods | The minimum number of periods required to apply the retirement benefit |
| Minimum Consecutive Periods | The minimum number of consecutive periods required to be eligible for this retirement benefit |
| Minimum Age | Minimum age of the employee to apply the retirement benefit |
| Life Certificate Recurrence | Specifies the frequency in terms of number of periods, for issuance of the Life Certificate (e.g. every 12 periods) |
| Upon Death Action | Action to take upon the death of pensioner: Activate Benefit or Cancel Benefit, from the drop-down menu |
| Calculation Mode | Benefit Calculation Mode: Automatic or Manual, from the drop-down menu |
| Calculation Method | Benefit Calculation Method: Base Salary or Deduction Contribution Amount, from the drop-down menu |
| Minimum Contribution Amount | Minimum amount to be made through a deduction. This field is only applicable if the benefit is linked to a deduction |
| Formula | Formula built from all rows in the formula builder, to be interpreted during payroll calculation. |
| Language | Language used |
| Name | Name of the Retirement Benefit |
| Description | Description of the Retirement Benefit |
Create a Retirement Benefit
Retirement Benefits requires the user to define benefits paid to an employee upon the employee's retirement. To CREATE a Retirement Benefit, follow the steps below:
Navigation 
By default, you will be in Search Mode.
- Click on the New icon
 (you will then be in Insert Mode).
 - Enter the new Retirement Benefit information. Fields with an asterisk
 are mandatory fields.
 - Enter the ID, click on the Apply If Alive, Life Certificate Required, and Is Paid Within Payroll checkmarks, as required.
- ID: Unique identification code of the Retirement Benefit.
- Apply If Alive: Apply If Alive Status - if checked, Retirement Benefits are applied to the employee's beneficiaries when the retired employee is alive.
- Life Certificate Required: Life Certificate Required Status - if checked, indicates that a life certificate is required in order to keep receiving the emoluments granted by this benefit.
Is Paid Within Payroll: Is Paid Within Payroll Status - if checked, Retirement Benefits are paid within the payroll of the organization.
4. Enter Max Pay Period After Death.
- Max Pay Period After Death: The maximum number of pay periods that the beneficiaries are entitled to receive the Retirement Benefits after the death of the employee.
5. Enter Maximum Periods To Pay.
- Maximum Periods To Pay: The maximum number of periods to pay Retirement Benefits to a retired employee. If Null, the Retirement Benefits will be recurrently paid until the death of the employee.
6. Choose a Retirement Benefit Type.
- Retirement Benefit Type: Choose a Retirement Benefit Type from the drop-down menu.
7. To enter the Cost Item, if required, click on the Lookup icon  , click on the Find icon
  to retrieve the Cost Item list, then select the Cost Item.
- Cost Item: The cost item associated to this benefit.
8. To enter the Deduction, if required, click on the Lookup icon  , click on Find icon
  to retrieve the Deduction list, then select the Deduction.
- Deduction: The deduction associated to this benefit.
9. To enter the Cost Item For Arrears, if required, click on the Lookup icon  , click on Find icon
  to retrieve the Cost Item list, then select the Cost Item For Arrears.
- Cost Item For Arrears: The cost item associated to this benefit specifically to be used for arrears.
10. Choose Retirement Benefit Status.
- Retirement Benefit Status: Choose either Approved, Cancelled, or Created from the drop-down menu.
11. Enter Minimum Periods.
- Minimum Periods: The minimum number of periods required to apply to this Retirement Benefit.
12. Enter Minimum Consecutive Periods.
- Minimum Consecutive Periods: The minimum number of consecutive periods required to be eligible for this retirement benefit.
13. Enter Minimum Age.
- Minimum Age: Minimum age of the employee to apply to this benefit.
14. Enter Life Certificate Recurrence.
- Life Certificate Recurrence: Specifies the frequency in terms of number of periods, for issuance of the Life Certificate (e.g. every 12 periods)
15. Choose Upon Death Action.
- Upon Death Action: Action to be taken upon death of the employee, either Activate Benefit or Cancel Benefit, from the drop-down menu
16. Choose Calculation Mode.
- Calculation Mode: Benefit Calculation Mode, either Automatic or Manual, from the drop-down menu
17. Choose Calculation Method.
- Calculation Method: Calculation Method, either Base Salary or Deduction Contribution Amount, from the drop-down menu.
18. Enter Minimum Contribution Amount.
- Minimum Contribution Amount: Applicable when the benefit is linked to a deduction, this is the minimum contribution amount to be made through a deduction.
19. Enter Formula.
- Formula: This will display the formula built from all rows in the formula builder.
20. Chose a Language.
- Language: Language used.
21. Enter the Name.
- Name: Name of the Retirement Benefit.
22. Enter the Description.
- Description: Description of the Retirement Benefit.
To ADD Prerequisite Benefits to the Retirement Benefits, if required:
1. Click on the  tab and then click on the Lookup icon
  , and enter the Prerequisite Benefit information, or leave the Prerequisite Benefit information blank to retrieve all Prerequisite Benefits.
2. Click the Find icon 
3. Click the individual Select Checkbox (es) to select and de-select the Prerequisite Benefits, as required.
4. Repeat steps 1, 2 and 3 for all required Prerequisite Benefits.
5. Click the Remove icon  to remove the selected Prerequisite Benefits information, if required.
6. Click the individual Select Checkbox (es) to select and de-select the Prerequisite Benefits, as required, or click the Select All icon  or Unselect All
  icon, to select all Prerequisite Benefits or de-select all Prerequisite Benefits, if required.
To ADD Allowed Retirement Types to the Retirement Benefits:
1. Click on the  tab and then click on the Lookup icon
  , and enter the Allowed Retirement Type information, or leave the Allowed Retirement Type information blank to retrieve all Allowed Retirement Types.
2. Repeat steps 2-6 which were used above for the  tab.
tab.
To ADD Benefit Share Beneficiary Types to the Retirement Benefits, if required:
1. Click on the  tab and then click on the Lookup icon
  , and enter the Benefit Share Beneficiary Type information, or leave the Benefit Share Beneficiary Type information blank to retrieve all Benefit Share Beneficiary Types.
2. Repeat steps 2-6 which were used above for the  tab.
tab.
To ADD Formulas to the Retirement Benefits, if required:
1. Click on the  tab and then click on the New icon
  to enter Formulas (refer to Formulas for more information).
2. Click on the Save and Return icon  to save the Formula information and return to the Retirement Benefits screen, or click on the Discard icon
  to discard the Formula entry and return to the Retirement Benefits screen.
3. Click the Remove icon  to remove the selected Formula information, if required.
4. Click the individual Select Checkbox (es) to select and de-select the Formulas, as required, or click the Select All icon  or Unselect All
  icon, to select all Formulas or de-select all Formulas, if required.
To ADD Restriction Per Beneficiaries to the Retirement Benefits, if required:
1. Click on the  tab and then click on the New icon
  to enter Restriction Per Beneficiaries (refer to Restriction Per Beneficiaries for more information).
2. Click on the Save and Return icon  to save the Restriction Per Beneficiary information and return to the Retirement Benefits screen, or click on the Discard icon
  to discard the Restriction Per Beneficiary entry and return to the Retirement Benefits screen.
3. Click the Remove icon  to remove the selected Restriction Per Beneficiary information, if required.
4. Click the individual Select Checkbox (es) to select and de-select the Restriction Per Beneficiaries, as required, or click the Select All icon  or Unselect All
  icon, to select all Restriction Per Beneficiaries or de-select all Restriction Per Beneficiaries, if required.
Click on the Save icon  at the bottom of the Retirement Benefit page to save your new Retirement Benefit information. A window will appear to confirm.

Formulas
Navigation (from  click the New Icon
 under
under  )
)
Create a Formula
Navigation (from  click the New Icon
 under
under  )
)
1. Enter the new Formula information.
2. Enter the Part.
- Part: The order in which the element of the formula will appear
3. Select a Variable from the drop-down menu.
- Variable: Choices include Initial Amount, Fixed Amount, Periods In Service, Consecutive Periods In Service, and Null
4. Enter the Fixed Amount.
- Fixed Amount: A fixed amount to be entered only if variable as defined in Step 3 is set to Fixed Amount
5. Select an Operator from the drop-down menu.
- Operator: Choices include: + ADD, - SUBTRACT, * MULTIPLY, / DIVIDE, ( START OF A GROUPING, ) END OF A GROUPING
6. Click on the Save and Return icon  to save the Formula information and return to the Retirement Benefits screen, or click on the Discard icon
  to discard the Formula entry and return to the Retirement Benefits screen.
Restriction Per Beneficiaries
Navigation (from  click the New Icon
 under
under  )
)
Create a Restriction Per Beneficiaries
Navigation (from  click the New Icon
 under
under  )
)
1. Enter the new Restriction Per Beneficiaries information.
2. Enter the ID, as required.
- ID: Unique identification code of the Restriction Per Beneficiaries
3. Select the Beneficiary Type from the drop-down menu.
- Beneficiary Type: The type of beneficiary receiving benefits (ie. Current Wife, Guardian, Father, Mother, Child, etc.)
4. Enter the Max Beneficiaries With Share.
- Max Beneficiaries With Share: Maximum number of beneficiaries. If no value specified means that this is an unlimited collection of beneficiaries
5. Select the Share Divide Action from the drop-down menu.
- Share Divide Action: The action taken to divide the share benefits amongst the specified beneficiaries. If Divide Into Beneficiaries is selected, the benefits are divided evenly amongst the specified beneficiaries. If Divide Into Beneficiaries If Maximum Is Reached is selected, the benefits are divided evenly amongst the specified beneficiaries up to the maximum number approved for benefits. If No Pay For Maximum Beneficiaries is selected, the benefits are divided evenly amongst the specified beneficiaries and not to the beneficiaries over the maximum value.
6. Enter Rate Per Beneficiary.
- Rate Per Beneficiary: The share, in percentage, that each of the beneficiaries is entitled to receive, example 16.66%
7. Enter Rate Per Beneficiary Collection.
- Rate Per Beneficiary Collection: Global rate, in percentage, for all beneficiaries collection that has to be divided into the number of beneficiaries, e.g. 50% of the pension payment and a collection of 3 beneficiaries, means that each beneficiary will receive a 50/3 share
8. Click on the Save and Return icon  to save the Restriction Per Beneficiary information and return to the Retirement Benefits screen, or click on the Discard icon
  to discard the Restriction Per Beneficiary entry and return to the Retirement Benefits screen.
Delete a Retirement Benefit
Retirement Benefits require a user to define benefits paid to an employee upon the employee's retirement. To DELETE a Retirement Benefit, follow the steps below:
Navigation 
By default, you will be in Search Mode.
- Find the Retirement Benefit you want to Delete
- Enter the information to be used as retrieval criteria in the appropriate field(s). If you prefer to see all Retirement Benefits, leave all fields blank.
- Click Find

- Select the Retirement Benefit you want to Delete
- Click on the Delete icon

- A window will appear asking you to confirm

- Click OK to confirm and delete the Retirement Benefit.
- A window will be displayed confirming the Retirement Benefit has been deleted

To Verify that the Retirement Benefit has been Deleted:
- Click on the Search icon

- Enter the Retirement Benefit information
- Click on the Find icon

- The window will appear

Modify a Retirement Benefit
Retirement Benefits require a user to define benefits paid to an employee upon the employee's retirement. To MODIFY a Retirement Benefit, follow the steps below:
Navigation 
By default, you will be in Search Mode.
- Enter the information to be used as retrieval criteria in the appropriate field(s).
If you prefer to see the list of all Retirement Benefits, leave all fields blank. - Click on the Find icon
 . The list of Retirement Benefits meeting the retrieval criteria will appear.
 - Click on the Retirement Benefit you want to modify.
You will then be in Update/Delete Mode. - Make the necessary modifications. To add or remove Formulas, refer to Formulas. Too add or remove Restrictions Per Beneficiaries, refer to Restriction Per Beneficiaries.
- Click on the Update icon
 at the bottom of the screen to save your modifications. A window will appear to confirm the modification. Click OK to confirm.
Beneficiary Type
Overview
This screen requires allows the user to be able to define possible Beneficiary types with a tab at the bottom to define the different Benefit Shares per Beneficiary type. Some examples of beneficiary types include current wife, father, mother, child, guardian, ex-wife, etc.
Navigation 
How to SEARCH:
- Enter the information to be used as retrieval criteria in the appropriate field (s). If you prefer to see a list of all Beneficiary Types, leave all fields blank.
- Click on the Find icon
 .
.
The Beneficiary Type screen includes the following fields:
| Report Fields | Description |
| ID | Unique identification code of the Beneficiary Type |
| Language | Language used |
| Name | Name of the beneficiary |
Create a Beneficiary Type
This screen requires allows the user to be able to define possible Beneficiary types with a tab at the bottom to define the different Benefit Shares per Beneficiary type. Some examples of beneficiary types include current wife, father, mother, child, guardian, ex-wife, etc. To ADD a Beneficiary Type, follow the steps below:
Navigation 
By default, you will be in Search Mode.
- Click on the New icon
 (you will then be in Insert Mode).
 - Enter the new Beneficiary Type information. Fields with an asterisk
 are mandatory fields.
 - Enter the ID and select the Language, as required.
- ID: Unique identification code of the Beneficiary Type.
- Language: Language used.
- Enter Name.
- Name: Name of the beneficiary.
5. Click on the Save icon  at the bottom of the Beneficiary Type to save your new Beneficiary Type information. A window will appear to confirm.

Delete a Beneficiary Type
This screen requires allows the user to be able to define possible Beneficiary types with a tab at the bottom to define the different Benefit Shares per Beneficiary type. Some examples of beneficiary types include current wife, father, mother, child, guardian, ex-wife, etc. To DELETE a Beneficiary Type, follow the steps below:
Navigation 
By default, you will be in Search Mode.
- Find the Beneficiary Type you want to Delete
- Enter the information to be used as retrieval criteria in the appropriate field(s). If you prefer to see all Beneficiary Type, leave all fields blank.
- Click Find

- Select the Beneficiary Type you want to Delete
- Click on the Delete icon

- A window will appear asking you to confirm

- Click OK to confirm and delete the Beneficiary Type.
- A window will be displayed confirming the Beneficiary Type has been deleted

To Verify that the Beneficiary Type has been Deleted:
- Click on the Search icon

- Enter the Beneficiary Type information
- Click on the Find icon

- The window will appear

Modify a Beneficiary Type
This screen requires allows the user to be able to define possible Beneficiary types with a tab at the bottom to define the different Benefit Shares per Beneficiary type. Some examples of beneficiary types include current wife, father, mother, child, guardian, ex-wife, etc. To MODIFY a Beneficiary Type, follow the steps below:
Navigation 
By default, you will be in Search Mode.
- Enter the information to be used as retrieval criteria in the appropriate field(s).
If you prefer to see the list of all Beneficiary Type, leave all fields blank. - Click on the Find icon
 . The list of Beneficiary Type meeting the retrieval criteria will appear.
 - Click on the Beneficiary Type you want to modify.
You will then be in Update/Delete Mode. - Make the necessary modification(s).
- Click on the Update icon
 at the bottom of the screen to save your modifications. A window will appear to confirm the modification. Click OK to confirm.
Benefit Share Per Beneficiary Type
Overview
This screen includes all of the information that a user will need to input data in order to prepare a Benefit Share per Beneficiary Type entry. ID code of the employee, beneficiary type, minimum and maximum ages for an employee to qualify for the benefit share per beneficiary type, the rate and the amount are all headings which must be defined by the user.
Navigation 
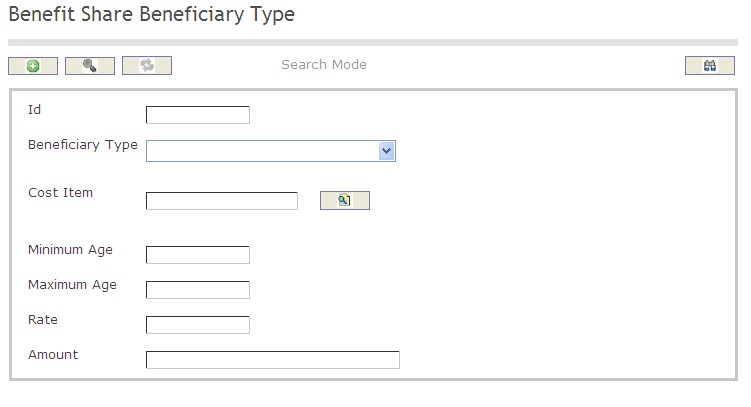
How to SEARCH:
- Enter the information to be used as retrieval criteria in the appropriate field (s). If you prefer to see a list of all Benefit Share Per Beneficiary Types, leave all fields blank.
- Click on the Find icon
 .
.
The Benefit Share Per Beneficiary Type screen includes the following fields:
| Report Fields | Description |
| ID | Unique identification code of the Benefit Share per Beneficiary Type |
| Beneficiary Type | The type of beneficiary associated to this benefit |
| Cost Item | The cost item associated to this benefit |
| Minimum Age | The minimum age required to receive this benefit share |
| Maximum Age | Specifies the maximum age in years of the beneficiary to receive this benefit. If this value is null means that the beneficiary will be receiving this benefit share until the benefit ends |
| Rate | The percentage over the benefit factor/amount to be granted to this beneficiary type |
| Amount | The amount of the benefit share |
Create a Benefit Share Per Beneficiary Type
Benefit Share Per Beneficiary Type includes all of the information that a user will need to input data in order to prepare a Benefit Share per Beneficiary Type entry. To CREATE a Benefit Share Per Beneficiary Type, follow the steps below:
Navigation 
By default, you will be in Search Mode.
- Click on the New icon
 (you will then be in Insert Mode).
 - Enter the new Benefit Share per Beneficiary Type information. Fields with an asterisk
 are mandatory fields.
 - Enter the ID, as required.
- ID: Unique identification code of the Benefit Share per Beneficiary Type.
- Select a Beneficiary Type from the drop-down menu.
- Beneficiary Type: The type of beneficiary associated to this benefit.
5. To enter the Cost Item data, if required, click on the Lookup icon  , click on the Find icon
  to retrieve the Cost Item list, then select the Cost Item.
- Cost Item: The cost item associated to this benefit.
6. Enter Minimum Age.
- Minimum Age: The minimum age required to receive this benefit share.
- Maximum Age: Specifies the maximum age in years of the beneficiary to receive this benefit. If this value is null means that the beneficiary will be receiving this benefit share until the benefit ends.
8. Enter Rate.
- Rate: The percentage over the benefit factor/amount to be granted to this beneficiary type.
9. Enter Amount.
- Amount: The amount of the benefit share.
10. Click on the Save icon  at the bottom of the Benefit Share per Beneficiary Type page to save your new Benefit Share per Beneficiary Type information. A window will appear to confirm.

Delete a Benefit Share Per Beneficiary Type
Benefit Share Per Beneficiary Type includes all of the information that a user will need to input data in order to prepare a Benefit Share per Beneficiary Type entry. To DELETE a Benefit Share Per Beneficiary Type, follow the steps below:
Navigation 
By default, you will be in Search Mode.
- Find the Benefit Share per Beneficiary Type you want to Delete
- Enter the information to be used as retrieval criteria in the appropriate field(s). If you prefer to see all Benefit Share per Beneficiary Types, leave all fields blank.
- Click Find

- Select the Benefit Share per Beneficiary Type you want to Delete
- Click on the Delete icon

- A window will appear asking you to confirm

- Click OK to confirm and delete the Benefit Share per Beneficiary Type.
- A window will be displayed confirming the Benefit Share per Beneficiary Type has been deleted

To Verify that the Benefit Share per Beneficiary Type has been Deleted:
- Click on the Search icon

- Enter the Benefit Share per Beneficiary Type information
- Click on the Find icon

- The window will appear

Modify a Benefit Share Per Beneficiary Type
Benefit Share Per Beneficiary Type includes all of the information that a user will need to input data in order to prepare a Benefit Share per Beneficiary Type entry. To MODIFY a Benefit Share Per Beneficiary Type, follow the steps below:
Navigation 
By default, you will be in Search Mode.
- Enter the information to be used as retrieval criteria in the appropriate field(s).
If you prefer to see the list of all Benefit Share per Beneficiary Types, leave all fields blank. - Click on the Find icon
 . The list of Benefit Share per Beneficiary Types meeting the retrieval criteria will appear.
 - Click on the Benefit Share per Beneficiary Type you want to modify.
You will then be in Update/Delete Mode. - Make the necessary modification(s).
- Click on the Update icon
 at the bottom of the screen to save your modifications. A window will appear to confirm the modification. Click OK to confirm.
Pension Category
Overview
This support entity contains all Pensions’ Categories defined by the employer.
Navigation
Human Resources ► Support Entities ► Retirement Management ► Pension Category
Pension Category Screen Fields
| Fields | Descriptions |
| Id | The unique Code of the Pension category. Can be given by the user. |
| Active | By default, it is marked as checked, it indicates that the Pension Category is available for use. If it is unmarked then it would be not available anymore to use. |
| Language | It allows the user to select the language to write the description. The default language is English. |
| Description | The user can write details description related to the Pension Category in the selected language. |
Leave Management
Leave Type
Overview
Leave Type defines all the leave reasons that an employee might request. Leave reasons varies and HR approves/disapproves the Leave Type requested.
Navigation 

How to SEARCH:
- Enter the information to be used as retrieval criteria in the appropriate field (s). If you prefer to see a list of all Leave Types, leave all fields blank
- Click on the Find icon

The Leave Type screen includes the following fields:
Field | Definition |
| Id | Unique identification number identifying the Leave Type |
| Cost Item Affected | Cost Item associated to the Leave |
Is Long Term | If checked, indicates that the Leave is Long Term |
Situation Code Combination | Situation Code Combination associated to the Leave, selected from the list of valid situation code combinations |
| Allow Schedule Conflicts | If checked, allows the creation of a Leave even if there is a schedule time conflicts in place |
| Create Timesheet Automatically | If checked, timesheet will be created automatically when leave is created. |
| Cost Item for Timesheet | If a timesheet is created, what will be the cost item? |
| Validate Balance | If checked, system will validate the balance. |
| is Active | Active Status - if checked, Business Trip Purpose will not be used/active |
| Inactive Date | Date the Leave Type is set to inactive |
| Language | Language used |
Description | Description of the Leave Type |
Create A Leave Type
To CREATE a Leave Type that lists the leave reasons that an employee might request, follow the steps below:
Navigation 
By default, you will be in Search Mode.
1. Click on the New icon ![]() . You will then be in Insert Mode.
. You will then be in Insert Mode.
2. Enter the new Leave Type information. Fields with an asterisk  are mandatory fields.
3. To enter the Cost Item Affected, if required, click on the Lookup icon  , click on Find icon
  to retrieve the Cost Item list, then select the Cost Item. Refer to Cost Item for more information.
4. Check the Is Long Term box as required, and once checked the Situation Code Combination field will appear.
Is Long Term: When checked it indicates that the Leave Type is for Long Term and a new assignment will be created.
Select the Situation Code Combination from drop down menu. Refer to Situation Code Combinations for more information.
5. Check the Allow Schedule Conflicts, and Is Active boxes as required.
Allow Schedule Conflicts: When checked it allow you to insert a Leave Type even if there is a schedule time conflicts in place.
6. Choose the Language from the drop down menu.
7. Enter the description of the Leave type in the Description field.
8. Click on the Save icon  at the bottom to save your new Leave Type information. A window will appear to confirm the new Leave Type creation. Click OK to confirm.
Delete A Leave Type
To DELETE a Leave Type that lists the leave reasons that an employee might request, follow the steps below:
Navigation 
By default, you will be in Search Mode.
- Find the Business Trip Groups you want to Delete.
- Enter the information to be used as retrieval criteria in the appropriate field(s). If you prefer to see all Leave Type, leave all fields blank.
- Click Find
 .
. - Select the Leave Type you want to Delete.
- Click on the Delete icon
 .
. - A window will appear asking you to confirm

- Click OK to confirm and delete the Leave Type
- A window will be displayed confirming the Leave Types has been deleted
To Verify that the Leave Type has been Deleted:
- Click on the Search icon

- Enter the Leave Type information in the appropriate field (s).
- Click on the Find icon

- This window will appear

Modify A Leave Type
To MODIFY a Leave Type that lists the leave reasons that an employee might request, follow the steps below:
Navigation 
By default, you will be in Search Mode.
- Enter the information to be used as retrieval criteria in the appropriate field (s). If you prefer to see a list of all Leave Types, leave all fields blank.
- Click on the Find icon
 .
. - Click on the Leave Type you want to modify.
You will then be in Update/Delete Mode. - Make the necessary modifications. To add or remove Leave Types, refer to Leave Type.
- Click on the Update icon
 at the bottom of the screen to save your modifications. A window will appear to confirm the modification. Click OK to confirm.
Recruitment Management
Interview Evaluation Factor
Overview
This screen contains evaluation factors for recruitment interview.
Navigation 
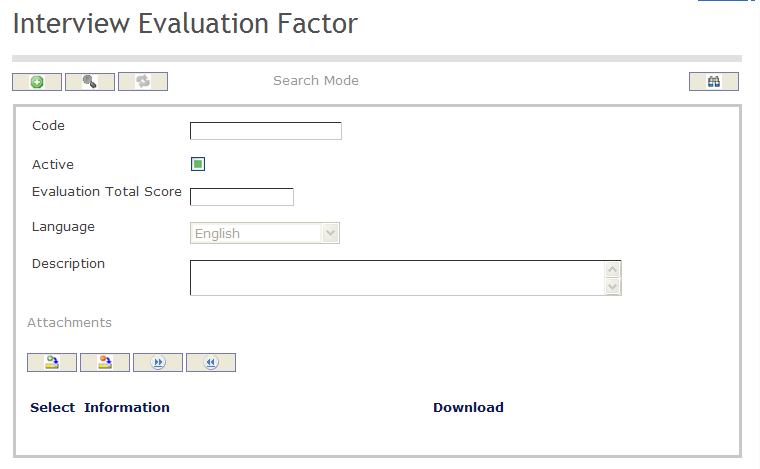
Create An Interview Evaluation Factor
Navigation 
By default, you will be in Search Mode.
- Click on the New icon
 (you will then be in Insert Mode).
 - Enter the new Interview Evaluation Factor information. Fields with an asterisk
 are mandatory fields.
 - Enter the Code, click on the Active checkmark, as required, and select the Language, as required.
- Code: Unique identification code of the Interview Evaluation Factor .
- Active: Active Status - if checked, Interview Evaluation Factor is available.
- Enter the Description
- Add Attachments if required
- Click Onto the Save icon at the bottom of the Interview Evaluation Factor to save your new Interview Evaluation Factor

- The following output will come out to confirm
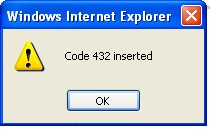
Delete an Interview Evaluation Factor
Navigation 
By default, you will be in Search Mode.
- Find the Interview Evaluation Factor you want to Delete
- Enter the information to be used as retrieval criteria in the appropriate field(s). If you prefer to see all Interview Evaluation Factor , leave all fields blank.
- Click Find

- Select the Interview Evaluation Factor you want to Delete
- Click on the Delete icon

- A window will appear asking you to confirm

- Click OK to confirm and delete the Interview Evaluation Factor .
- A window will be displayed confirming the Interview Evaluation Factor has been deleted

- Click on the Delete icon
To Verify that the Interview Evaluation Factor has been Deleted:
- Click on the Search icon

- Enter the Interview Evaluation Factor information
- Click on the Find icon

The window will appear 
Modify An Interview Evaluation Factor
Navigation 
By default, you will be in Search Mode.
- Enter the information to be used as retrieval criteria in the appropriate field(s).
If you prefer to see the list of all Interview Evaluation Factors, leave all fields blank. - Click on the Find icon
 . The list of Interview Evaluation Factors meeting the retrieval criteria will appear.
 - Click on the Interview Evaluation Factor you want to modify.
You will then be in Update/Delete Mode. - Make the necessary modification(s).
- Click on the Update icon
 at the bottom of the screen to save your modifications. A window will appear to confirm the modification. Click OK to confirm.
Priority Enrollment
Overview
The registered employees to this list will have priority over other people that are applying to the jobs except for those that have a promotion proposal.
Navigation
Human Resources ► Support Entities ► Recruitment Management ► Priority Enrollment
Priority Enrollment Screen Fields
| Fields | Descriptions |
Workflow Status | It shows the workflow status of the Priority Enrollment. It is updated by the system according to the successful approval stages. The default value is Created. |
Active | By default this check box is unchecked, when the user makes it checked then it would be available in the recruitment module. |
Start Date | The date at which the priority list enrollment started. User can select the date using the calendar feature. |
End Date | The date at which the priority list ends. This end date needs to be available even once the enrolment has the status 'APPROVED'. |
| Employee | The ID of the registered employee. |
| External Candidate | The ID of the registered external applicant. |
| Type | It allows user to select the employee type from the drop-down list. Possible types: Graduate, Civil Servant, Other Default: Graduate. |
| Reserve List Type | It allows user to select the reserve list type from the drop-down list. Possible Values are "INTERNAL", "NATIONAL". The Default value is "NATIONAL". |
| Institutions | This tab allows user to select the one or multiple institution using the institution tree. |
Recruitment Board
Overview
This screen allows user to create Recruitment Board support entity.
Navigation
Human Resources ► Support Entities ► Recruitment Management ► Recruitment Board
Recruitment Board Screen Fields
| Fields | Descriptions |
| Code | It is entered by user which must be a unique code for the Recruitment Board. |
| Active | The default value is marked as checked. If it is marked as unchecked then it would be not available anymore to use. |
| Language | The country-specific language can be selected by user to give the name. The Default language is English. |
| Name | The short name for the Rercuitment board in the selected language or in English. |
Salary Scale Management
Cost Item Scale Group
Overview
The Salary Scale Management is used to categorize salaries throughout the organization. Each Employee Assignment includes a Cost Item Scale Group, Sub-Group, Level and Step for payroll calculation. The Cost Item Scale Group includes the information related to the group used in the Cost Item Scale.
Navigation
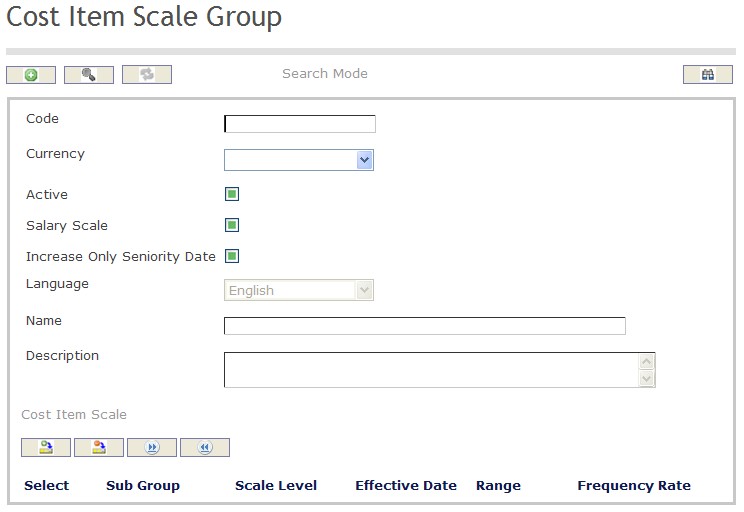
Create a Cost Item Scale Group
Overview
The Cost Item Scale Group includes the information related to the group used in the Cost Item Scale.
Navigation 
By default, you will be in Search Mode.
- Click on the New icon
 (you will then be in Insert Mode).
 - Enter the new Cost Item Scale Group information. Fields with an asterisk
 are mandatory fields.
 - Enter the Code, select the Currency, click on the Active, Salary Scale, Increase Only Seniority Date, as required. Select the Language, enter the Name and Description.
- Code: Cost Item Scale Group unique identification code
- Currency: Currency used by the Cost Item Scale Group
- Active: Active Status - if checked, Cost Item Scale Group is available
- Salary Scale: Salary Scale True/False Indicator
- Increase Only Seniority Date: If checked, only the employees with seniority dates will have salary increases
- Language: Language used
- Name: Name of the Cost Item Scale Group
- Description: Detailed description of the Cost Item Group
- Click on the New icon
 under
under to enter the Cost Item Scale information (refer to Cost Item Scale for more information)
 - Click on the Save and Return icon
 to save the Cost Item Scale information and return to the Cost Item Scale Group, or click on the Discard icon
  to discard the Cost Item Scale information entry and return to the Cost Item Scale Group.
 - Click the individual Select Checkbox (es), under
 to select and de-select the Cost Item Scale (s), as required, or click the Select All icon
  or Unselect All
  icon, to select or de-select all Cost Item Scale (s), if required.
 - Click the Remove icon
 to remove the selected Cost Item Scale (s), if required
 - Repeat steps 4 to 7 for all required Cost Item Scales.
- Click on the Save icon
 at the bottom to save your new Cost Item Scale Group information. A window will appear to confirm the new Cost Item Scale Group creation. Click OK to confirm.
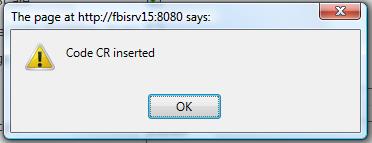 .
.
Cost Item Scale
Navigation (From  click the New Icon
 , under
  )
)
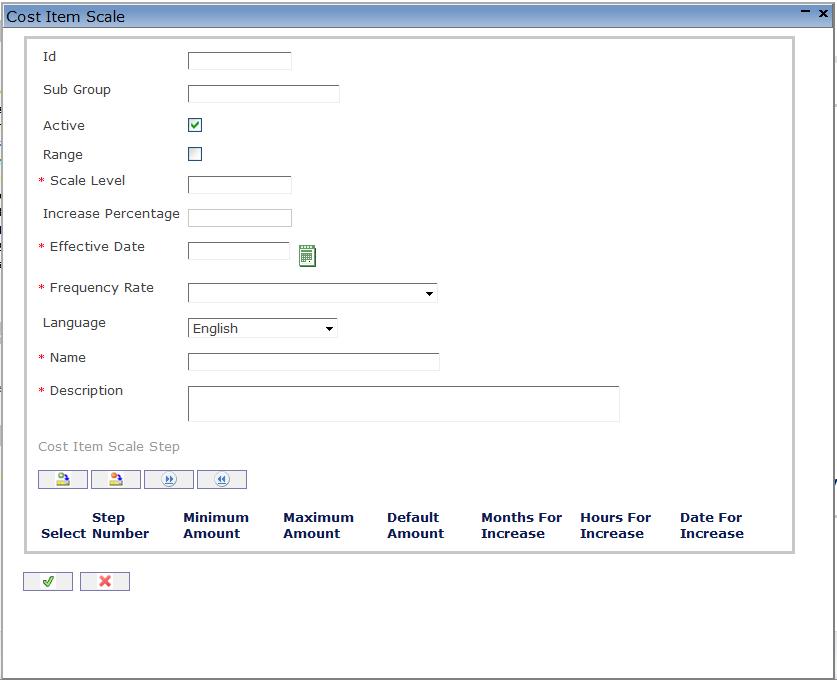
Create a Cost Item Scale
Navigation (From  click the New Icon
 , under
  )
)
- Enter the new Cost Item Scale information. Fields with an asterisk
 are mandatory fields.
 - Enter the ID, Sub-Group, click on the Active and Range checkmarks, as required. Enter the Scale Level, Increase Percentage, Effective Date, Frequency Rate, select the Language, and enter the Name and Description.
- ID: Unique Identification Number
- Sub Group: Sub group of the Cost Item Scale.
- Active: Active Status - if checked, Cost Item Scale is available.
- Range: If checked, the Cost Item Scale Level will not be a fixed rate but a Cost Item Scale Level with a range
- Scale Level: Number indicating the Cost Item Scale Level
- Increase Percentage: Percentage of Increase at anniversary date for Cost Item Scales with a minimum-maximum range
- Effective Date: Date at which the Cost Item Scale becomes effective. To enter the date, click on the Calendar icon
 and select the date.
 - Frequency Rate: Type of rate of the Cost Item Scale: Hourly, Daily, Weekly, Monthly, or Annually.
- Language: Language used
- Name: Cost Item Scale Name
- Description: Detailed description of the Cost Item Scale
- Click on the New icon
 under
under  to enter the Cost Item Scale Step information (refer to Cost Item Scale Step for more information).
 - Click the individual Select Checkbox (es), under
 to select and de-select the Cost Item Scale Step (s), as required, or click the Select All icon
  or Unselect All
  icon, to select or de-select all Cost Item Scale Step (s), if required.
 - Click the Remove icon
 to remove the selected Cost Item Scale Steps, from step 4, if required.
 - Click on the Save and Return icon
 to save the Cost Item Scale information and return to the Cost Item Scale Group, or click on the Discard icon
  to discard the Cost Item Scale information entry and return to the Cost Item Scale Group.
Cost Item Scale Step
Navigation (From  click the New Icon
 , under
  , and New Icon
 , under
  ).
).
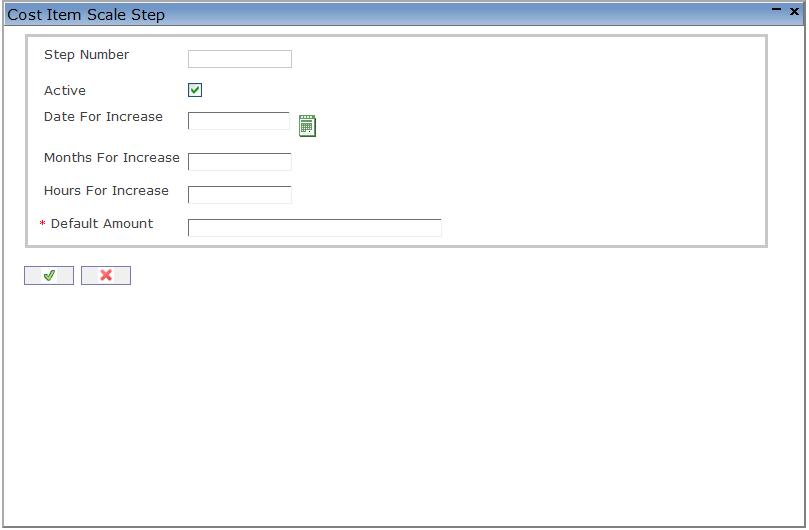
Create a Cost Item Scale Step
Navigation (From  click the New Icon
 , under
  , and New Icon
 , under
  ).
).
- Enter the new Cost Item Scale Step information. Fields with an asterisk
 are mandatory fields.
 - Click on the Active checkmark, as required, enter the Date For Increase, Months For Increase, or Hours For Increase, as required. Enter the Default Amount, if Range is not selected under Cost Item Scale, or Minimum Amount and Maximum Amount if Range is selected, under Cost Item Scale.
- Active: Active status - if checked, Cost Item Scale Step is available.
- Date For Increase: Date at which the salary will be automatically increased to the next level. To enter the date, click on the Calendar icon
 and select the date.
 - Months For Increase: Number of months prior to a salary increase to the next level.
- Hours For Increase: Number of hours prior to a salary increase to the next level.
- Default Amount: Cost Item Scale Step Default Amount..
- Minimum Amount: Cost Item Scale Minimum Amount.
- Maximum Amount: Cost Item Scale Maximum Amount.
- Click on the Save and Return icon
 to save the Cost Item Scale Step information and return to the Cost Item Scale, or click on the Discard icon
  to discard the Cost Item Scale Step information entry and return to the Cost Item Scale Group.
 - Repeat steps 1 to 3 for all required Cost Item Scale Steps.
Delete a Cost Item Scale Group
Overview
The Cost Item Scale Group includes the information related to the group used in the Cost Item Scale.
Navigation 
By default, you will be in Search Mode.
- Find the Cost Item Scale Group you want to Delete
- Enter the information to be used as retrieval criteria in the appropriate field(s). If you prefer to see all Cost Item Scale Groups, leave all fields blank.
- Click Find
 .
. - Select the Cost Item Scale Group you want to Delete.
- Click on the Delete icon
 .
. - A window will appear asking you to confirm

- Click OK to confirm and delete the Cost Item Scale Group.
- A window will be displayed confirming the Cost Item Scale Group has been deleted
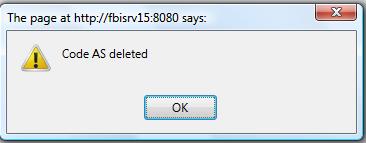
To Verify that the Cost Item Scale Group has been Deleted:
- Click on the Search icon

- Enter the Cost Item Scale Group information in the appropriate field (s).
- Click on the Find icon

- This window will appear

Modify a Cost Item Scale Group
Overview
The Cost Item Scale Group includes the information related to the group used in the Cost Item Scale.
Navigation 
By default, you will be in Search Mode.
- Enter the information to be used as retrieval criteria in the appropriate field (s). If you prefer to see a list of all Cost Item Scale Groups, leave all fields blank.
- Click on the Find icon
 .
. - Click on the Cost Item Scale Group you want to modify.
You will then be in Update/Delete Mode. - Make the necessary modifications. To add or remove Cost Item Scales, refer to Cost Item Scales.
- Click on the Update icon
 at the bottom of the screen to save your modifications. A window will appear to confirm the modification. Click OK to confirm.
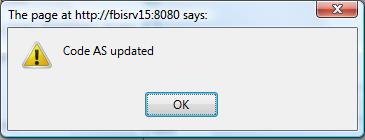
Succession Planning
Succession Weighting
Overview
This screen holds the weighting for Employee Positions. When looking at specific Employee Positions, the weighting can be tailored to fit specific organization skills and certificate priorities.
Navigation 
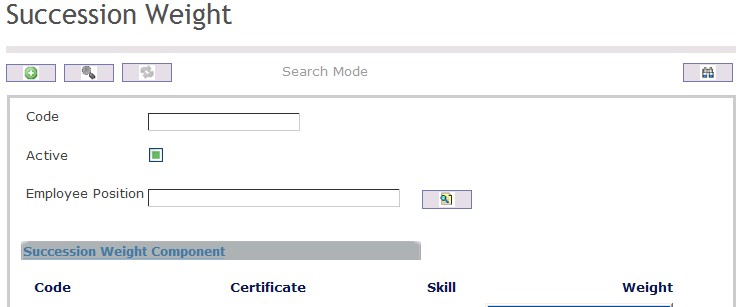
How to SEARCH:
- Enter the information to be used as retrieval criteria in the appropriate field (s). If you prefer to see a list of all Succession Weights, leave all fields blank.
- Click on the Find icon
 .
.
The Succession Weight screen includes the following fields:
| Fields | Description |
| Code | Unique identification code of the Succession Weight |
| Active | Active Status - if checked, Succession Weight is available |
| Employee Position | The Employee Position this weight is applicable to |
Create a Succession Weight
Succession Weighting holds the weighting for Employee Positions. To CREATE a Succession Weighting, follow the steps below:
Navigation 
By default, you will be in Search Mode.
1. Click on the New icon ![]() (you will then be in Insert Mode).
(you will then be in Insert Mode).
2. Enter the new Succession Weight information. Fields with an asterisk  are mandatory fields.
3. Enter the Code, and click on the Active checkmark, as required.
- Code: Unique identification code of the Succession Weight.
- Active: Active Status - if checked, Succession Weight is available.
4. To enter the Employee Position, if required, click on the Lookup icon  , click on the Find icon
  to retrieve the Employee Position list, then select the Employee Position.
- Employee Position: The Employee Position this weight is applicable to
To ADD a Succession Weight Component to the Succession Weight, if required:
1. Click on the  tab and then click on the New icon
  to enter Succession Weight Components (refer to Succession Weight Component for more information).
2. Click on the Save and Return icon  to save the Succession Weight Component information and return to the Succession Weight screen, or click on the Discard icon
  to discard the Succession Weight Component entry and return to the Succession Weight screen.
3. Click the Remove icon  to remove the selected Succession Weight Component information, if required.
4. Click the individual Select Checkbox (es) to select and de-select the Succession Weight Components, as required, or click the Select All icon  or Unselect All
  icon, to select all Succession Weight Components or de-select all Succession Weight Components, if required.
Click on the Save icon  at the bottom of the Succession Weight page to save your new Succession Weight information. A window will appear to confirm.

Delete a Succession Weight
Succession Weighting holds the weighting for Employee Positions. To DELETE a Succession Weighting, follow the steps below:
Navigation 
By default, you will be in Search Mode.
- Find the Succession Weight you want to Delete
- Enter the information to be used as retrieval criteria in the appropriate field(s). If you prefer to see all Succession Weights, leave all fields blank.
- Click Find

- Select the Succession Weight you want to Delete
- Click on the Delete icon

- A window will appear asking you to confirm

4. Click OK to confirm and delete the Succession Weight.
5. A window will be displayed confirming the Succession Weight has been deleted

To Verify that the Succession Weight has been Deleted:
- Click on the Search icon

- Enter the Succession Weight information
- Click on the Find icon

- The window will appear

Modify a Succession Weight
Succession Weighting holds the weighting for Employee Positions. To MODIFY a Succession Weighting, follow the steps below:
Navigation 
By default, you will be in Search Mode.
- Enter the information to be used as retrieval criteria in the appropriate field(s).
If you prefer to see the list of all Succession Weights, leave all fields blank. - Click on the Find icon
 . The list of Succession Weights meeting the retrieval criteria will appear.
 - Click on the Succession Weight you want to modify.
You will then be in Update/Delete Mode. - Make the necessary modification(s). To add or remove Succession Weight Components, refer to.......
- Click on the Update icon
 at the bottom of the screen to save your modifications. A window will appear to confirm the modification. Click OK to confirm.
Termination of Employment
Departure Reasons
Overview
Departure Reasons display a list of reasons as to why a civil servant is departing his/her job. Valid reasons include: Retirement, Private sector, Personal, Health, Moving, Position abolished, Dismissal, Death, and Impairment.
Navigation 
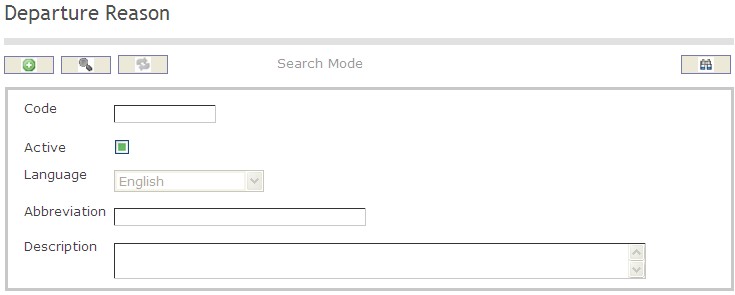
How to SEARCH:
- Enter the information to be used as retrieval criteria in the appropriate field (s). If you prefer to see a list of all Departure Reasons, leave all fields blank
- Click on the Find icon

The Departure Reasons screen includes the following fields:
Field | Definition |
Code | Unique identification number describing departure reasons |
Active | Active Status - if checked, Departure Reasons become available |
Language | Language used |
Abbreviation | Refers to the short format for the Departure Reasons |
Create A Departure Reason
To CREATE a list of reasons as to why a civil servant is departing his/her job, follow the steps below:
Navigation 
By default, you will be in Search Mode.
1. Click on the New icon ![]() . You will then be in Insert Mode.
. You will then be in Insert Mode.
2. Enter the new Departure Reasons information. Fields with an asterisk  are mandatory fields.
3. Enter the Code as required, and check the Active box as necessary.
4. Select the preferred language from the Language drop down menu.
5. Fill in the Abbreviation, and the Description fields.
- Abbreviation: Refers to the short format for the Departure Reasons.
6. Click on the Save icon  at the bottom to save your new Departure Reason. A window will appear to confirm the new School creation. Click OK to confirm.

Delete Departure Reasons
To DELETE a list of reasons as to why a civil servant is departing his/her job, follow the steps below:
Navigation 
By default, you will be in Search Mode.
- Find the Departure Reasons you want to Delete
- Enter the information to be used as retrieval criteria in the appropriate field(s). If you prefer to see all Departure Reasons, leave all fields blank.
- Click Find
 .
. - Select the Departure Reason(s) you want to Delete.
- Click on the Delete icon
 .
. - A window will appear asking you to confirm

- Click OK to confirm and delete the Departure Reasons.
- A window will be displayed confirming the Departure Reasons has been deleted

To Verify that the Departure Reasons has been Deleted:
- Click on the Search icon

- Enter the Departure Reasons information in the appropriate field (s).
- Click on the Find icon

- This window will appear

Modify Departure Reasons
To MODIFY a list of reasons as to why a civil servant is departing his/her job, follow the steps below:
Navigation 
By default, you will be in Search Mode.
- Enter the information to be used as retrieval criteria in the appropriate field (s). If you prefer to see a list of all Departure Reasons, leave all fields blank.
- Click on the Find icon
 .
. - Click on the Departure Reason you want to modify.
You will then be in Update/Delete Mode. - Make the necessary modifications.
- Click on the Update icon
 at the bottom of the screen to save your modifications. A window will appear to confirm the modification. Click OK to confirm.

Time and Attendance Management
Time and Attendance Assignment Settings
Overview
Time and Attendance Assignment Settings are used to represent the settings for Time and Attendance assigned to a particular employee's assignment. Time and Attendance Assignment Settings include: Time Record Source, Enter clock hours, and Default Base Salary Cost Item Code. These settings overwrite the Time and Attendance Assignment Settings defined under System Parameters.
Navigation 
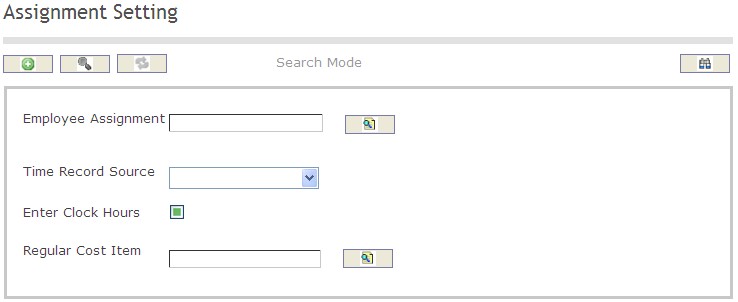
How to SEARCH:
- Enter the information to be used as retrieval criteria in the appropriate field (s). If you prefer to see a list of all Time and Attendance Assignment Settings, leave all fields blank
- Click on the Find icon

The Time and Attendance Assignment Settings screen includes the following fields:
Field | Definition |
Employee Assignment | The employee's assigned work task |
Time Record Source | Choose whether the time record is 'External' or 'Manual' |
Regular Cost Item | Cost Items associated to Regular Pay |
Create A Time and Attendance Assignment Settings
To CREATE a Time and Attendance settings and assign it to a particular employee's assignment, follow these steps:
Navigation 
By default, you will be in Search Mode.
1. Click on the New icon ![]() . You will then be in Insert Mode.
. You will then be in Insert Mode.
2. Enter the new Assignment Setting information. Fields with an asterisk  are mandatory fields.
3. To enter the Employee Assignment, click on the Lookup icon  , click on Find icon
  to retrieve the Employee Assignment list, then select the Employee Assignment. Refer to Employee Assignment for more information.
- Employee Assignment: The employee's assigned assignment.
4. Select the Time Record Source from the drop down menu.
- Time Record Source: Choose whether the time record is 'External' or 'Manual'.
5. Check the Enter Clock Hours box if required.
6. To enter the Regular Cost Item, if required, click on the Lookup icon  , click on Find icon
  to retrieve the Regular Cost Item list, then select the Regular Cost Item. Refer to Cost Item for more information.
- Regular Cost Item: Cost Items associated to Regular Pay.
7. Click on the Save icon  at the bottom to save your new Assignment Settings information. A window will appear to confirm the new Assignment Settings creation. Click OK to confirm.

Delete The Time and Attendance Assignment Settings
To DELETE a Time and Attendance settings and assign it to a particular employee's assignment, follow these steps:
Navigation 
By default, you will be in Search Mode.
- Find the Assignment Settings you want to Delete
- Enter the information to be used as retrieval criteria in the appropriate field(s). If you prefer to see all Assignment Settings, leave all fields blank.
- Click Find
 .
. - Select the Assignment Settings you want to Delete.
- Click on the Delete icon
 .
. - A window will appear asking you to confirm

- Click OK to confirm and delete the Assignment Settings.
- A window will be displayed confirming the Assignment Settings has been deleted

To Verify that the Assignment Settings has been Deleted:
- Click on the Search icon

- Enter the Assignment Settings information in the appropriate field (s).
- Click on the Find icon

- This window will appear
Modify The Time and Attendance Assignment Settings
To MODIFY a Time and Attendance settings and assign it to a particular employee's assignment, follow these steps:
Navigation 
By default, you will be in Search Mode.
- Enter the information to be used as retrieval criteria in the appropriate field (s). If you prefer to see a list of all Assignment Settings, leave all fields blank.
- Click on the Find icon
 .
. - Click on the Assignment Settings you want to modify.
You will then be in Update/Delete Mode. - Make the necessary modifications.
- Click on the Update icon
 at the bottom of the screen to save your modifications. A window will appear to confirm the modification. Click OK to confirm.

Training Management
Training Course Catalog
Overview
This training course catalog contains all the general courses offered by the organization. Training staff will use this catalog to create and schedule specific training courses. This is where all the prerequisite courses and skills for each specific training course will be determined.
Navigation 
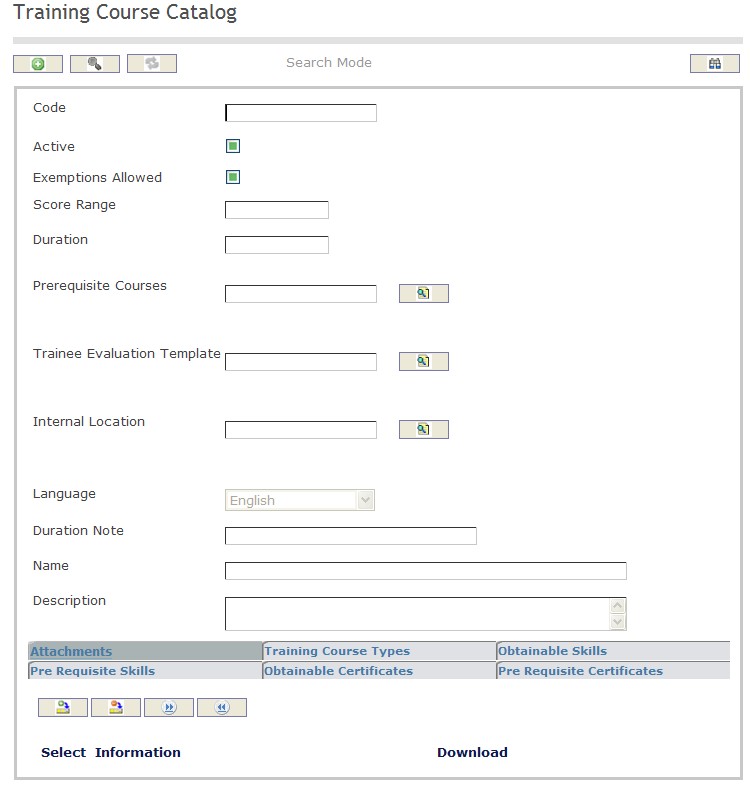
How to SEARCH:
- Enter the information to be used as retrieval criteria in the appropriate field (s). If you prefer to see a list of all training course catalog leave all fields blank.
- Click on the Find icon
 .
.
The Training Course Catalog screen includes the following fields:
| Field | Definition |
| Code | Unique identification code of the Training Course Catalog. |
| Active | Active Status - if checked, Training Course is available in the Catalog. |
| Exemptions Allowed | Exemptions Allowed indicator - if checked, indicates if exemptions are allowed on skills and certificate requirements. |
| Score Range | Highest score that could be given on this course. |
| Duration | How many days the course will be. |
| Prerequisite Course | Courses that the trainee needs to have already taken and passed before taking the selected course. |
| Trainee Evaluation Template | Template that is used for evaluating the people who attended the course. |
| Internal Location | Internal Location where the course normally occurs. |
| External Location | External location where the course normally occurs. |
| Language | Language used |
| Name | Name of the Training Course |
| Description | Description of the Training Course in catalog |
Create a Training Course Catalog
Overview
The training course catalog contains all the general courses offered by the organization.
To CREATE training course catalogs follow the steps below:
Navigation 
By default, you will be in Search Mode.
1. Click on the New icon ![]() (you will then be in Insert Mode).
(you will then be in Insert Mode).
2. Enter the new Training Course Catalog information. Fields with an asterisk  are mandatory fields.
3. Enter the Code, click on the Active and Exceptions Allowed checkmarks, as required.
- Code: Unique identification code of the Training Course Catalog.
- Active: Active Status - if checked, Training Course is available in the Catalog.
- Exemptions Allowed: Exemptions Allowed indicator - if checked, indicates that exemptions are allowed on skills and certificate requirements.
4. Enter the Score Range and Duration
- Score Range: Highest possible score that should be given on this course.
- Duration: How many days the course will be.
5. To enter the Prerequisite Course, if required, click on the Lookup icon  , click on Find icon
  to retrieve the Training Course Catalog list, then select the Course.
- Prerequisite Course: Courses that the trainee needs to have already taken and passed before taking the selected course.
6. To enter the Trainee Evaluation Template, if required, click on the Lookup icon  , click on Find icon
  to retrieve the Training Feedback Template list, then select the Training Feedback Template.
- Trainee Evaluation Template: Template that is used for evaluating the people who attended the course.
7. To enter the Internal Location, if required, click on the Lookup icon  , click on Find icon
  to retrieve the Work Location list, then select the Work Location.
- Internal Location: Internal Location where the course normally occurs
8. Click on the New icon ![]() beside External Location, if required (refer to Address for more information).
beside External Location, if required (refer to Address for more information).
- External Location: External location where the course normally occurs.
9. Select the Language as required.
- Language: Language used
10. Enter the Name, Duration Note and Description of the Training Feedback Criteria.
- Name: Name of the Training Course
- Duration Note: Details about the duration. For example: Starts at 9 am.
- Description: Description of the Training Course in the Catalog
11. Click on the New icon  under
under  to enter the Attachments (refer to Attachments for more information).
12. Click on the Save and Return icon  to save the Attachments information and return to the Training Course Catalog screen, or click on the Discard icon
  to discard the Attachments entry and return to the Training Course Catalog.
13. Click the individual Select Checkbox (es), under  to select and de-select the Attachment (s), as required, or click the Select All icon
  or Un-select All
  icon, to select or de-select all Attachments, if required.
14. Click the Remove icon  to remove the selected Attachment, if required
15. Repeat steps 11 to 14 for all required Attachments.
To ADD Training Course Type to Training Course Catalog, if required
1. Click on  tab and then click on the Lookup icon
  , and enter the Training Course Type information, or leave the Training Course Type information blank to retrieve all Training Course Type.
2. Click Find icon 
3. Click the individual Select Checkbox (es) to select and de-select the Training Course Type(s), as required.
4. Repeat steps 1, 2 and 3 for all required Training Course Types.
5. Click the Return icon  to return to the Training Course Catalog screen, or click the Discard button
  to discard the selection entry and return to Training Course Catalog.
6. Click the individual Select Checkbox (es) to select and de-select the Training Course Type, as required, or click the Select All icon  or Un-select All
  icon, to select all Training Course Types or de-select all Training Course Types, if required.
7. Click the Remove icon to remove the selected Training Course Type information, if required.
ADD new Training Course Type, refer to Training Course Type.
To ADD Obtainable Skills to Training Course Catalog, if required
1. Click on  tab and then click on the Lookup icon
  , and enter the Obtainable Skills information, or leave the Obtainable Skills information blank to retrieve all Obtainable Skills.
2. Repeat steps 2 to 7 which were used above for the  tab.
tab.
ADD new Obtainable Skill, refer to Skills.
To ADD Pre Requisite Skills to Training Course Catalog, if required
1. Click on  tab and then click on the Lookup icon
  , and enter the Pre Requisite Skills information, or leave the Pre Requisite Skills information blank to retrieve all Pre Requisite Skills.
2. Repeat steps 2 to 7 which were used above for the  tab.
tab.
ADD new Pre Requisite Skill, refer to Skills.
To ADD Obtainable Certificates to Training Course Catalog, if required
1. Click  on Lookup icon
  , and enter the Certificate information, or leave the Certificate information blank to retrieve all Certificates.
2. Repeat steps 2 to 7 which were used above for the  tab.
tab.
ADD new Certificate, refer to Certificates.
To ADD Pre Requisite Certificates to Training Course Catalog, if required
1. Click  on Lookup icon
  , and enter the Certificate information, or leave the Certificate information blank to retrieve all Certificates.
2. Repeat steps 2 to 7 which were used above for the  tab.
tab.
ADD new Certificate, refer to Certificates.
 at the bottom of the Training Course Catalog page to save your new Training Course Catalog information. A window will appear to confirm.
Delete a Training Course Catalog
Overview
The training course catalog contains all the general courses offered by the organization.
To DELETE training course catalogs follow the steps below:
Navigation 
By default, you will be in Search Mode.
- Find the Training Course Catalog you want to Delete
- Enter the information to be used as retrieval criteria in the appropriate field(s). If you prefer to see all Training Course Catalogs, leave all fields blank.
- Click Find
 .
. - Select the Training Course Catalog you want to Delete.
- Click on the Delete icon
 .
. - A window will appear asking you to confirm

- Click OK to confirm and delete the Training Course Catalog
- A window will be displayed confirming the Training Course Catalog has been deleted

To Verify that the Training Course Catalog has been Deleted:
- Click on the Search icon

- Enter the Training Course Catalog information in the appropriate field (s).
- Click on the Find icon

- This window will appear

Modify a Training Course Catalog
Overview
The training course catalog contains all the general courses offered by the organization.
To MODIFY training course catalogs follow the steps below:
Navigation 
By default, you will be in Search Mode.
- Enter the information to be used as retrieval criteria in the appropriate field (s). If you prefer to see a list of all Training Course Catalogs, leave all fields blank.
- Click on the Find icon
 .
. - Click on the Training Course Catalog you want to modify. You will then be in Update/Delete Mode.
- Make the necessary modifications. To add or remove Attachments, refer to Create an Attachment. A window will appear to confirm the modification. Click OK to confirm.

To Modify Addresses
1. Click the Update icon  beside External Location.
2. Make the necessary modification(s).
3. Click the Update icon  at the bottom of the Address Screen to save the modification.
Click on the Update icon  at the bottom of the screen to save the modifications. A window will appear to confirm the modification. Click OK to confirm.

Training Course Provider
Overview
The Training course provider administers the training course. The provider must be a vendor, an employee or an organization. For example if the company is offering a training course on this application administered by FreeBalance, then FreeBalance would be the vendor providing the course.
Navigation 
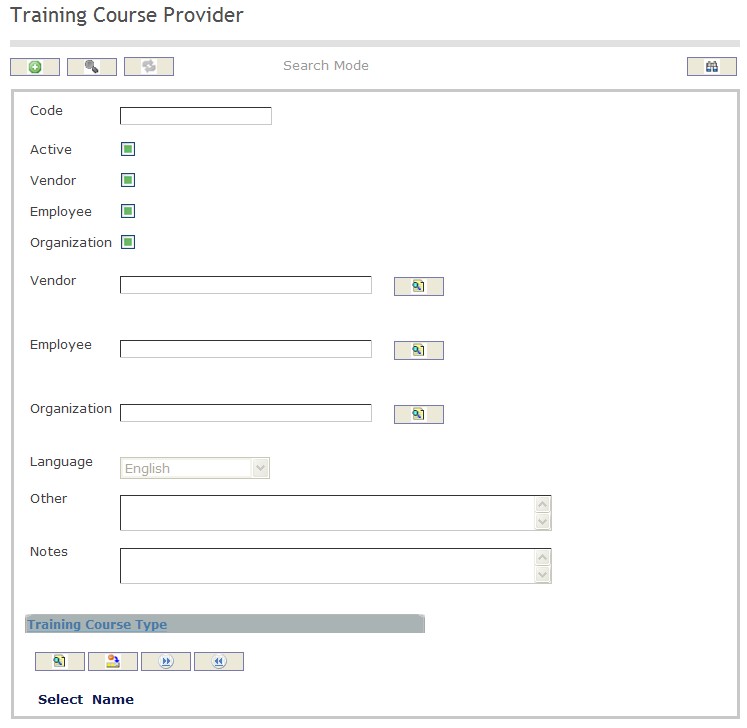
How to SEARCH:
- Enter the information to be used as retrieval criteria in the appropriate field (s). If you prefer to see a list of all training course provider leave all fields blank.
- Click on the Find icon
 .
.
The Training Course Provider screen includes the following fields:
| Field | Definition |
| Code | Unique identification code of the Training Course Provider. |
| Active | Active Status - if checked, Training Course Provider is available. |
| Vendor | If checked, indicates that the provider is an existing vendor from the system. |
| Employee | If checked, indicates than an Employee will provide the training. |
| Organization | if checked, indicates than an Organization will provide the course. |
| Vendor | Vendor that provides the training. |
| Organization | Organization that provides the training. |
| Employee | Employee who provides the training. |
| Language | Language used. |
| Name | Name of the Training Course Provider. |
| Notes | Additional notes on the Training Course Provider. |
Create a Training Course Provider
Overview
Training course providers administer the training course.
To CREATE training course providers follow the steps below:
Navigation 
By default, you will be in Search Mode.
1. Click on the New icon ![]() (you will then be in Insert Mode).
(you will then be in Insert Mode).
2. Enter the new Training Course Provider information. Fields with an asterisk  are mandatory fields.
3. Enter the Code, click on the Active, Vendor, Employee and Organization checkmarks, as required.
- Code: Unique identification code of the Training Course Provider.
- Active: Active Status - if checked, Training Course Provider is available.
- Vendor: If checked, Indicates that the provider is an existing vendor from the system.
- Employee: If checked, indicates that an Employee will provide the training.
- Organization: If checked, indicates that an Organization will provide the course.
4. To enter the Vendor, if required, click on the Lookup icon  , click on Find icon
  to retrieve the Vendor list, then select the Vendor.
- Vendor: vendor that provides the training
5. To enter the Organization, if required, click on the Lookup icon  , click on Find icon
  to retrieve the Institute list, then select the Institute.
- Organization: organization that provides the training
6. To enter the Employee, if required, click on the Lookup icon  , click on Find icon
  to retrieve the Employee list, then select the Employee.
- Employee: the employee who provides the training
7. Select the Language as required.
- Language: Language used
8. Enter the Name, and Notes.
- Name: Name of the Training Course Provider
- Notes: Additional notes on the Training Course Provider
To ADD Training Course Type to Training Course Provider, if required
1. Click on the Lookup icon  , under
  and enter the Training Course Type information, or leave the Training Course Type information blank to retrieve all Training Course Types.
2. Click Find icon 
3. Click the individual Select Checkbox (es) to select and de-select the Training Course Type(s), as required.
4. Repeat steps 1, 2 and 3 for all required Training Course Types.
5. Click the Return icon  to return to the Training Course Provider screen, or click the Discard button
  to discard the selection entry and return to Training Course Provider.
6. Click the individual Select Checkbox (es) to select and de-select the Training Course Type, as required, or click the Select All icon  or Un-select All
  icon, to select all Training Course Types or de-select all Training Course Types, if required.
7. Click the Remove icon to remove the selected Training Course Type information, if required.
ADD new Training Course Type, refer to Training Course Type.
Click on the Save icon  at the bottom of the Training Course Provider page to save your new Training Course Provider information. A window will appear to confirm.
Delete a Training Course Provider
Overview
Training course providers administer the training course.
To DELETE training course providers follow the steps below:
Navigation 
By default, you will be in Search Mode.
- Find the Training Course Provider you want to Delete
- Enter the information to be used as retrieval criteria in the appropriate field(s). If you prefer to see all Training Course Providers, leave all fields blank.
- Click Find
 .
. - Select the Training Course Provider you want to Delete.
- Click on the Delete icon
 .
. - A window will appear asking you to confirm

- Click OK to confirm and delete the Training Course Provider
- A window will be displayed confirming the Training Course Provider has been deleted

To Verify that the Training Course Provider has been Deleted:
- Click on the Search icon

- Enter the Training Course Provider information in the appropriate field (s).
- Click on the Find icon

- This window will appear

Modify a Training Course Provider
Overview
Training course providers administer the training course.
To MODIFY training course providers follow the steps below:
Navigation 
By default, you will be in Search Mode.
- Enter the information to be used as retrieval criteria in the appropriate field (s). If you prefer to see a list of all Training Course Providers, leave all fields blank.
- Click on the Find icon
 .
. - Click on the Training Course Provider you want to modify. You will then be in Update/Delete Mode.
- Make the necessary modification(s).
- Click on the Update icon
 at the bottom of the screen to save your modifications. A window will appear to confirm the modification. Click OK to confirm.

Training Course Type
Objective The training course type screen is where the name and the description for the training course type are defined. This data is used to make up the training course catalog. For example, the name of the Software training type could be "FreeBalance Training" and the description could be "to learn how to use the FreeBalance software efficiently and effectively."
Navigation 
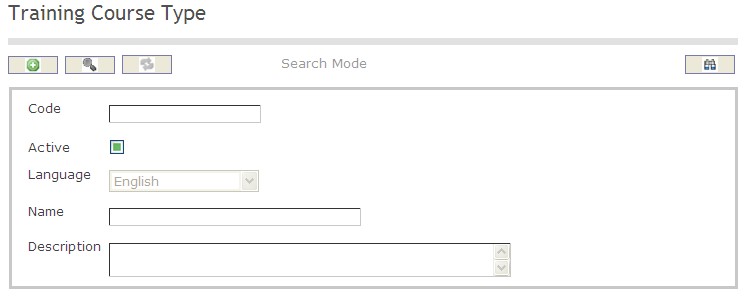
How to SEARCH:
- Enter the information to be used as retrieval criteria in the appropriate field (s). If you prefer to see a list of all training course type leave all fields blank.
- Click on the Find icon
 .
.
The Training Course Type screen includes the following fields:
| Field | Definition |
| Code | Unique identification code of the Training Course Type. |
| Active | Active Status - if checked, Training Course Type is available. |
| Language | Language used. |
| Title | Name of the Training Course Type. |
| Description | Description of the Training Course Type. |
Create a Training Course Type
The training course type screen is where the name and the description of the training course type are defined.
To CREATE training course types follow the steps below:
Navigation 
By default, you will be in Search Mode.
- Click on the New icon
 (you will then be in Insert Mode).
 - Enter the new Training Course Type information. Fields with an asterisk
 are mandatory fields.
 - Enter the Code, click on the Active, and select the Language, as required.
- Code: Unique identification code of the Training Course Type.
- Active: Active Status - if checked, Training Course Type is available.
- Language: Language used.
4. Enter Title and Description of the Training Course Type.
- Title: Name of the Training Course Type.
- Description: Description of the Training Course Type.
5. Click on the Save icon  at the bottom of the Training Course Type page to save your new Training Course Type information. A window will appear to confirm.
Delete a Training Course Type
The training course type screen is where the name and the description of the training course are defined.
To DELETE training course types follow the steps below:
Navigation 
By default, you will be in Search Mode.
- Find the Training Course Type you want to Delete
- Enter the information to be used as retrieval criteria in the appropriate field(s). If you prefer to see all Training Course Types, leave all fields blank.
- Click Find

- Select the Training Course Type you want to Delete
- Click on the Delete icon

- A window will appear asking you to confirm

- Click OK to confirm and delete the Training Course Type.
- A window will be displayed confirming the Training Course Type has been deleted

To Verify that the Training Course Type has been Deleted:
- Click on the Search icon

- Enter the Training Course Type information
- Click on the Find icon

- The window will appear

Modify a Training Course Type
The training course type screen is where the name and the description of the training course are defined.
To MODIFY training course types follow the steps below:
Navigation 
By default, you will be in Search Mode.
- Enter the information to be used as retrieval criteria in the appropriate field(s).
If you prefer to see the list of all Training Course Types, leave all fields blank. - Click on the Find icon
 . The list of Training Course Type meeting the retrieval criteria will appear.
 - Click on the Training Course Type you want to modify.
You will then be in Update/Delete Mode. - Make the necessary modification(s).
- Click on the Update icon
 at the bottom of the screen to save your modifications. A window will appear to confirm the modification. Click OK to confirm.

Training Feedback Criteria
Overview
It is important that training courses get evaluated by the trainees to provide feedback on how effective the training course is. The organization can then make the necessary adjustments.
In this application the training feedback criteria screen contains the individual criteria that the employee will use to evaluate the course. The employees ("Trainees") will fill in the individual criteria and provide feedback on the course that they have attended. An example of a training feedback criteria could be "Irrelevant aspects of the Training" and could ask "What aspect of the training did you find the least beneficial?".
Navigation 
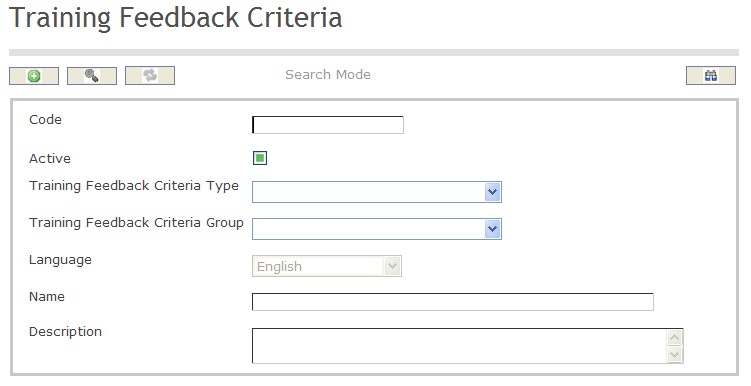
How to SEARCH:
- Enter the information to be used as retrieval criteria in the appropriate field (s). If you prefer to see a list of all training feedback criteria leave all fields blank.
- Click on the Find icon
 .
.
The Training Feedback Criteria screen includes the following fields:
| Field | Definition |
| Code | Unique identification code of the Training Feedback Criteria. |
| Active | Active Status - if checked, Training Feedback Criteria is available. |
| Training Feedback Criteria Type | The type of feedback criteria that will be used. |
| Training Feedback Criteria Group | The group that the training feedback belongs to. |
| Language | Language used. |
| Name | Name of the Training Feedback Criteria. |
| Description | Description of the Training Feedback Criteria. |
Create a Training Feedback Criteria
Overview
Training feedback criteria screen contains the individual criteria that the employee will use to evaluate the course.
To CREATE training feedback criteria follow the steps below:
Navigation 
By default, you will be in Search Mode.
- Click on the New icon
 (you will then be in Insert Mode).
 - Enter the new Training Feedback Criteria information. Fields with an asterisk
 are mandatory fields.
 - Enter the Code, click on the Active checkmark, as required.
- Code: Unique identification code of the Training Feedback Criteria.
- Active: Active Status - if checked, Training Feedback Criteria is available.
4. Choose the Training Feedback Criteria Type and Training Feedback Criteria Group from the dropdown menu
- Training Feedback Criteria Type: the type of feedback criteria that will be used
- Training Feedback Criteria Group: the group that the training feedback belongs to.
5. Select the Language as required.
- Language: Language used
6. Enter the Name and the Description of the Training Feedback Criteria.
- Name: Name of the Training Feedback Criteria
- Description: Description of the Training Feedback Criteria
7. Click on the Save icon  at the bottom of the Training Feedback Criteria page to save your new Training Feedback Criteria information. A window will appear to confirm.
Delete a Training Feedback Criteria
Overview
Training feedback criteria screen contains the individual criteria that the employee will use to evaluate the course.
To DELETE training feedback criteria follow the steps below:
Navigation 
By default, you will be in Search Mode.
- Find the Training Feedback Criteria you want to Delete
- Enter the information to be used as retrieval criteria in the appropriate field(s). If you prefer to see all Training Feedback Criteria, leave all fields blank.
- Click Find

- Select the Training Feedback Criteria you want to Delete
- Click on the Delete icon

- A window will appear asking you to confirm

- Click OK to confirm and delete the Training Feedback Criteria.
- A window will be displayed confirming the Training Feedback Criteria has been deleted

To Verify that the Training Feedback Criteria has been Deleted:
- Click on the Search icon

- Enter the Training Feedback Criteria information
- Click on the Find icon

- The window will appear

Modify a Training Feedback Criteria
Overview
Training feedback criteria screen contains the individual criteria that the employee will use to evaluate the course.
To MODIFY training feedback criteria follow the steps below:
Navigation 
By default, you will be in Search Mode.
- Enter the information to be used as retrieval criteria in the appropriate field(s).
If you prefer to see the list of all Training Feedback Criteria, leave all fields blank. - Click on the Find icon
 . The list of Training Feedback Criteria meeting the retrieval criteria will appear.
 - Click on the Training Feedback Criteria you want to modify.
You will then be in Update/Delete Mode. - Make the necessary modification(s).
Click on the Update icon
 at the bottom of the screen to save your modifications. A window will appear to confirm the modification. Click OK to confirm.
Training Feedback Criteria Group
Overview
Once training courses have been completed, it is important that they get evaluated to ensure that the training courses are being implemented properly and supplying employees with the necessary information. In this application, the employee will fill out the trainee feedback form to provide feedback on the training course. The feedback will be linked to the appropriate group. For example, the Training Feedback Criteria "I will be able to apply the knowledge learned" would be grouped under "All Staff" and the Training Feedback Criteria feedback "Did you find the introduction training useful? " would be grouped under "New Staff".
Navigation 
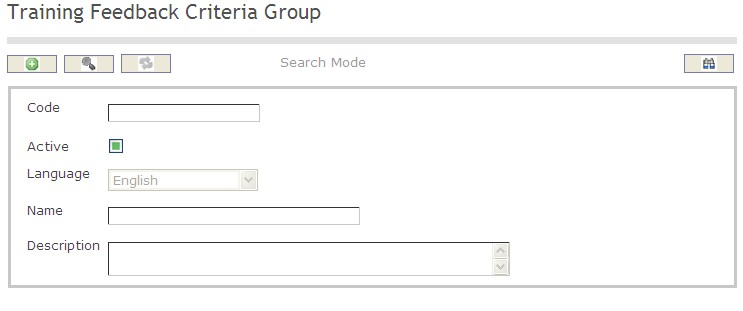
How to SEARCH:
- Enter the information to be used as retrieval criteria in the appropriate field (s). If you prefer to see a list of all training feedback criteria group leave all fields blank.
- Click on the Find icon
 .
.
The Training Feedback Criteria Group screen includes the following fields:
| Field | Definition |
| Code | Unique identification code of the Training Feedback Criteria Group. |
| Active | Active Status - if checked, Training Feedback Criteria Group is available. |
| Language | Language used. |
| Name | Name of the Training Feedback Criteria Group. |
| Description | Description of the Training Feedback Criteria Group. |
Create a Training Feedback Criteria Group
Overview
Employees will fill out the trainee feedback form to provide feedback on the training course. The feedback will be linked to the appropriate Training Feedback Criteria Group.
To CREATE Training Feedback Criteria Groups follow the steps below:
Navigation 
By default, you will be in Search Mode.
- Click on the New icon
 (you will then be in Insert Mode).
 - Enter the new Training Feedback Criteria Group information. Fields with an asterisk
 are mandatory fields.
 - Enter the Code, click on the Active, and select the Language, as required.
- Code: Unique identification code of the Training Feedback Criteria Group.
- Active: Active Status - if checked, Training Feedback Criteria Group is available.
- Language: Language used.
4. Enter Name and Description of the Training Feedback Criteria Group.
- Name: Name of the Training Feedback Criteria Group.
- Description: Description of the Training Feedback Criteria Group.
5. Click on the Save icon  at the bottom of the Training Feedback Criteria Group page to save your new Training Feedback Criteria Group information. A window will appear to confirm.
Delete a Training Feedback Criteria Group
Overview
Employees will fill out the trainee feedback form to provide feedback on the training course. The feedback will be linked to the appropriate Training Feedback Criteria Group.
To DELETE Training Feedback Criteria Groups follow the steps below:
Navigation 
By default, you will be in Search Mode.
- Find the Training Feedback Criteria Group you want to Delete
- Enter the information to be used as retrieval criteria in the appropriate field(s). If you prefer to see all Training Feedback Criteria Groups, leave all fields blank.
- Click Find

- Select the Training Feedback Criteria Group you want to Delete
- Click on the Delete icon

- A window will appear asking you to confirm

- Click OK to confirm and delete the Training Feedback Criteria Group.
- A window will be displayed confirming the Training Feedback Criteria Group has been deleted

To Verify that the Training Feedback Criteria Group has been Deleted:
- Click on the Search icon

- Enter the Training Feedback Criteria Group information
- Click on the Find icon

- The window will appear

Modify a Training Feedback Criteria Group
Overview
Employees will fill out the trainee feedback form to provide feedback on the training course. The feedback will be linked to the appropriate Training Feedback Criteria Group.
To MODIFY training feedback criteria groups follow the steps below:
Navigation 
By default, you will be in Search Mode.
- Enter the information to be used as retrieval criteria in the appropriate field(s).
If you prefer to see the list of all Training Feedback Criteria Group, leave all fields blank. - Click on the Find icon
 . The list of Training Feedback Criteria Group meeting the retrieval criteria will appear.
 - Click on the Training Feedback Criteria Group you want to modify.
You will then be in Update/Delete Mode. - Make the necessary modification(s).
- Click on the Update icon
 at the bottom of the screen to save your modifications. A window will appear to confirm the modification. Click OK to confirm.

Training Feedback Template
Overview
Training Feedback Templates are files that serve as starting points for the training course evaluation. They contain the all the information that the training course will be evaluated on. In this application, Training Feedback Templates includes all the required training course feedback for the specific training course. These templates are then used by employees ("trainees") for providing feedback on the course that they have attended. For example, the First Aid course will be evaluated on different criteria then the typing course as they may be administered by different vendors, employees or organizations and therefore will require different templates.
Navigation 
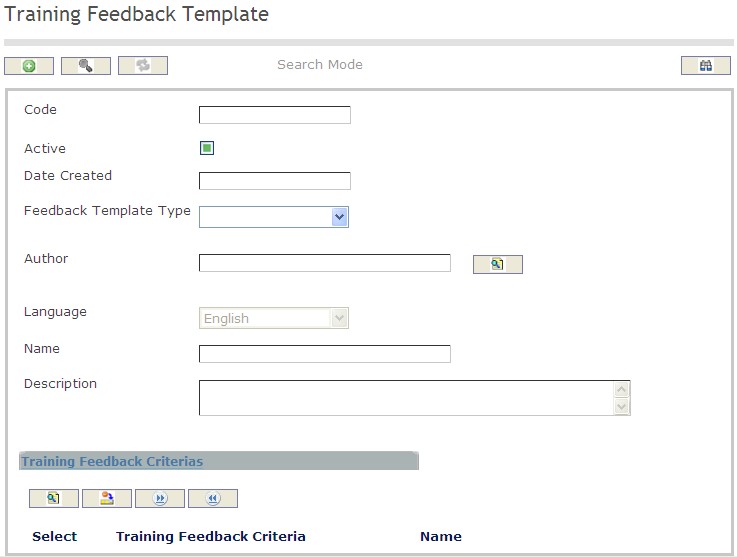
How to SEARCH:
- Enter the information to be used as retrieval criteria in the appropriate field (s). If you prefer to see a list of all training feedback template leave all fields blank.
- Click on the Find icon
 .
.
The Training Feedback Template screen includes the following fields:
| Feild | Definition |
| Code | Unique identification code of the Training Feedback Template. |
| Active | Active Status - if checked, Training Feedback Template is available. |
| Date Created | The date the template is created. |
| Training Feedback Template Type | The type of training feedback that will be used, selected from the drop=-down menu. |
| Language | Language used. |
| Name | Name of the Training Feedback Template. |
| Description | Description of the Training Feedback Template. |
Create a Training Feedback Template
Overview
Training Feedback Templates include all the required training course feedback for the specific training course.
To CREATE training feedback templates follow the steps below:
Navigation 
By default, you will be in Search Mode.
- Click on the New icon
 (you will then be in Insert Mode).
 - Enter the new Training Feedback Template information. Fields with an asterisk
 are mandatory fields.
 - Enter the Code, click on the Active checkmark, as required.
- Code: Unique identification code of the Training Feedback Template.
- Active: Active Status - if checked, Training Feedback Template is available.
4. The Date Created will be automatically generated.
- Date Created: The date the template is created.
5. Choose the Training Feedback Template Type from the drop down menu
- Training Feedback Template Type: The type of training feedback that will be used, from the drop-down menu.
6. To enter the Author, click on the Lookup icon  , click on Find icon
  to retrieve the Employee list, then select the Employee.
7. Select the Language, as required.
- Language: language used.
8. Enter Name and Description of Training Feedback Template.
- Name: Name of the Training Feedback Template.
- Description: Description of the Training Feedback Template.
To ADD Training Feedback Criteria to the Training Feedback Template:
- Click on Lookup icon
 , under
  and enter the Training Feedback Criteria information, or leave the Training Feedback Criteria information blank to retrieve all Training Feedback Criteria .
 - Click Find icon

- Click the individual Select Checkbox (es) to select and de-select the Training Feedback Criteria, as required.
- Repeat steps 1, 2 and 3 for all required Training Feedback Criteria .
- Click the Return icon
 to return to the Training Feedback Template screen, or click the Discard button
  to discard the selection entry and return to Training Feedback Template.
 - Click the individual Select Checkbox (es) to select and de-select the Training Feedback Criteria, as required, or click the Select All icon
 or Un-select All
  icon, to select all Training Feedback Criteria or de-select all Training Feedback Criteria, if required.
 - Click the Remove icon to remove the selected Training Feedback Criteria information, if required.
To ADD new Training Feedback Criteria, refer to Training Feedback Criteria.
8. Click on the Save icon  at the bottom of the Training Feedback Template page to save your new Training Feedback Template information. A window will appear to confirm.

Delete a Training Feedback Template
Overview
Training feedback templates include all the required training course feedback for the specific training course.
To DELETE training feedback templates follow the steps below:
Navigation 
By default, you will be in Search Mode.
- Find the Training Feedback Template you want to Delete
- Enter the information to be used as retrieval criteria in the appropriate field(s). If you prefer to see all Training Feedback Templates, leave all fields blank.
- Click Find

- Select the Training Feedback Template you want to Delete
- Click on the Delete icon

- A window will appear asking you to confirm

- Click OK to confirm and delete the Training Feedback Template.
- A window will be displayed confirming the Training Feedback Template has been deleted

To Verify that the Training Feedback Template has been Deleted:
- Click on the Search icon

- Enter the Training Feedback Template information
- Click on the Find icon

- The window will appear

Modify a Training Feedback Template
Overview
Training feedback templates include all the required training course feedback for the specific training course.
To MODIFY training feedback templates follow the steps below:
Navigation 
By default, you will be in Search Mode.
- Enter the information to be used as retrieval criteria in the appropriate field(s).
If you prefer to see the list of all Training Feedback Template, leave all fields blank. - Click on the Find icon
 . The list of Training Feedback Template meeting the retrieval criteria will appear.
 - Click on the Training Feedback Template you want to modify.
You will then be in Update/Delete Mode. - Make the necessary modification(s).
Click on the Update icon
 at the bottom of the screen to save your modifications. A window will appear to confirm the modification. Click OK to confirm.
Travel and Subsistence Management
Business Trip Group
Overview
The Business Trip Group defines the list of individual employees who are on a business trip and are part of the same group. Individual employee itineraries may be different, but their intention is to be part of the same group going on a common business trip.
A Business Trip Group is not required for an employee to go on a business trip. It is an optional component in which when two or more employees want to be part of the same group. An employee may create the trip group and other trip participants can then associate their individual business trips to that same business trip group.
Navigation 
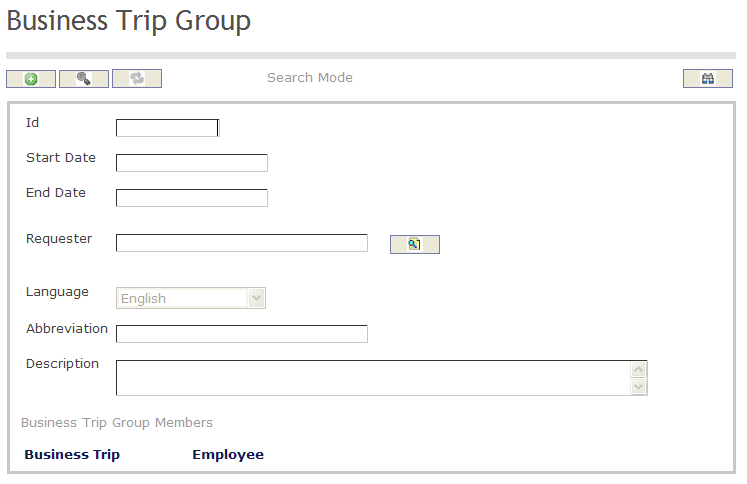
How to SEARCH:
- Enter the information to be used as retrieval criteria in the appropriate field (s). If you prefer to see a list of all tardiness policies, leave all fields blank
- Click on the Findicon

The Business Trip Group screen includes the following fields:
Field | Definition |
ID | Unique identification number describing the business trip group |
Start Date | Start date for the business trip group |
| End Date | End date for the business trip group |
| Requester | Describes the employee requesting the business trip |
| Language | Language used |
Description | Description of the Business Trip Group |
Abbreviation | Refers to the short format describing the Business Trip Group |
Create A Business Trip Group
To CREATE a Business Trip Group that list individual employees who are on a business trip and are part of the same group, follow the steps below:
Navigation 
By default, you will be in Search Mode.
1. Click on the New icon ![]() . You will then be in Insert Mode.
. You will then be in Insert Mode.
2. Enter the new Business Trip Group information. Fields with an asterisk  are mandatory fields.
3. Enter the Business Trip Group Start Date and End Date in the fields provided using the calendar ![]()
4. To see more details about the Requester, click on the details button  to view the employee details.
5. Choose the Language desired from the drop down menu.
6. Enter the Abbreviation, and fill in the Description for the Business Trip Group.
7. Click on the Save icon  at the bottom to save your new Business Trip Group information. A window will appear to confirm the new Business Trip Group creation. Click OK to confirm.

Delete A Business Trip Group
To DELETE a Business Trip Group that list individual employees who are on a business trip and are part of the same group, follow the steps below:
Navigation 
By default, you will be in Search Mode.
- Find the Business Trip Group(s) you want to Delete
- Enter the information to be used as retrieval criteria in the appropriate field(s). If you prefer to see all Business Trip Group, leave all fields blank.
- Click Find
 .
. - Select the Business Trip Group you want to Delete.
- Click on the Delete icon
 .
. - A window will appear asking you to confirm

- Click OK to confirm and delete the Business Trip Group
- A window will be displayed confirming the Business Trip Groups has been deleted

To Verify that the Business Trip Group has been Deleted:
- Click on the Search icon

- Enter the Business Trip Group information in the appropriate field (s).
- Click on the Find icon

- This window will appear

Modify A Business Trip Group
To MODIFY a Business Trip Group that list individual employees who are on a business trip and are part of the same group, follow the steps below:
Navigation 
By default, you will be in Search Mode.
- Enter the information to be used as retrieval criteria in the appropriate field (s). If you prefer to see a list of all Business Trip Groups, leave all fields blank.
- Click on the Find icon
 .
. - Click on the Business Trip Group Field you want to modify.
You will then be in Update/Delete Mode. - Make the necessary modifications.
- Click on the Update icon
 at the bottom of the screen to save your modifications. A window will appear to confirm the modification. Click OK to confirm.

Business Trip Purpose
Overview
The Business Trip Purpose defines the list of valid rationales for the purposes of requesting a Business Trip. The Business Trip application is filled and submitted by the employee requesting the trip. The employee must provide the Start and End Dates, the Purpose, the Logistics, Estimated Costs and submit them to the managers for approval. An example of a valid business trip rationales include: Study Tour, Training, Site Visit (visiting a site related to government operations), Project/Program, and Operations.
Navigation 
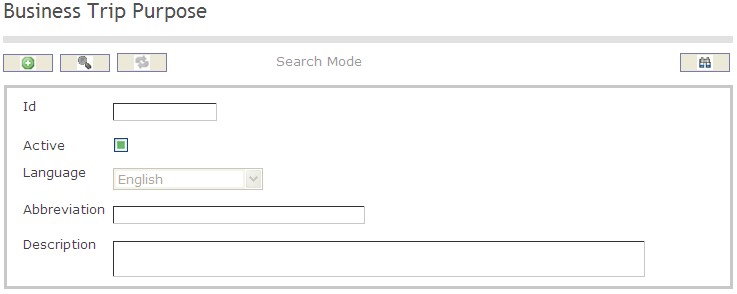
How to SEARCH:
- Enter the information to be used as retrieval criteria in the appropriate field (s). If you prefer to see a list of all business trip purposes, leave all fields blank
- Click on the Find icon

The Business Trip Purpose screen includes the following fields:
Field | Definition |
ID | Unique identification number describing the business trip purpose |
Active | Active Status - if checked, Business Trip Purpose will not be used/active |
Description | Description of the Business Trip Purpose |
Abbreviation | Refers to the short format describing the Business Trip Purpose |
Create A Business Trip Purpose
To CREATE a list of valid rationales for the purposes of requesting a Business Trip, follow the steps below:
Navigation 
By default, you will be in Search Mode.
1. Click on the New icon  . You will then be in Insert Mode.
2. Enter the new Business Trip Purpose information. Fields with an asterisk  are mandatory fields.
3. Check the Active box as necessary, and then select the Language from the drop down menu.
- Active: Active Status - if checked, Business Trip Purpose will not be used/active
4. Enter the Abbreviation of the Business Trip Purpose in the Abbreviation field, and describe the Business Trip Purpose in the Description field.
- Abbreviation: Refers to the short format describing the Business Trip Purpose.
5. Click on the Save icon  at the bottom to save your new Business Trip Purpose information. A window will appear to confirm the new School Type creation. Click OK to confirm.
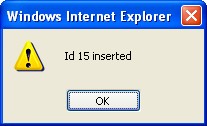
Delete A Business Trip Purpose
To DELETE a list of valid rationales for the purposes of requesting a Business Trip, follow the steps below:
Navigation 
By default, you will be in Search Mode.
- Find the Business Trip Purpose you want to Delete.
- Enter the information to be used as retrieval criteria in the appropriate field(s). If you prefer to see all Business Trip Purposes, leave all fields blank.
- Click Find
 .
. - Select the Business Trip Purpose you want to Delete.
- Click on the Delete icon
 .
. - A window will appear asking you to confirm.

- Click OK to confirm and delete the Business Trip Purpose
- A window will be displayed confirming the Business Trip Purpose has been deleted

To Verify that the Business Trip Purpose has been Deleted:
- Click on the Search icon

- Enter the Business Trip Purpose information in the appropriate field (s).
- Click on the Find icon

- This window will appear

Modify A Business Trip Purpose
To MODIFY a list of valid rationales for the purposes of requesting a Business Trip, follow the steps below:
Navigation 
By default, you will be in Search Mode.
- Enter the information to be used as retrieval criteria in the appropriate field (s). If you prefer to see a list of all Business Trip Purposes, leave all fields blank.
- Click on the Find icon
 .
. - Click on the Business Trip Purpose you want to modify.
You will then be in Update/Delete Mode. - Make the necessary modifications.
- Click on the Update icon
 at the bottom of the screen to save your modifications. A window will appear to confirm the modification. Click OK to confirm.
Per Diem Rate Table
Overview

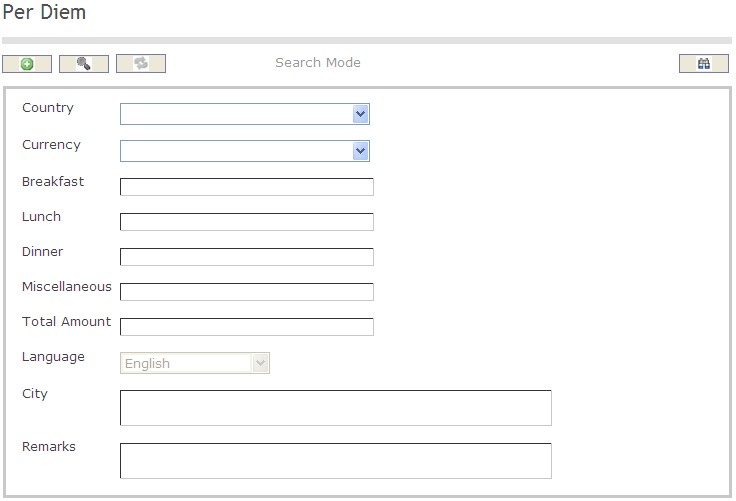
How to SEARCH:
- Enter the information to be used as retrieval criteria in the appropriate field (s). If you prefer to see a list of all Per Diem Rate Table , leave all fields blank
- Click on the Findicon

The Per Diem Rate Table screen includes the following fields:
Field | Definition |
Currency | Defines the type of currency used, i.e: Dollar, Dinar, Euro |
| Breakfast | Refers to per diem amount allocated to the breakfast |
| Lunch | Refers to per diem amount allocated to lunch |
| Dinner | Refers to per diem amount allocated to dinner |
Miscellaneous | Refers to per diem amount allocated to miscellaneous (general) expenses |
| Total Amount | Per diem total amount |
Remarks | Includes any remark or comment related to the Per Diem Table |
City | Refers to the city for which the Per Diem Table is applicable |
Create A Per Diem Rate
To CREATE a Per Diem Rate Table that includes the Per Diem Rates by country and city, follow the steps below:
Navigation 
By default, you will be in Search Mode.
1. Click on the New icon ![]() . You will then be in Insert Mode.
. You will then be in Insert Mode.
2. Enter the new Per Diem information. Fields with an asterisk  are mandatory fields.
3. Choose the Country, and the Currency from the drop down menus.
4. Fill in the Breakfast, Lunch, Dinner, Miscellaneous, and Total Amount as required.
- Miscellaneous: Refers to Miscellaneous (general) expenses.
5. Choose the Language from the drop down menu.
6. Fill in the City name and the Remarks in the fields as required.
- Remarks: Refers to a brief description on the types of of miscellaneous expenses typical the country/city
- City: Refers to a city for which the Per Diem Rate applies.
7. Click on the Save icon  at the bottom to save your new Per Diem information. A window will appear to confirm the new Per Diem creation. Click OK to confirm.

Delete A Per Diem Rate
To DELETE a Per Diem Rate Table that includes the Per Diem Rate for a particular country and city, follow the steps below:
Navigation 
By default, you will be in Search Mode.
- Find the Per Diem Rate you want to Delete
- Enter the information to be used as retrieval criteria in the appropriate field(s). If you prefer to see all Per Diem Rates, leave all fields blank.
- Click Find
 .
. - Select the Per Diem Rate you want to Delete.
- Click on the Delete icon
 .
. - A window will appear asking you to confirm

- Click OK to confirm and delete the Per Diem Rate
- A window will be displayed confirming the Per Diem Rate has been deleted

To Verify that the Per Diem Rate has been Deleted:
- Click on the Search icon

- Enter the Per Diem Rate information in the appropriate field (s).
- Click on the Find icon

- This window will appear

Modify A Per Diem Rate
To MODIFY a Per Diem Rate Table that includes the Per Diem Rates for a particular country and city, follow the steps below:
Navigation 
By default, you will be in Search Mode.
- Enter the information to be used as retrieval criteria in the appropriate field (s). If you prefer to see a list of all Per Diem Rates, leave all fields blank.
- Click on the Find icon
 .
. - Click on the Per Diem Rate you want to modify.
You will then be in Update/Delete Mode. - Make the necessary modifications.
- Click on the Update icon
 at the bottom of the screen to save your modifications. A window will appear to confirm the modification. Click OK to confirm.

Financial Disclosure
Agreement Type
Overview
Contains the information related with the agreement types used for revenues and assets (e.g. Contract of sale, Gift agreement, Rent agreement, Payment service, etc).
Navigation
Human Resources ► Support Entities ► Financial Disclosure ► Agreement Types
Agreement Type screen fields
| Fields | Description |
| Code | Unique identifier for type of agreement, manually entered by users. |
| Active | Default value true, if value is changed to false it can’t be selected again and record remains for reference purposes only. |
| Used By Movable Assets | Default value false, flag to define if the agreement type is used by movable assets. |
| Used By Immovable Assets | Default value false. Flag to define if the agreement type is by immovable assets |
| Used By Revenues | Default value false. Flag to define if the agreement type is used by revenues |
| Agreement Number Mandatory | Default value false. Flag that used to validate the Number of Agreement as a mandatory field in the Revenues section of the Declaration Form. When attribute 'Is Used by Revenues' is FALSE, this field is not visible. |
| Agreement Issue Date Mandatory | Default value false. Flag used to validate the Agreement Date of Issue as a mandatory field in the Revenues section of the Declaration Form. Attribute is not visible when 'Is Used by Revenues' is FALSE. |
| Language | Select language to register the name and description. |
| Name | Contains the name of the Agreement Type. |
| Description | Contains the full description of the Agreement Type. |
Declaration Schedule
Overview
This feature contains the information related with the declaration years and validation date types used for all the declaration status defining a start and end date (e.g. create declaration allowed between January 1st and March 31 of current year, analysis declaration allowed between April 1st and September 30th). Also defining which declaration year is the current to be used by the system.
Users access Declaration Schedule from within the menu through this navigation path: Human Resources ► Support Entities ► Financial Disclosure ► Declaration Schedules
A screenshot of the Declaration Schedule feature is available here.
Image shown as reference material; position and names for labels, fields and buttons are subject to parameter, rendering control configuration and installed revision.
Visible Fields
| Fields | Description |
| Id | Unique identifier for Declaration Schedule, automatically assigned by the system. |
| Current Schedule | It is a flag that identifies if the current declaration year record is the current one. Default value for this field is false. |
| Schedule Start Date | Allows to enter start date of Schedule as initial period for declaration year. |
| Schedule End Date | Allows to enter end date of schedule as final period for declaration year, the date must be later or equal to schedule start date. |
| Exception on Start Date | Allows to enter the exception on the start date of schedule as initial period for declaration year. |
| Exception on Appointment Date | Allows to enter an exception date on appointment, the date must be between schedule start date and end date. |
| Exception on Dismissal Date | Allows to enter an exception date on dismissal, the date must be between schedule start date and end date. |
| Months for Submission | Allows to enter the number of months after the schedule start date when the declaration needs to be submitted. |
| Exception For Submission In Days | Allows to enter the exception on the number of months after the date of appointment or date of dismissal when the declaration needs to be submitted. |
| Start Date To Modify | Allows to enter the start date to modify a declaration, the date must be a later date than schedule end date. |
| End Date To Modify | Allows to enter the end date to modify a declaration, the date must be between schedile end date and start date to modify. |
| Based on Legislation Number | Allows to enter the legislation number on which the declaration schedule is based. |
| Language | Allow users to select language to register name and description. |
| Name | Allows to enter a short name of the declaration dchedule. |
| Description | Allows to enter a detail description of the declaration dchedule. |
Buttons
| Button Image | Description |
 | The New button allows users to switch to insert mode. This action button allows users to manually create Declaration Schedule. |
 | The Search button allows users to switch to search mode. |
 | Once an entity has been created or searched for, users may view results when necessary. |
 | Allows to select a calendar date. The following window appears:
|
 | Click to Save a created record. The record is then added and a window appears to notify the record has been saved. |
Financial Commitment Type
Overview
Contains the information related with the type of financial commitments that civil servants declare (e.g. demand loan, target loan, loan, goods loan, mortgage lending, commercial credit, lending).
Navigation
Human Resources ► Support Entities ► Financial Disclosure ► Financial Commitment Types
Financial Commitment Type screen fields
| Fields | Description |
| Code | Unique identifier for type of financial commitment, manually entered by the user |
| Active | Default value true. If this value is changed to false, it can’t be selected again and record remains for reference purposes only |
| Language | Select language to register the details |
| Name | Contains the name of the Financial Commitment Type |
| Description | Contains the full description of the Financial Commitment Type |
Owned Immovable Asset Type
Overview
Owned Immovable Asset Type contains the information related with the type of assets (immovable) that civil servants should declare as owners (e.g. house, apartment, villa, land, garage; building, block, workplace).
Navigation
Human Resources ► Support Entities ► Financial Disclosure ► Owned Immovable Asset Type
Owned Immovable Asset Type screen fields
| Fields | Descriptions |
| Code | The unique identification code for the type of asset to be manually entered by users. |
| Active | Active refers that the record s available for use. If this value is changed to false, it can’t be selected again and it will remain for reference purposes only. |
| Area Mandatory | This field validates whether the Area is a mandatory field in the Immovable Assets section of the Declaration Form. The default value is false. |
| Registry Nbr Mandatory | This field validates whether Registry number is the mandatory field in the Immovable Assets section of the Declaration Form. The default value is False. |
| Share In Property Mandatory | This field validates whether Share in Property is a mandatory field in the Immovable Assets Information of the Declaration Form. The default value is false. |
| Show In Share Capital Asset Information | This field used to show the record on the Share Capital Assets Information from the Declaration Form. The default value is False. |
| Is Trust Manager | This field defines the use of the record as Trust Manager (TRUE) on the Share Capital Assets Information from the Declaration Form. |
| Is Share Capital | It defines the use of the record as Share Capital (TRUE) on the Share Capital Assets Information from the Declaration Form. |
| Language | The country-specific language used for description to be selected from the dropdown box. |
| Name | This field contains the name of the Asset. |
| Description | This field allows the user to write full description of the Asset. |
Owned Movable Asset Type
Overview
Owned Movable Asset Type contains the information related with the type of movable asset that civil servants should declare as owners (e.g. forests, perennial plantings, automobiles light, trucks, agricultural equipment, and furniture).
Navigation
Human Resources ► Support Entities ► Financial Disclosure ► Owned Movable Asset Type
Owned Movable Asset Type screen fields
| Fields | Descriptions |
| Code | The unique identification code for the type of asset to be manually entered by users. |
| Active | Active refers that the record s available for use. If this value is changed to false, it can’t be selected again and it will remain for reference purposes only. |
| Vehicle Serial Nbr Mandatory | This field validates whether the Property Registry Number is a mandatory field in the Movable Assets Information of the Declaration Form. The default value is false. |
| Brand Mandatory | This field validates whether the Brand is a mandatory field in the Movable Assets Information of the Declaration Form. The default value is false. |
| Model Mandatory | This field validates whether the field Model is a mandatory field in the Movable Assets Information of the Declaration Form. The default value is false. |
| Year Mandatory | This field validates whether Year is a mandatory field in the Movable Assets Information of the Declaration Form. The default value is false. |
| Volume Mandatory | This field validates whether Volume is a mandatory field in the Movable Assets Information of the Declaration Form. The default value is false. |
| Location Mandatory | This field validates whether the Location is a mandatory field in the Movable Assets Information of the Declaration Form. The default value is false. |
| Legal Entity Name Mandatory | This field validates whether Legal Entity Name is a mandatory field in the Movable Assets Information of the Declaration Form. The default value is false. |
| Nbr. Livestock Mandatory | This field validates whether Number Livestock is a mandatory field in the Movable Assets Information of the Declaration Form. The default value is false. |
| Nbr. Crop Mandatory | This field validates whether Number Crop is a mandatory field in the Movable Assets Information of the Declaration Form. The default value is false |
| Nbr. Shares Mandatory | This field validates whether Number Shares is a mandatory field in the Movable Assets Information of the Declaration Form. The default value is false. |
| Nbr. Precious Metal Bullion Mandatory | This field validates whether Number Precious Metal Bullion is a mandatory field in the Movable Assets Information of the Declaration Form. The default value is false. |
| Nbr. Precious Metal Items and Antiquities Mandatory | This field validates whether Number Precious Metal Items and Antiquities is a mandatory field in the Movable Assets Information of the Declaration Form. The default value is false. |
| Show In Share Capital Asset Information | This field validates whether to show Share Capital Asset Information in Declaration Form. The default value is false. |
| Language | The country-specific language used for description to be selected from the dropdown box. |
| Name | Contains the name of the Asset. |
| Description | Contains the full description of the Asset. |
Relative Relation Degree
Overview
It contains the information related with the kind of relatives relation degree, whom have financial dependencies from civil servants and should declare (e.g. Spouse, Children (under 18), Parents, Brother or Sister).
Navigation
Human Resources ► Support Entities ► Financial Disclosure ► Relative Relation Degree
Relative Relation Degree Screen Fields
| Fields | Descriptions |
| Code | Unique identifier for relation degree and it will be manually entered by the user. |
| Active | Default value true. If this value is changed to false, It can’t be selected again and it will remain for reference purposes only. |
| Language | The country specific language user can select from the drop-down list. The Default language is English. |
| Name | Contains the name of the Relation Degree. |
| Description | Contains the full description of the Relation Degree. |
Revenue Type
Overview
The type of revenues that civil servants should declare is registered through Revenue Types (e.g. revenues from working place; from competitions, awards, lotteries, gambling; from capital assets and shares in commercial companies; as gifts; as inheritance; from business activity).
Navigation
Human Resources ► Support Entities ► Financial Disclosure ► Revenue Type
Revenue Type Screen Fields
| Fields | Description |
| Code | Unique identifier for type of revenue manually entered or automatically generated depending on the system parameters |
| Active | Default value true. If value is changed to False (unchecked), it can’t be selected again and it will remain for reference purposes only. |
| Source Mandatory | Default value false. If value is changed to True (checked) than the Source of Revenue will become a mandatory field in the Revenues section of the Declaration Form. |
| Agreement Type Mandatory | Default value false. If value is changed to True (checked) than the Type of Agreement will become a mandatory field in the Revenues section of the Declaration Form. |
| Name | Contains the name of the Revenue Type. |
| Description | Contains the full description of the Revenue Type |

