Position Management
Association
Overview
Association is a screen that contains general information about each employees position with different associations. For example, a medical doctor may be associated with a specific association for doctors and work at a hospital.
Navigation 
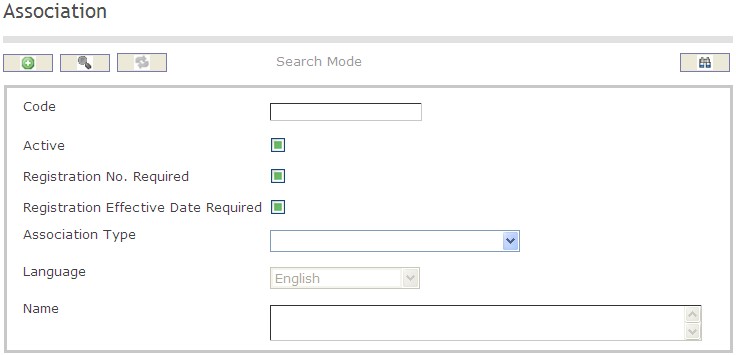
To SEARCH an Association
- Enter the information to be used as retrieval criteria in the appropriate field(s).
If you prefer to see the list of all Association, leave all fields blank. - Click on the Find icon
 .
.
The screen Association includes the following fields:
| Field | Definition |
| Code | Unique identification code |
| Active | Default |
| Association Number Required | Number of the association |
| Association Effective Date Required | Date when the association is effective |
| Association Type | Type of association |
| Language | Language of use |
| Name | Name of the association |
Create An Association
Association is a screen that contains general information about each employees position with different associations. To CREATE an Association, please follow the steps provided below:
Navigation 
By default, you will be in Search Mode.
1. Click on the New icon ![]() . You will then be in Insert Mode.
. You will then be in Insert Mode.
2. Enter the new Association information. Fields with an asterisk  are mandatory fields.
3. Enter the Code, and check box the Active, Registration No. Required, and Registration Effective Date Required as required.
- Code: Unique identification number representing the Association.
4. Select the Association Type from the drop down menu (i.e. Union, Professional Association)
5. Select the language from the drop down menu
6. Enter the description in the field provided
7. Click on the Save icon  at the bottom to save your new Association information. A window will appear to confirm the new Association . Click OK to confirm.

Delete An Association
Association is a screen that contains general information about each employees position with different associations. To DELETE an Association, please follow the steps provided below:
Navigation 
By default, you will be in Search Mode.
- Find the Association you want to Delete
- Enter the information to be used as retrieval criteria in the appropriate field(s). If you prefer to see all Association , leave all fields blank.
- Click Find

- Select the Association you want to Delete
- Click on the Delete icon

- A window will appear asking you to confirm
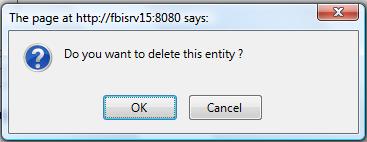
- Click OK to confirm and delete the Association.
- A window will be displayed confirming the Association has been deleted
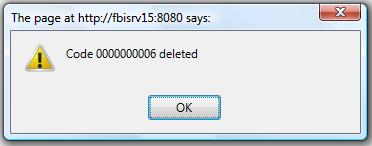
To Verify that the Association has been Deleted:
- Click on the Search icon

- Enter the Association information
- Click on the Find icon

The window will appear 
Modify An Association
Association is a screen that contains general information about each employees position with different associations. To MODIFY an Association, please follow the steps provided below:
Navigation 
By default, you will be in Search Mode.
- Enter the information to be used as retrieval criteria in the appropriate field(s).
If you prefer to see the list of all Associations, leave all fields blank. - Click on the Find icon
 . The list of Associations meeting the retrieval criteria will appear.
 - Click on the Association you want to modify.
You will then be in Update/Delete Mode. - Make the necessary modification(s).
- Click on the Update icon
 at the bottom of the screen to save your modifications. A window will appear to confirm the modification. Click OK to confirm.
Association Type
Overview
The Association Type indicates if the association is part of an Union or not.
Navigation 
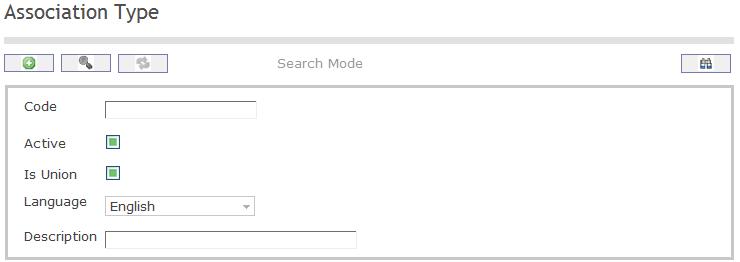
Create an association type
By default, you will be in Search Mode.
- Click on the New icon
 (you will then be in Insert Mode).
 - Enter the new Association Type information. Fields with an asterisk
 are mandatory fields.
 - Enter the Code, click on the Active, and Is Union checkmarks, as required, and select the Language, as required. Enter Description.
- Code: Unique identification code of the Association Type.
- Active: Active Status - if checked the Association Type is available.
- Is Union: Union indicator - if checked, the Association is part of an Union.
- Language: Language used
- Description: Description of the Type (e.g. retired, union, regular)
- Click on the Save icon
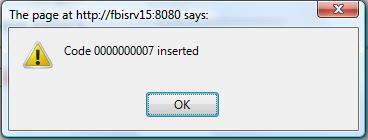
 at the bottom of the Skill screen to save your new Skill information. A window will appear to confirm. Click OK to confirm.
Delete an Association Type
By default, you will be in Search Mode.
- Find the Association Type you want to Delete
- Enter the information to be used as retrieval criteria in the appropriate field(s). If you prefer to see all Association Types , leave all fields blank.
- Click Find
 .
. - Select the Association Type you want to Delete.
- Click on the Delete icon
 .
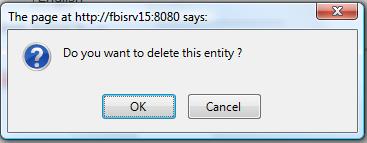
. - A window will appear asking you to confirm.
- Click OK to confirm and delete the Association Type.
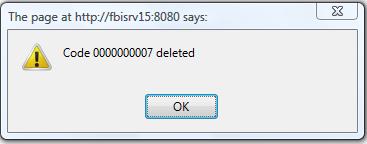
- A window will be displayed confirming the Association Type has been deleted
To Verify that the Association Type has been deleted:
- Click on the Search icon

- Enter the Association Type information in the appropriate field (s).
- Click on the Find icon

- This window will appear

By default, you will be in Search Mode.
- Find the Association you want to Delete
- Enter the Association information in the Field(s)
- Click Find

- Select the Association you want to Delete
- Click on the Delete icon

- A window will appear asking you to confirm

- Click OK to confirm and delete the Association.
- A window will be displayed confirming the Employee has been deleted.

To Verify that the Association Type has been Deleted:
- Click on the Search icon

- Enter the Association Type information
- Click on the Find icon

- The window will appear

Modify an association type
By default, you will be in Search Mode.
- Enter the information to be used as retrieval criteria in the appropriate field (s). If you prefer to see a list of all Association Types, leave all fields blank.
- Click on the Find icon
 .
. - Click on the Association Type you want to modify.
You will then be in Update/Delete Mode. - Make the necessary modifications.
- Click on the Update icon
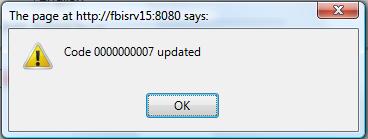
 at the bottom of the screen to save your modifications. A window will appear to confirm the modification. Click OK to confirm
Certificate
Overview
This screen contains a Certificate catalogue, which could be used among other screens on the system. A certificate can be mandatory or desirable for a given Generic/Employee Position. It is important to match different requirements of position available to the qualifications of the candidate. For a position, a certain certificate required could be the CA (Chartered Accountant) Certification.
Navigation
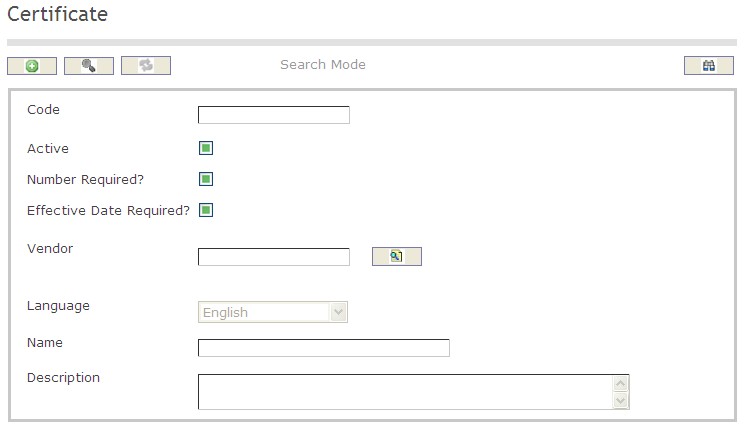
How to SEARCH:
- Enter the information to be used as retrieval criteria in the appropriate field (s). If you prefer to see a list of all Certificates, leave all fields blank.
- Click on the Find icon
 .
.
The Certificate screen includes the following fields:
| Report Fields | Description |
| Code | Unique identification code of the Certificate |
| Active | Active Status - if checked, Certificate is available |
| Number Required | Number Required Status - if checked, Number Required is available |
| Effective Date Required | Effective Date Required Status - if checked, Effective Date Required is available |
| Language | Language used |
| Vendor | The Organization that provides the Certificate |
| Name | Name of the Certificate |
| Description | Short description of the Certificate |
Create a Certificate
Certificate contains a Certificate catalogue, which could be used among other screens on the system. To CREATE a Certificate, follow the steps below:
Navigation 
By default, you will be in Search Mode.
- Click on the New icon
 (you will then be in Insert Mode).
 - Enter the new Certificate information. Fields with an asterisk
 are mandatory fields.
 - Enter the Code, click on the Active, Number Required, and Effective Date Required checkmarks, and select the Language, as required.
- Code: Unique identification code of the Certificate.
- Active: Active Status - if checked, Certificate is available.
- Number Required: Number Required Status - if checked, Number Required is available
- Effective Date Required: Effective Date Required Status - if checked, Effective Date Required is available
- Language: Language used
4. To enter the Vendor information, if required, click on the Lookup icon  , click on Find icon
  to retrieve the Vendor list, then select the Vendor.
- Vendor: The Organization that provides the Certificate.
5. Enter Name.
- Name: Name of the Certificate.
6. Enter Description.
- Description: Short description of the Certificate.
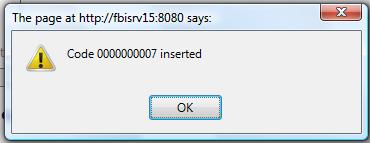
7. Click on the Save icon  at the bottom of the Certificate to save your new Certificate information. A window will appear to confirm.
Delete a Certificate
Certificate contains a Certificate catalogue, which could be used among other screens on the system. To DELETE a Certificate, follow the steps below:
Navigation 
By default, you will be in Search Mode.
- Find the Certificate you want to Delete
- Enter the information to be used as retrieval criteria in the appropriate field(s). If you prefer to see all Certificates, leave all fields blank.
- Click Find

- Select the Certificate you want to Delete
- Click on the Delete icon

- A window will appear asking you to confirm
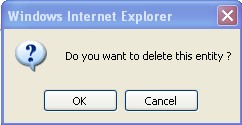
4. Click OK to confirm and delete the Certificate.
5. A window will be displayed confirming the Certificate has been deleted
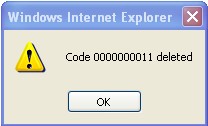
To Verify that the Certificate has been Deleted:
- Click on the Search icon

- Enter the Certificate information
- Click on the Find icon

- The window will appear

Modify a Certificate
Certificate contains a Certificate catalogue, which could be used among other screens on the system. To MODIFY a Certificate, follow the steps below:
Navigation 
By default, you will be in Search Mode.
- Enter the information to be used as retrieval criteria in the appropriate field(s).
If you prefer to see the list of all Certificates, leave all fields blank. - Click on the Find icon
 . The list of Certificates meeting the retrieval criteria will appear.
 - Click on the Certificate you want to modify.
You will then be in Update/Delete Mode. - Make the necessary modification(s).
- Click on the Update icon
 at the bottom of the screen to save your modifications. A window will appear to confirm the modification. Click OK to confirm.
Skill
Overview
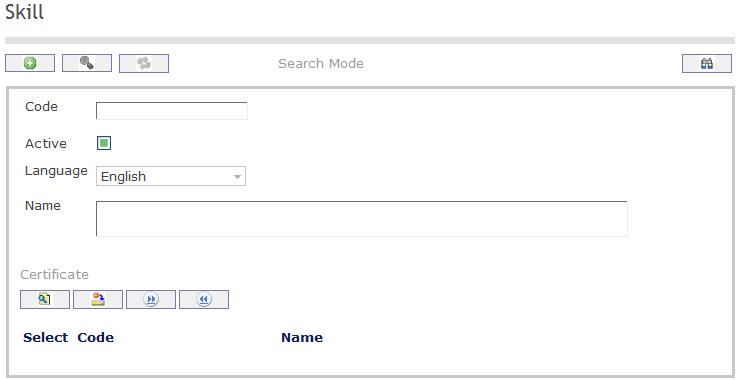
This skill screen describes all skills that can be mandatory or desirable for a given Generic/Employee position.
Navigation 
Create a skill
Navigation 
By default, you will be in Search Mode.
- Click on the New icon
 (you will then be in Insert Mode).
 - Enter the new Skill information. Fields with an asterisk
 are mandatory fields.
 - Enter the Code, click on the Active checkmark, as required, and select the Language, as required.
- Code: Unique identification code of the skill.
- Active: Active Status - if checked, Skill is available.
- Enter Name.
- Name: Name of the skill.
To ADD Certificates to Skills, if required:
- Click on Lookup icon
 , and enter the Certificate information, or leave the Certificate information blank to retrieve all Certificates.
 - Click Find icon

- Click the individual Select Checkbox (es) to select and de-select the Certificate (s), as required.
- Repeat steps 1, 2 and 3 for all required certificates.
- Click the Return icon
 to return to the Skill screen, or click the Discard button
  to discard the selection entry and return to Skill.
 - Click the individual Select Checkbox (es) to select and de-select the Certificates (s), as required, or click the Select All icon
 or Unselect All
  icon, to select all Certificates or de-select all Certificates, if required.
 - Click the Remove icon to remove the selected Certificate information, if required.
To ADD new Certificates, refer to Certificate.
Click on the Save icon  at the bottom of the Skill to save your new Skill information. A window will appear to confirm.
Delete a skill
Navigation 
By default, you will be in Search Mode.
- Find the Skill you want to Delete
- Enter the information to be used as retrieval criteria in the appropriate field(s). If you prefer to see all Skills , leave all fields blank.
- Click Find

- Select the Skill you want to Delete
- Click on the Delete icon

- A window will appear asking you to confirm

- Click OK to confirm and delete the Skill.
- A window will be displayed confirming the Skill has been deleted

To Verify that the Skill has been Deleted:
- Click on the Search icon

- Enter the Skill information
- Click on the Find icon

- The window will appear

Modify a skill
Navigation 
By default, you will be in Search Mode.
- Enter the information to be used as retrieval criteria in the appropriate field(s).
If you prefer to see the list of all Skills, leave all fields blank. - Click on the Find icon
 . The list of Skills meeting the retrieval criteria will appear.
 - Click on the Skill you want to modify.
You will then be in Update/Delete Mode. - Make the necessary modification(s).
- Click on the Update icon
 at the bottom of the screen to save your modifications. A window will appear to confirm the modification. Click OK to confirm.
Degree
Overview
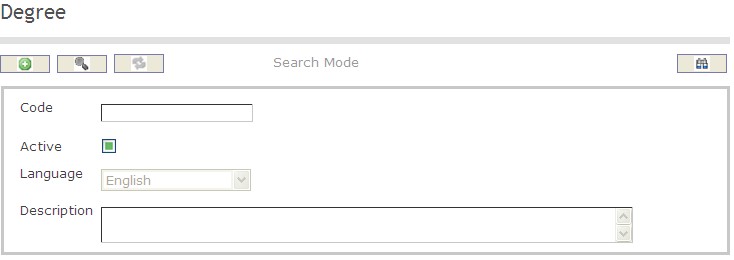
This screen describes degree of Education. Employees may enter their degree information in this form and add a description further explaining the degree. Organizations may use this to locate a certain employee by their degree
Objective and Benefits
Navigation 
To SEARCH a degree:
1. Enter the information to be used as retrieval criteria in the appropriate field(s).
If you prefer to see the list of all Degrees, leave all fields blank.
2. Click on the Find icon  .
.
The screen Degree includes the following fields:
| Field | Definition |
| Code | Unique identification code |
| Active | Default |
| Language | Language of use |
| Description | Comments or Remarks about the degree |
Create A Degree
Navigation 
By default, you will be in Search Mode.
- Click on the New icon
 (you will then be in Insert Mode).
 - Enter the new Degree information. Fields with an asterisk
 are mandatory fields.
 - Enter the Code, click on the Active checkmark, as required, and select the Language, as required.
- Code: Unique identification code of the degree.
- Active: Active Status - if checked, Degreeis available.
- Enter a Description
- Click Onto the Save icon at the bottom of the Degree to save your new Degree

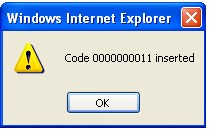
- This window will appear to confirm
Delete a Degree
Navigation 
By default, you will be in Search Mode.
- Find the Degree you want to Delete
- Enter the information to be used as retrieval criteria in the appropriate field(s). If you prefer to see all Degrees , leave all fields blank.
- Click Find

- Select the Degree you want to Delete
- Click on the Delete icon

- A window will appear asking you to confirm

- Click OK to confirm and delete the Degree.
- A window will be displayed confirming the Degree has been deleted

To Verify that the Degree has been Deleted:
- Click on the Search icon

- Enter the Degree information
- Click on the Find icon

The window will appear 
Modify A Degree
Navigation 
By default, you will be in Search Mode.
- Enter the information to be used as retrieval criteria in the appropriate field(s).
If you prefer to see the list of all Degrees, leave all fields blank. - Click on the Find icon
 . The list of Degrees meeting the retrieval criteria will appear.
 - Click on the Degree you want to modify.
You will then be in Update/Delete Mode. - Make the necessary modification(s).
- Click on the Update icon
 at the bottom of the screen to save your modifications. A window will appear to confirm the modification. Click OK to confirm.
Position Category
Overview
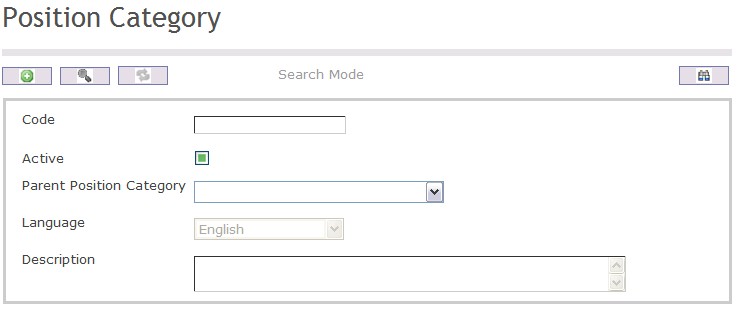
This screen contains information regarding the organizations categories of positions and each position is placed somewhere within the hierarchy of all possible positions. Each position has a parent to which it responds to which is located higher up in the hierarchy.
Navigation 
To SEARCH a Position Category
- Enter the information to be used as retrieval criteria in the appropriate field(s).
If you prefer to see the list of all Position Categories, leave all fields blank. - Click on the Find icon
 .
.
The screen Position Category includes the following fields:
| Field | Definition |
| Code | Unique identification |
| Active | Default |
| Parent Position Category | Position Category under which the current position category being put in falls under |
| Language | Language of use |
| Description | Comments and remarks |
Create a Position Category
Navigation 
By default, you will be in Search Mode. Fields with an asterisk  are mandatory fields
Click on the New icon  (you will then be in Insert Mode).
1. Enter the Code, click on the Active checkmark, as required,
- Code: Unique identification code of the Position Category.
2. Active: Active Status - if checked, Position Category is available.
3. Select Parent Position Category from the drop down menu.
5. select the Language, as required.
6. Add the Description,as required
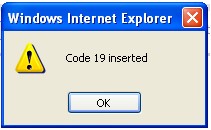
7. The following display will confirm
Delete a Position Category
Navigation 
By default, you will be in Search Mode.
- Find the Position Category you want to Delete
- Enter the information to be used as retrieval criteria in the appropriate field(s). If you prefer to see all Position Categories, leave all fields blank.
- Click Find

- Select the Position Category you want to Delete
- Click on the Delete icon

- A window will appear asking you to confirm
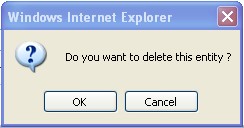
4. Click OK to confirm and delete the Position Category.
5. A window will be displayed confirming the Position Category has been deleted
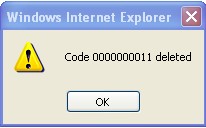
To Verify that the Position Category has been Deleted:
- Click on the Search icon

- Enter the Position Category information
- Click on the Find icon

- The window will appear

Modify a Position Category
Navigation 
By default, you will be in Search Mode.
- Enter the information to be used as retrieval criteria in the appropriate field(s).
If you prefer to see the list of all Position Categories, leave all fields blank. - Click on the Find icon
 . The list of Position Category meeting the retrieval criteria will appear.
 - Click on the Position Category you want to modify.
You will then be in Update/Delete Mode. - Make the necessary modification(s).
- Click on the Update icon
 at the bottom of the screen to save your modifications. A window will appear to confirm the modification. Click OK to confirm.
Work Location
Overview
Work Location provides information regarding where each employee works. An Institution will have many different locations and the employees of an organization can work in different locations and regions.
Navigation 
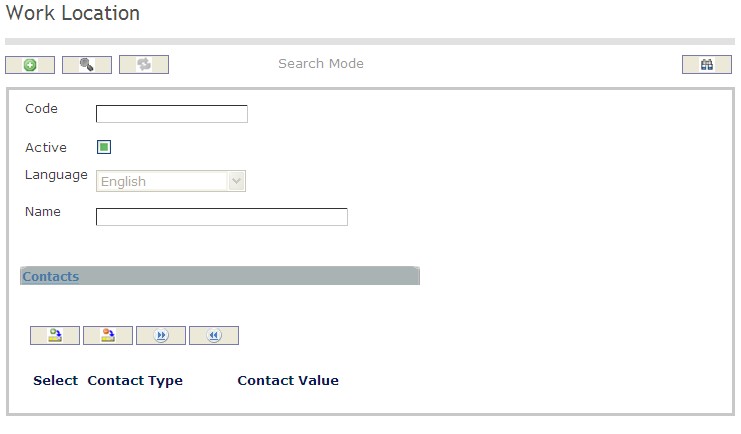
How to SEARCH:
- Enter the information to be used as retrieval criteria in the appropriate field (s). If you prefer to see a list of all Work Locations, leave all fields blank.
- Click on the Find icon
 .
.
The Work Location screen includes the following fields:
| Report Fields | Description |
| Code | Unique identification code of the work location |
| Active | Active Status - if checked, Work Location is available |
| Language | Language used |
| Name | Name of the Work Location |
Create a Work Location
Work Location provides information regarding where each employee works.
To CREATE a Work Location, follow the steps below:
Navigation 
By default, you will be in Search Mode.
- Click on the New icon
 (you will then be in Insert Mode).
 - Enter the new Work Location information. Fields with an asterisk
 are mandatory fields.
 - Enter the Code, click on the Active checkmark, and select the Language, as required.
- Code: Unique identification code of the work location.
- Active: Active Status - if checked, Work Location is available.
- Language: Language used.
- Enter Name.
- Name: Name of the Work Location.
To ADD Contacts to the Work Location, if required:
1. Click on the  tab and then click on the New icon
  to enter Contacts (refer to Contacts for more information).
2. Click on the Save and Return icon  to save the Contact information and return to Work Locations, or click on the Discard icon
  to discard the Contact entry and return to Work Locations.
3. Click the Remove icon  to remove the selected Contacts, if required.
4. Click the individual Select Checkbox (es) to select and de-select the Contact (s), as required, or click the Select All icon  or Unselect All
  icon, to select all Contacts or de-select all Contacts, if required.
Click on the Save icon  at the bottom of the Work Location to save your new Work Location information. A window will appear to confirm.

Contacts
Navigation (From  click the New Icon
 under
under  )
)
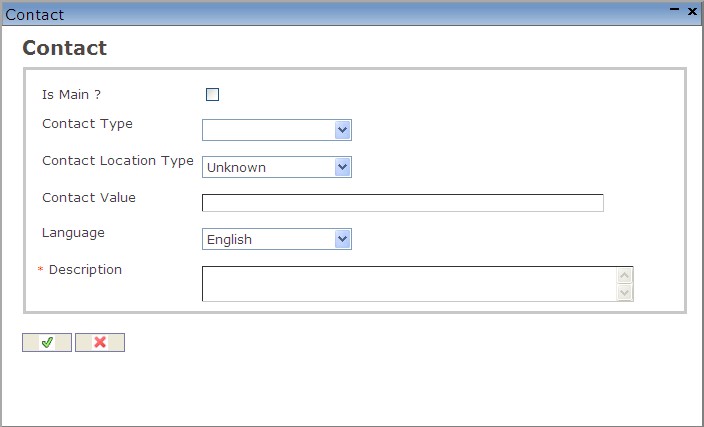
Create a Contact
Navigation (From  click the New Icon
 under
under  )
)
1. Enter the new Contact information. Fields with an asterisk  are mandatory fields.
2. Click on the Is Main? checkmark, as required.
- Is Main?: Is Main? Status - if checked, this will be the main contact information.
3. Select Contact Type.
- Contact Type: Choose from the drop-down menu, either Electronic Mail, Fax, Mobile Phone, Pager, Phone, or Web Site.
4. Select Contact Location Type.
- Contact Location Type: Choose from the drop-down menu
5. Enter Contact Value.
- Contact Value: Enter a description of the contact value
6. Select a Language.
- Language: Language used
7. Enter Description.
- Description: Enter a short description of the contact
8. Click on the Save and Return icon  to save the Contact information and return to the Work Location screen, or click on the Discard icon
  to discard the Contact entry and return to the Work Location screen.
Delete a Work Location
Work Location provides information regarding where each employee works.
To DELETE a Work Location, follow the steps below:
Navigation 
By default, you will be in Search Mode.
- Find the Work Location you want to Delete
- Enter the information to be used as retrieval criteria in the appropriate field(s). If you prefer to see all Work Locations, leave all fields blank.
- Click Find

- Select the Work Location you want to Delete
- Click on the Delete icon

- A window will appear asking you to confirm

4. Click OK to confirm and delete the Work Location.
5. A window will be displayed confirming the Work Location has been deleted

To Verify that the Work Location has been Deleted:
- Click on the Search icon

- Enter the Work Location information
- Click on the Find icon

- The window will appear

Modify a Work Location
Work Location provides information regarding where each employee works.
To MODIFY a Work Location, follow the steps below:
Navigation 
By default, you will be in Search Mode.
- Enter the information to be used as retrieval criteria in the appropriate field(s).
If you prefer to see the list of all Work Locations, leave all fields blank. - Click on the Find icon
 . The list of Work Locations meeting the retrieval criteria will appear.
 - Click on the Work Location you want to modify.
You will then be in Update/Delete Mode. - Make the necessary modification(s). To add or remove Contacts, refer to Contacts.
- Click on the Update icon
 at the bottom of the screen to save your modifications. A window will appear to confirm the modification. Click OK to confirm.
Dimension
Overview
This feature describes the Dimensions as Economic Magnitude or Number of Subalterns associated for a position.
Navigation
Dimension screen fields
| Fields | Description |
| Code | Unique String Code. Depends on parameter settings to deterimne if it is entered by user or system generated. When system generated, it is left padded with zeros. |
| Active | True by default. When False the Dimension is not available for use. |
| Dimension Type Status | This attribute takes one of the following values:
The default value is 'Economic Magnitudes'. when inherited it is READONLY, otherwise it is editable. |
| Origin | Read Only field. Displays the source of the Dimension. Default value is 'Manual' when record is created manually. |
| Language | Select language to register the description. |
| Description | A detail description of the Dimension. |
Main Functions Activity
Overview
This feature allows users to store the Main function/activities require or desirable for a position. This is used by users to create a position.
Navigation
Human Resources ► Support Entities ► Position Management ► Main Functions Activity
Main Functions Activity screen fields
| Fields | Description |
| Code | It is a unique string code for the Main Functions Activity. It is system generated or manually entered. |
| Active | By default this check box is checked, when the user makes it unchecked then it would be not available anymore to use. |
| Origin | It displays the origin of the Main Function Activity. |
| Language | It allows users to select the language to write the description. The default language is English. |
| Description | The details description of the Main Function Activity. |
Main Relationship
Overview
This feature allows creating the main relationships require or desirable for a position. It is required in some cases when users create a position.
Navigation
Human Resources ► Support Entities ► Position Management ► Main Relationship
Main Relationship screen fields
| Fields | Descriptions |
| Code | This field displays the unique string code of the main relationship. It can be system generated or the user-generated, it depends on the system parameter setting for this field. |
| Active | By default it is checked, when it is marked as unchecked then it (Main Relationship) is not available to use for all modules. |
| Relationship Type | This field allows users to select the relationship type from the drop-down list. The possible values are "Other Positions", and "Other Institutions". |
| Origin | It displays the origin information. |
| Language | It allows users to select the language to write the description. The default language is English. |
| Description | Users can write the details description related to Main Relationship in the selected language. |
Nature
Overview
This support entity allows creating the Nature of Problems and Responsibilities associated and required for a position. It would be used by the user while creating a Position in the system.
Navigation
Human Resources ► Support Entities ► Position Management ► Nature
Nature screen fields
| Fields | Descriptions |
| Code | It shows the unique string code. It is system generated or user-generated, depends on the parameter setting in the system. |
| Active | By default this check box is checked, when the user makes it unchecked then it would be not available anymore to use. |
| Nature Type | The user can select the nature type from the drop-down list. The possible values are "Problem" and "Responsibility". |
| Origin | It displays the origin information of the Nature. |
| Language | It allows the user to select the language to write the description. The default language is English. |
| Description | The user can write details description related to the nature in the selected language. |
Other Aspect
Overview
This support entity allows creating Other Aspect for the position. It would be used by the user while creating a position.
Navigation
Human Resources ► Support Entities ► Position Management ► Other Aspect
Other Aspect Screen Fields
| Fields | Descriptions |
| Code | It is a unique string code generated by the system or by the user, depends on the system parameter setting for this feature. |
| Active | By default this check box is checked, when the user makes it unchecked then it would be not available anymore to use. |
| Origin | It displays the origin of the Other Aspect. |
| Language | It allows the user to select the language to write the description. The default language is English. |
| Description | The user can write details description related to the Other Aspect in the selected language. |
Position Experience
Overview
This screen describes all the experience requirements or desirable for a position.
Navigation
Human Resources ► Support Entities ► Position Management ► Position Experience
Position Experience Screen Fields
| Fields | Descriptions |
Code | The unique String Code. It is generated by the system or entered by user depends on the parameter setting for this screen. |
| Active | By default, the checkbox is marked as checked, if it is unchecked then it would be not available anymore to use elsewhere. |
| Years of Experience | It allows entering the total work experience required for the position. |
| Origin | It displays the origin of the Position Experience. |
| Language | It allows the user to select the language to write the description. The default language is English. |
| Description | The user can write details description related to the Position Experience in the selected language. |
Position Knowledge
Overview
This screen describes the knowledge required or desirable for a position.
Navigation
Human Resources ► Support Entities ► Position Management ► Position Knowledge
Position Knowledge Screen Fields
| Fields | Descriptions |
Code | It is a unique string code generated by the system or by the user, depends on the system parameter setting for this feature. |
| Active | By default this check box is checked, when the user makes it unchecked then it would be not available anymore to use. |
| Knowledge Type | It allows to enter the knowledge type for the position. The default value is 'Specific Knowledge'. |
| Origin | It displays the origin of the Position Knowledge. |
| Language | It allows the user to select the language to write the description. The default language is English. |
| Description | The user can write details description related to the Position Knowledge in the selected language. |
Work Condition
Overview
This screen contains the Work Conditions associated for a position.
Navigation
Human Resources ► Support Entities ► Position Management ► Work Condition
Work Condition Screen Fields
| Fields | Descriptions |
| Code | The unique String Code. It is generated by the system or entered by user depends on the parameter setting for this screen. |
| Active | By default, the checkbox is marked as checked, if it is unchecked then it would be not available anymore to use elsewhere. |
| Origin | It displays the origin of the Work Condition. |
| Language | It allows the user to select the language to write the description. The default language is English. |
| Description | Detailed Description of the Work Condition. |