Employee Management
Life Certificate
Overview
This screen contains information that helps users understand the requirements that are necessary to obtain pensions
Navigation 
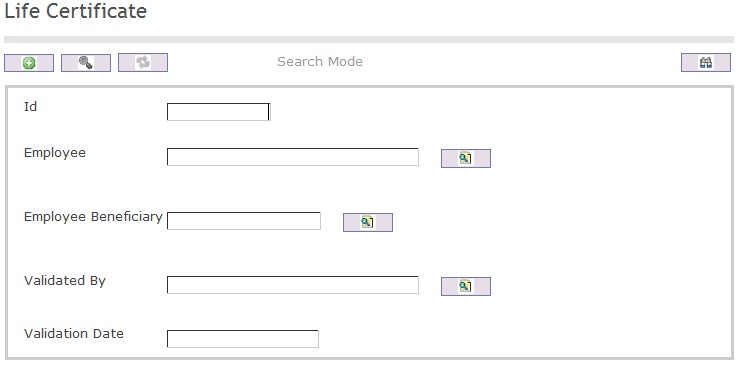
To SEARCH a Life Certificate
- Enter the information to be used as retrieval criteria in the appropriate field(s).
If you prefer to see the list of all Life Certificates, leave all fields blank. - Click on the Find icon
 .
.
| Field | Definition |
| ID | Unique identification code |
| Employee | User within the organization |
| Employee Beneficiary | Employee benefits |
| Validated By | Employee completing the validation |
| Validation Date | Date of validation |
Create A Life Certificate
Overview
This screen contains information that helps users understand the requirements that are necessary to obatin a pensions
Navigation 
To CREATE a Life Certificate follow the steps below
By default, you will be in Search Mode.
- Click on the New icon
 (you will then be in Insert Mode).
 - Enter the new Life Certificate information. Fields with an asterisk
 are mandatory fields.
 - Enter the ID
- To enter the Employee, if required, click on the Lookup icon
 , click on Find icon
  to retrieve the Employee list, then select the Employee.
 - To enter the Employee Beneficiary, if required, click on the Lookup icon
 , click on Find icon
  to retrieve the Employee Beneficiary list, then select the Employee Beneficiary .
 - To enter the Validated By, if required, click on the Lookup icon
 , click on Find icon
  to retrieve the Validated By list, then select the Validated By.
 - Enter the Validation Date
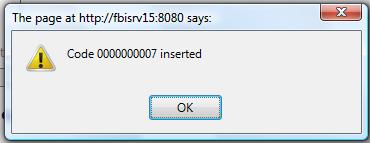
Click on the Save icon  at the bottom of the Life Certificate to save your new Life Certificate information. A window will appear to confirm.
Delete A Life Certificate
Overview
This screen contains information that helps users understand the requirements that are necessary to obatin a pensions
Navigation 
To DELETE a Life Certificate follow the steps below
By default, you will be in Search Mode.
- Find the Life Certificate you want to Delete
- Enter the information to be used as retrieval criteria in the appropriate field(s). If you prefer to see all Life Certificates , leave all fields blank.
- Click Find

- Select the Life Certificate you want to Delete
- Click on the Delete icon

- A window will appear asking you to confirm
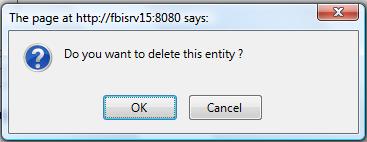
- Click OK to confirm and delete the Life Certificate.
- A window will be displayed confirming the Life Certificate has been deleted
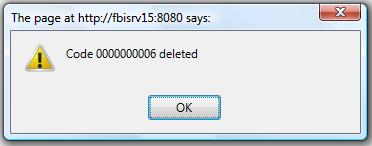
To Verify that the Life Certificate has been Deleted:
- Click on the Search icon

- Enter the Life Certificate information
- Click on the Find icon

The window will appear 
Modify A Life Certificate
Overview
This screen contains information that helps users understand the requirements that are necessary to obtain a pensions
Navigation 
To MODIFY a Life Certificate follow the steps below
By default, you will be in Search Mode.
- Enter the information to be used as retrieval criteria in the appropriate field(s).
If you prefer to see the list of all Life Certificates, leave all fields blank. - Click on the Find icon
 . The list of Life Certificates meeting the retrieval criteria will appear.
 - Click on the Life Certificate you want to modify.
You will then be in Update/Delete Mode. - Make the necessary modification(s).
- Click on the Update icon
 at the bottom of the screen to save your modifications. A window will appear to confirm the modification. Click OK to confirm.
School Type
Overview
School Type is used to identify the type of school the employee attended.
Navigation 
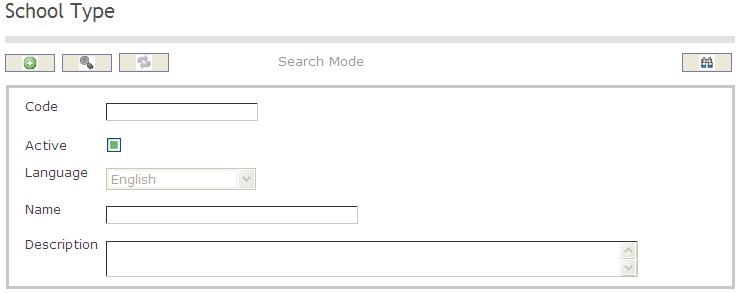
How to SEARCH:
- Enter the information to be used as retrieval criteria in the appropriate field (s). If you prefer to see a list of all , leave all fields blank
- Click on the Find icon

The School Type screen includes the following fields:
Field | Definition |
Code | School Types unique identification code |
Active | Active Status - if checked, School Type will become available |
Name | Name of the School Type |
Description | Description of the School Type |
Create A School Type
To CREATE a School Type that identifes the type of school the employee attended, follow these steps:
Navigation 
By default, you will be in Search Mode.
1. Click on the New icon ![]() . You will then be in Insert Mode.
. You will then be in Insert Mode.
2. Enter the new School Type information. Fields with an asterisk  are mandatory fields.
3. Enter the Code, check the Active box as necessary, and then select the Language from the drop down menu.
- Code: School Type unique identification code
- Active: Active Status when checked, the School Type will not be used/active
4. Enter the Name of the school type in the Name field, and describe the School Type in the Description field.
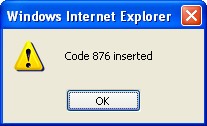
Click on the Save icon  at the bottom to save your new School Type information. A window will appear to confirm the new School Type creation. Click OK to confirm.
Delete A School Type
To DELETE a School Type that identifes the type of school the employee attended, follow these steps:
Navigation 
By default, you will be in Search Mode.
- Find the School Type you want to Delete
- Enter the information to be used as retrieval criteria in the appropriate field(s). If you prefer to see all School Types, leave all fields blank.
- Click Find
 .
. - Select the School Type you want to Delete.
- Click on the Delete icon
 .
. - A window will appear asking you to confirm

- Click OK to confirm and delete the School Type.
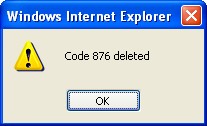
- A window will be displayed confirming the School Type has been deleted
To Verify that the School Type has been Deleted:
- Click on the Search icon

- Enter the School Type information in the appropriate field (s).
- Click on the Find icon

- This window will appear

Modify A School Type
To MODIFY a School Type that identifes the type of school the employee attended, follow these steps:
Navigation 
By default, you will be in Search Mode.
- Enter the information to be used as retrieval criteria in the appropriate field (s). If you prefer to see a list of all School Types, leave all fields blank.
- Click on the Find icon
 .
. - Click on the School Type you want to modify.
You will then be in Update/Delete Mode. - Make the necessary modifications. To add or remove School Types, refer to School Type.
- Click on the Update icon
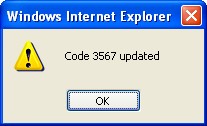
 at the bottom of the screen to save your modifications. A window will appear to confirm the modification. Click OK to confirm.
School
Overview
School describes the names of various Education institutions.
Navigation 
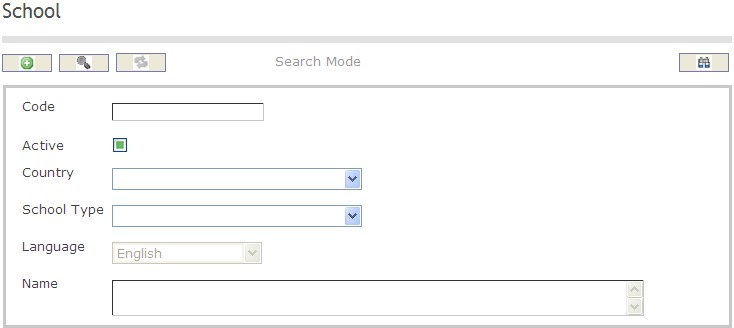
How to SEARCH:
- Enter the information to be used as retrieval criteria in the appropriate field (s). If you prefer to see a list of all Educations, leave all fields blank
- Click on the Find icon

The School screen includes the following fields:
Field | Definition |
Code | School unique identification code |
Active | Active Status - if checked, School become available |
Name | Name of the Major Education Field |
School Type | The type of school the employee attended |
Create A School
To CREATE a School that identifies the name of schools the employees attended, follow these steps:
Navigation 
By default, you will be in Search Mode.
1. Click on the New icon ![]() . You will then be in Insert Mode.
. You will then be in Insert Mode.
2. Enter the new School information. Fields with an asterisk  are mandatory fields.
3. Enter the Code as required, and check the Active box.
4. Choose the Country, School Type, and Language from the drop down menus.
5. Enter the name of the school in the Name field.
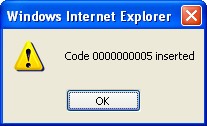
6. Click on the Save icon  at the bottom to save your new School information. A window will appear to confirm the new School creation. Click OK to confirm.
Delete A School
To DELETE a School that identifes the name of schools the employees attended, follow these steps:
Navigation 
By default, you will be in Search Mode.
- Find the School you want to Delete
- Enter the information to be used as retrieval criteria in the appropriate field(s). If you prefer to see all Schools, leave all fields blank.
- Click Find
 .
. - Select the School you want to Delete.
- Click on the Delete icon
 .
. - A window will appear asking you to confirm

- Click OK to confirm and delete the School
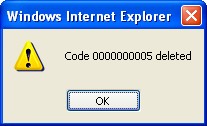
- A window will be displayed confirming the School has been deleted
To Verify that the School has been Deleted:
- Click on the Search icon

- Enter the School information in the appropriate field (s).
- Click on the Find icon

- This window will appear

Modify A School
To MODIFY a School that identifes the name of schools the employees attended, follow these steps:
Navigation 
By default, you will be in Search Mode.
- Enter the information to be used as retrieval criteria in the appropriate field (s). If you prefer to see a list of all School, leave all fields blank.
- Click on the Find icon
 .
. - Click on the School you want to modify.
You will then be in Update/Delete Mode. - Make the necessary modifications.
- Click on the Update icon
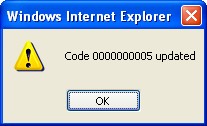
 at the bottom of the screen to save your modifications. A window will appear to confirm the modification. Click OK to confirm.
Pay Agent
Overview
This Entity contains information about a pay agent. A pay agent is a person who delivers cash or cheques to empoyees.
Navigation
Pay Agent Screen Fields
| Fields | Definitions |
| Code | Unique identification code of the Pay Agent. |
| Active | Active Status - if checked, Pay Master is available for all modules. |
| Employee | This indicates the employee number if the pay agent is an internal employee. |
| Vendor | The pay source that is used by the Pay Agent to deliver employee earnings. |
| Bank Account | Bank account for pay agent. |
| Paid by Cheque | Default = TRUE |
| Language | Language as chosen for name of pay agent. |
| Name | Name of Pay Agent. |
Address
Overview
A pay agent has one or many addresses.
Address Screen Fields
| Fields | Description |
| Is Main ? | Identifies the main address |
| Region | Region of the Agent |
| Address Type | Choose from the Drop Down Menu and select the appropriate address type. |
| Address | Address of the Pay Agent. |
| Location | Location of the Agent |
| City | City of Pay Agent |
| State | State of Pay Agent. |
| Zip Code | Zip Code of Pay Agent. |
| Country | Country of the Agent |
Medical Catalog
Overview
This screen specifies the possible Medical Conditions that an employee could experience during their employment career. A user will enter the appropriate medical information on this screen and then associate the conditions to the employees who suffer from them. Some examples of medical conditions are asthma, allergies, common colds, viral infections, or cancer.
Navigation 
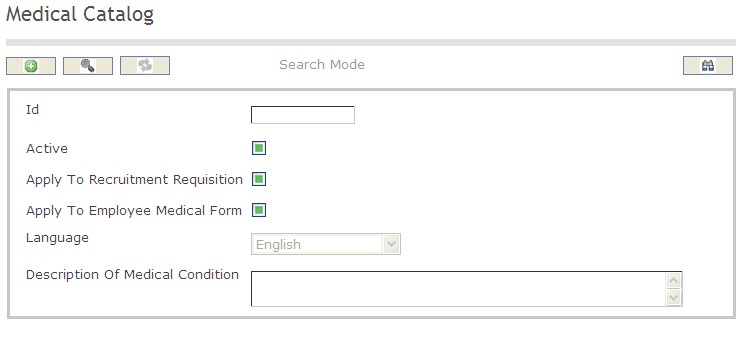
How to SEARCH:
- Enter the information to be used as retrieval criteria in the appropriate field (s). If you prefer to see a list of all Medical Catalogs, leave all fields blank.
- Click on the Find icon
 .
.
The Medical Catalog screen includes the following fields:
| Report Fields | Description |
| ID | Unique identification code of the Medical Catalog |
| Active | Active Status - if checked, Medical Catalog is available |
| Apply to Recruitment Requisition | Apply to Recruitment Requisition Status - if checked, Apply to Recruitment Requisition is available |
| Apply to Employee Medical Form | Apply to Employee Medical Form Status - if checked, Apply to Employee Medical Form is available |
| Language | Language used |
| Description | Provide a short description of the medical condition |
Create a Medical Catalog
The Medical Catalog specifies the possible Medical Conditions that an employee could experience during their employment career. To CREATE a Medical Catalog, follow the steps below:
Navigation 
By default, you will be in Search Mode.
- Click on the New icon
 (you will then be in Insert Mode).
 - Enter the new Medical Catalog information. Fields with an asterisk
 are mandatory fields.
 - Enter the ID, click on the Active, Apply to Recruitment Requisition, and Apply to Employee Medical Form checkmarks, and select the Language, as required.
- ID: Unique identification code of the Medical Catalog.
- Active: Active Status - if checked, Medical Catalog is available.
- Apply to Recruitment Requisition: Apply to Recruitment Requisition Status - if checked, Apply to Recruitment Requisition is available.
- Apply to Employee Medical Form: Apply to Employee Medical Form Status - if checked, Apply to Employee Medical Form is available.
- Language: Language used.
- Enter Description.
- Description: Provide a short description of the medical condition.
5. Click on the Save icon  at the bottom of the Medical Catalog to save your new Medical Catalog information. A window will appear to confirm.

Delete a Medical Catalog
The Medical Catalog specifies the possible Medical Conditions that an employee could experience during their employment career. To DELETE a Medical Catalog, follow the steps below:
Navigation 
By default, you will be in Search Mode.
- Find the Medical Catalog you want to Delete
- Enter the information to be used as retrieval criteria in the appropriate field(s). If you prefer to see all Medical Catalogs, leave all fields blank.
- Click Find

- Select the Medical Catalog you want to Delete
- Click on the Delete icon

- A window will appear asking you to confirm

- Click OK to confirm and delete the Medical Catalog.
- A window will be displayed confirming the Medical Catalog has been deleted

To Verify that the Medical Catalog has been Deleted:
- Click on the Search icon

- Enter the Medical Catalog information
- Click on the Find icon

- The window will appear

Modify a Medical Catalog
The Medical Catalog specifies the possible Medical Conditions that an employee could experience during their employment career. To MODIFY a Medical Catalog, follow the steps below:
Navigation 
By default, you will be in Search Mode.
- Enter the information to be used as retrieval criteria in the appropriate field(s).
If you prefer to see the list of all Medical Catalogs, leave all fields blank. - Click on the Find icon
 . The list of Medical Catalogs meeting the retrieval criteria will appear.
 - Click on the Medical Catalog you want to modify.
You will then be in Update/Delete Mode. - Make the necessary modification(s).
- Click on the Update icon
 at the bottom of the screen to save your modifications. A window will appear to confirm the modification. Click OK to confirm.
Standard Letters
Overview
This screen contains the standard templates used for generating personnel letters such as for appointments, probation, confirmation, entitlements, etc. Information to include on this screen are the identification code, the active status (if checked, the form is active), the language used to prepare the standard letter, and the description of the standard letter.
Navigation 
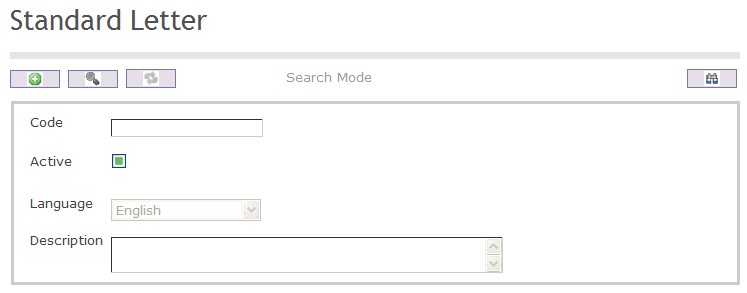
How to SEARCH:
- Enter the information to be used as retrieval criteria in the appropriate field (s). If you prefer to see a list of all Standard Letters, leave all fields blank.
- Click on the Find icon
 .
.
The Standard Letter screen includes the following fields:
| Report Fields | Description |
| Code | Unique identification code of the standard letter |
| Active | Active Status - if checked, Standard Letter is available |
| Language | Language used |
| Description | Short description of the standard letter |
Create a Standard Letter
Standard Letters contains the standard templates used for generating personnel letters such as for appointments, probation, confirmation, entitlements, etc. To CREATE a Standard Letter, follow the steps below:
Navigation 
By default, you will be in Search Mode.
- Click on the New icon
 (you will then be in Insert Mode).
 - Enter the new Standard Letter information. Fields with an asterisk
 are mandatory fields.
 - Enter the Code, click on the Active checkmark, and select the Language, as required.
- Code: Unique identification code of the standard letter.
- Active: Active Status - if checked, Standard Letter is available.
- Language: Language used.
- Enter Description.
- Description: Short description of the standard letter.
5. Click on the Save icon  at the bottom of the Standard Letter to save your new Standard Letter information. A window will appear to confirm.

Delete a Standard Letter
Standard Letters contains the standard templates used for generating personnel letters such as for appointments, probation, confirmation, entitlements, etc. To DELETE a Standard Letter, follow the steps below:
Navigation 
By default, you will be in Search Mode.
- Find the Standard Letter you want to Delete
- Enter the information to be used as retrieval criteria in the appropriate field(s). If you prefer to see all Standard Letters, leave all fields blank.
- Click Find

- Select the Standard Letter you want to Delete
- Click on the Delete icon

- A window will appear asking you to confirm
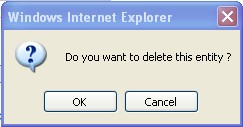
4. Click OK to confirm and delete the Standard Letter.
5. A window will be displayed confirming the Standard Letter has been deleted
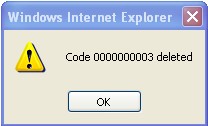 \
\
To Verify that the Standard Letter has been Deleted:
- Click on the Search icon

- Enter the Standard Letter information
- Click on the Find icon

- The window will appear

Modify a Standard Letter
Standard Letters contains the standard templates used for generating personnel letters such as for appointments, probation, confirmation, entitlements, etc. To MODIFY a Standard Letter, follow the steps below:
Navigation 
By default, you will be in Search Mode.
- Enter the information to be used as retrieval criteria in the appropriate field(s).
If you prefer to see the list of all Standard Letters, leave all fields blank. - Click on the Find icon
 . The list of Standard Letters meeting the retrieval criteria will appear.
 - Click on the Standard Letter you want to modify.
You will then be in Update/Delete Mode. - Make the necessary modification(s).
- Click on the Update icon
 at the bottom of the screen to save your modifications. A window will appear to confirm the modification. Click OK to confirm.
Note Types
Overview
This screen contains the different categories available for Note Types. It is a free form which allows the user to record personal information on an employee which can not be captured on any other forms available in the system.
Navigation 
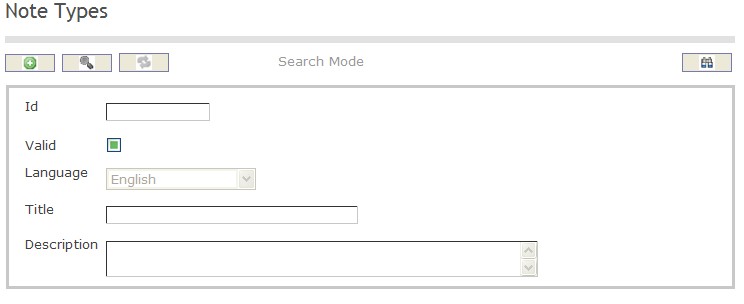
How to SEARCH:
- Enter the information to be used as retrieval criteria in the appropriate field (s). If you prefer to see a list of all Employee Note Types, leave all fields blank.
- Click on the Find icon
 .
.
The Employee Note Type screen includes the following fields:
| Report Fields | Description |
| ID | Unique identification code of the Employee Note Type |
| Valid | Valid Status - if checked, Employee Note Type is available |
| Language | Language used |
| Title | Title of the Employee Note Type |
| Description | Provide a short description of the Employee Note Type |
Create an Employee Note Type
Employee Note Type contains the different categories available for Employee Notes. To CREATE an Employee Note Type, follow the steps below:
Navigation 
By default, you will be in Search Mode.
- Click on the New icon
 (you will then be in Insert Mode).
 - Enter the new Employee Note Type information. Fields with an asterisk
 are mandatory fields.
 - Enter the ID, click on the Valid checkmark, and select the Language, as required.
- ID: Unique identification code of the Employee Note Type.
- Valid: Valid Status - if checked, Employee Note Type is available.
- Language: Language used.
- Enter Title.
- Title: Title of the Employee Note Type.
5. Enter Description.
- Description: Provide a short description of the Employee Note Type.
6. Click on the Save icon  at the bottom of the Employee Note Type to save your new Employee Note Type information. A window will appear to confirm.

Delete an Employee Note Type
Employee Note Type contains the different categories available for Employee Notes. To DELETE an Employee Note Type, follow the steps below:
Navigation 
By default, you will be in Search Mode.
- Find the Employee Note Type you want to Delete
- Enter the information to be used as retrieval criteria in the appropriate field(s). If you prefer to see all Employee Note Types, leave all fields blank.
- Click Find

- Select the Employee Note Type you want to Delete
- Click on the Delete icon

- A window will appear asking you to confirm

- Click OK to confirm and delete the Employee Note Type.
- A window will be displayed confirming the Employee Note Type has been deleted

To Verify that the Employee Note Type has been Deleted:
- Click on the Search icon

- Enter the Employee Note Type information
- Click on the Find icon

- The window will appear

Modify an Employee Note Type
Employee Note Type contains the different categories available for Employee Notes. To MODIFY an Employee Note Type, follow the steps below:
Navigation 
By default, you will be in Search Mode.
- Enter the information to be used as retrieval criteria in the appropriate field(s).
If you prefer to see the list of all Employee Note Types, leave all fields blank. - Click on the Find icon
 . The list of Employee Note Types meeting the retrieval criteria will appear.
 - Click on the Employee Note Type you want to modify.
You will then be in Update/Delete Mode. - Make the necessary modification(s).
- Click on the Update icon
 at the bottom of the screen to save your modifications. A window will appear to confirm the modification. Click OK to confirm.
Create A Major Education Field
To CREATE an Employee Major Education Field that describes the employee's major degrees, follow these steps:
Navigation 
By default, you will be in Search Mode.
- Click on the New icon
 . You will then be in Insert Mode.
 - Enter the new Major Education Field information. Fields with an asterisk
 are mandatory fields.
 - Enter the Code, and click on the Active. Select the Language from the drop down menu, and then specify the Major Education in the Name field.
- Code: Major Education Field unique identification code
- Active: Active Status - if checked, Major Education Field will become available.
- Language: Language used
- Name: Name of the Major Education Field
- Description: Description of the Major Education Field
4. Click on the Save icon  at the bottom to save your new Major Education Field information. A window will appear to confirm the new Major Education Field creation. Click OK to confirm.
Create A Scholastic Rank
To CREATE a Scholastic Rank that identify the employee's ranking according to their education level, follow these steps:
Navigation
By default, you will be in Search Mode.
- Click on the New icon
 . You will then be in Insert Mode.
 - Enter the new Scholastic Rank information. Fields with an asterisk
 are mandatory fields.
 - Enter the ID as required, and click on the Active. Select the Language, specify the Scholastic Rank Title in the Title field, and specify the Scholastic Rank Description in the Description Field,
- ID: Scholastic Rank unique identification number (Numbers only field)
- Active: Active Status - if checked, Scholastic Rank will become available.
- Language: Language used
- Name: Name of the Scholastic Rank
- Title: Provide a title describing the Scholastic Rank
- Description: Description of the Scholastic Rank
4. Click on the Save icon  at the bottom to save your new Scholastic Rank information. A window will appear to confirm the new Scholastic Rank creation. Click OK to confirm.
Create An Education
To CREATE an Education that describes the employee’s education levels, follow these steps:
Navigation 
By default, you will be in Search Mode.
1. Click on the New icon  . You will then be in Insert Mode.
2. Enter the new Educations information. Fields with an asterisk  are mandatory fields.
3. Enter the Code as required, and click on Active.
- Code: Educations unique identification code
- Active: Active Status - if checked, Scholastic Rank will become available.
4. Select the Degree from the drop down menu, and enter the graduation date in the Graduation Date field using the calendar button ![]() .
.
- Graduation Date: Year the employee graduated from the degree
5. Specify the Major Education Field from the drop down menu.
- Major Education Field: The field that the Education belong to
6. Choose the School Rank from the drop down menu.
- School Rank: Identifies the employee's ranking
7. Enter the School Start Year and End Year in the fields provided
- Start Year: Start year of Education
- End Year: End year of Education
8. Enter the School Degree in the field provided, school degree refers to the final degree score obtained
9. To enter the School, if required, click on the Lookup icon , click on Find icon
  to retrieve the School list, and then select the School. Refer to School for more information.
- School: The school attended to obtain the degree
10. Click on the Save icon  at the bottom to save your new Educations information. A window will appear to confirm the new Educations creation. Click OK to confirm.
Delete A Major Education Field
To DELETE an Employee Major Education Field that describes the employees major degrees , follow these steps:
Navigation 
By default, you will be in Search Mode.
- Find the Major Education Field you want to Delete
- Enter the information to be used as retrieval criteria in the appropriate field(s). If you prefer to see all Major Education Fields, leave all fields blank.
- Click Find
 .
. - Select the Major Education Field you want to Delete.
- Click on the Delete icon
 .
. - A window will appear asking you to confirm

- Click OK to confirm and delete the Major Education Field
- A window will be displayed confirming the Major Education Field has been deleted

To Verify that the Major Education Field has been Deleted:
- Click on the Search icon

- Enter the Major Education Field information in the appropriate field (s).
- Click on the Find icon

- This window will appear

Delete A Scholastic Rank
To DELETE a Scholastic Rank that identifies the employee's ranking according to their education level, follow these steps:
Navigation
By default, you will be in Search Mode.
- Find the Scholastic Rank you want to Delete
- Enter the information to be used as retrieval criteria in the appropriate field(s). If you prefer to see all Scholastic Rank, leave all fields blank.
- Click Find
 .
. - Select the Scholastic Rank you want to Delete.
- Click on the Delete icon
 .
. - A window will appear asking you to confirm

- Click OK to confirm and delete the Scholastic Rank
- A window will be displayed confirming the Scholastic Rank has been deleted

To Verify that the Scholastic Rank has been Deleted:
- Click on the Search icon

- Enter the Scholastic Rank information in the appropriate field (s).
- Click on the Find icon

- This window will appear

Delete An Education
To DELETE an Education that describes the employee’s education levels, follow these steps:
Navigation 
By default, you will be in Search Mode.
- Find the Educations you want to Delete
- Enter the information to be used as retrieval criteria in the appropriate field(s). If you prefer to see all Educations, leave all fields blank.
- Click Find
 .
. - Select the Educations you want to Delete.
- Click on the Delete icon
 .
. - A window will appear asking you to confirm

- Click OK to confirm and delete the Educations
- A window will be displayed confirming the Educations has been deleted

To Verify that the Educations has been Deleted:
- Click on the Search icon

- Enter the Educations information in the appropriate field (s).
- Click on the Find icon

- This window will appear

Modify A Scholastic Rank
To MODIFY a Scholastic Rank that identify the employee's ranking according to their education level, follow these steps:
Navigation
By default, you will be in Search Mode.
- Enter the information to be used as retrieval criteria in the appropriate field (s). If you prefer to see a list of all Scholastic Rank, leave all fields blank.
- Click on the Find icon
 .
. - Click on the Scholastic Rank you want to modify.
You will then be in Update/Delete Mode. - Make the necessary modifications.
- Click on the Update icon
 at the bottom of the screen to save your modifications. A window will appear to confirm the modification. Click OK to confirm.

Modify An Education
To MODIFY an Education that describes the employee’s education levels, follow these steps:
Navigation 
By default, you will be in Search Mode.
- Enter the information to be used as retrieval criteria in the appropriate field (s). If you prefer to see a list of all Educations, leave all fields blank.
- Click on the Find icon
 .
. - Click on the Educations Field you want to modify.
You will then be in Update/Delete Mode. - Make the necessary modifications. To add or remove a School, refer to School for more information.
- Click on the Update icon
 at the bottom of the screen to save your modifications. A window will appear to confirm the modification. Click OK to confirm.

Modify Major Education Field
To MODIFY an Employee Major Education Field that describes the employees major degrees , follow these steps:
Navigation 
By default, you will be in Search Mode.
- Enter the information to be used as retrieval criteria in the appropriate field (s). If you prefer to see a list of all Major Education Fields, leave all fields blank.
- Click on the Find icon
 .
. - Click on the Major Education Field you want to modify.
You will then be in Update/Delete Mode. - Make the necessary modifications.
- Click on the Update icon
 at the bottom of the screen to save your modifications. A window will appear to confirm the modification. Click OK to confirm.

Race
Overview
The Race screen provides information to the organization about each individual race.
Navigation 
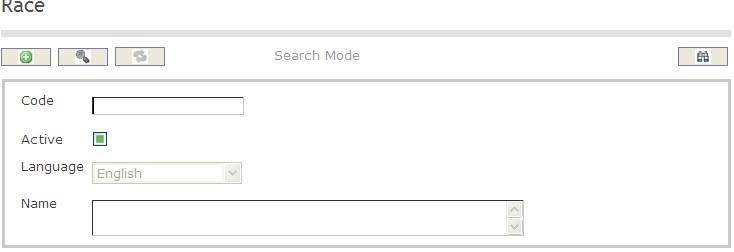
To SEARCH a Race
1. Enter the information to be used as retrieval criteria in the appropriate field(s). If you prefer to see the list of all Races, leave all fields blank.
2. Click on the Find icon  .
.
The screen Race includes the following fields:
| Field | Definition |
| Code | Unique code of identification |
| Active | Default |
| Language | Language of Use |
| Name | Name of Race |
Create A Race
Navigation 
By default, you will be in Search Mode.
- Click on the New icon
 (you will then be in Insert Mode).
 - Enter the new Race information. Fields with an asterisk
 are mandatory fields.
 - Enter the Code, click on the Active checkmark, as required, and select the Language, as required.
Code: Unique identification code of the religion.
Active: Active Status - if checked, Race is available.
4 . Enter Name.
Name: Name of the race.
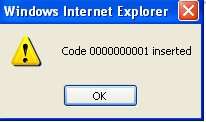
Click on the Save icon  at the bottom of the Race to save your new Race information.
The following window will appear to confirm:
Delete A Race
Navigation 
By default, you will be in Search Mode.
- Find the Race you want to Delete
- Enter the information to be used as retrieval criteria in the appropriate field(s). If you prefer to see all Races, leave all fields blank.
- Click Find

- Select the Race you want to Delete
- Click on the Delete icon

- A window will appear asking you to confirm

- Click OK to confirm and delete the Race.
- A window will be displayed confirming the Race has been deleted

- Click on the Delete icon
To Verify that the Race has been Deleted:
- Click on the Search icon

- Enter the Race information
- Click on the Find icon

The window will appear 
Modify A Race
Navigation 
By default, you will be in Search Mode.
- Enter the information to be used as retrieval criteria in the appropriate field(s).
If you prefer to see the list of all Races, leave all fields blank. - Click on the Find icon
 . The list of Races meeting the retrieval criteria will appear.
 - Click on the Races you want to modify.
You will then be in Update/Delete Mode. - Make the necessary modification(s).
- Click on the Update icon
 at the bottom of the screen to save your modifications. A window will appear to confirm the modification. Click OK to confirm.
Religion
Overview
This screen represents a catalogue of possible religions.
Navigation 

To SEARCH a Religion
1. Enter the information to be used as retrieval criteria in the appropriate field(s). If you prefer to see the list of all Religion, leave all fields blank.
2. Click on the Find icon  .
.
The Religion screen includes the following fields:
| Field | Definition |
| Code | Unique identification code |
| Active | If checked, then the religion is available |
| Language | Language of use |
| Name | Name of Religion |
Create A Religion
Navigation 
By default, you will be in Search Mode.
- Click on the New icon
 (you will then be in Insert Mode).
 - Enter the new Religion information. Fields with an asterisk
 are mandatory fields.
 - Enter the Code, click on the Active checkmark, as required, and select the Language, as required.
Code: Unique identification code of the religion.
Active: Active Status - if checked, Religion is available.
4 . Enter Name.
Name: Name of the religion.
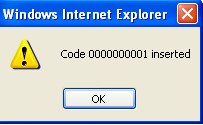
Click on the Save icon  at the bottom of the Religion to save your new Religion information.
The following window will appear to confirm:
Delete a Religion
Navigation 
By default, you will be in Search Mode.
- Find the Religion you want to Delete
- Enter the information to be used as retrieval criteria in the appropriate field(s). If you prefer to see all Religions, leave all fields blank.
- Click Find

- Select the Religion you want to Delete
- Click on the Delete icon

- A window will appear asking you to confirm

- Click OK to confirm and delete the Religion.
- A window will be displayed confirming the Religion has been deleted

- Click on the Delete icon
To Verify that the Religion has been Deleted:
- Click on the Search icon

- Enter the Religion information
- Click on the Find icon

The window will appear 
Modify A Religion
Navigation 
By default, you will be in Search Mode.
- Enter the information to be used as retrieval criteria in the appropriate field(s).
If you prefer to see the list of all Religions, leave all fields blank. - Click on the Find icon
 . The list of Religons meeting the retrieval criteria will appear.
 - Click on the Religion you want to modify.
You will then be in Update/Delete Mode. - Make the necessary modification(s).
- Click on the Update icon
 at the bottom of the screen to save your modifications. A window will appear to confirm the modification. Click OK to confirm.
Tribe
Overview
This screen represents a catalogue of Tribes. Normally most countries will not have a "tribes" as a mandatory information component of their HR system. The Tribes entity is available for those countries that require it.
Navigation 
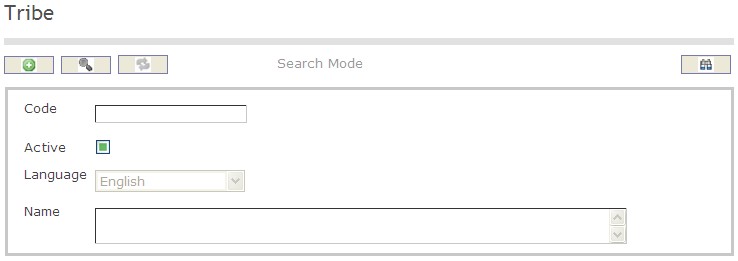
To SEARCH a Tribe:
- Enter the information to be used as retrieval criteria in the appropriate field(s).
If you prefer to see the list of all Tribes, leave all fields blank. - Click on the Find icon
 .
.
The Religion screen includes the following fields:
| Field | Definition |
| Code | Unique code of identification |
| Active | if checked, then the tribe is available |
| Language | Language of use |
| Name | Name of tribe |
Create A Tribe
Navigation 
By default, you will be in Search Mode.
- Click on the New icon
 (you will then be in Insert Mode).
 - Enter the new Tribe information. Fields with an asterisk
 are mandatory fields.
 - Enter the Code, click on the Active checkmark, as required, and select the Language, as required.
Code: Unique identification code of the tribe.
Active: Active Status - if checked, Tribe is available.
4 . Enter Name.
Name: Name of the Tribe.
Click on the Save icon  at the bottom of the Tribe to save your new Tribe information.
The following window will appear to confirm:

| Attachment | Size |
|---|---|
| Tribenavigation.jpg | 4.76 KB |
Delete A Tribe
Navigation 
By default, you will be in Search Mode.
- Find the Tribe you want to Delete
- Enter the information to be used as retrieval criteria in the appropriate field(s). If you prefer to see all Tribe, leave all fields blank.
- Click Find

- Select the Tribe you want to Delete
- Click on the Delete icon

- A window will appear asking you to confirm

- Click OK to confirm and delete the Tribe.
- A window will be displayed confirming the Tribe has been deleted

- Click on the Delete icon
To Verify that the Tribe has been Deleted:
- Click on the Search icon

- Enter the Tribe information
- Click on the Find icon

The window will appear

Modify A Tribe
Navigation 
By default, you will be in Search Mode.
- Enter the information to be used as retrieval criteria in the appropriate field(s).
If you prefer to see the list of all Tribes, leave all fields blank. - Click on the Find icon
 . The list of Tribes meeting the retrieval criteria will appear.
 - Click on the Tribe you want to modify.
You will then be in Update/Delete Mode. - Make the necessary modification(s).
- Click on the Update icon
 at the bottom of the screen to save your modifications. A window will appear to confirm the modification. Click OK to confirm.
Required Document List
Overview
This entity is a catalogue of documents that are necessary for certain processes. Needs UI to create,update catalogue entries.
Navigation
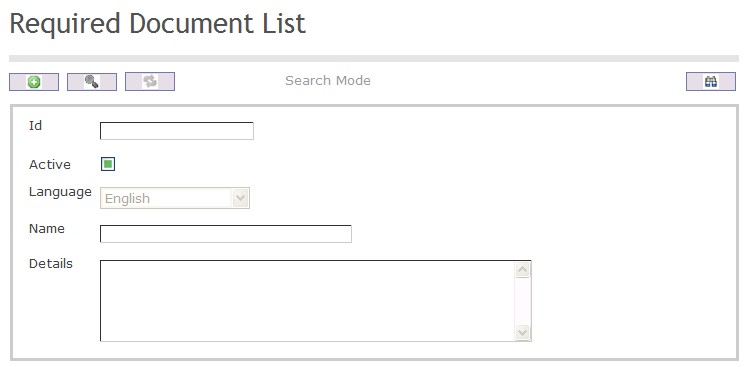
How to SEARCH:
- Enter the information to be used as retrieval criteria in the appropriate field (s). If you prefer to see a list of all Required Document Lists, leave all fields blank.
- Click on the Find icon
 .
.
The Required Document List screen includes the following fields:
| Report Fields | Description |
| ID | Unique identification code of the Required Document List |
| Active | Active Status - if checked, Required Document List is available |
| Language | Language used |
| Name | Name of the individual |
| Description | Provide a short description of the Required Document List |
Create a Required Document List
This entity is a catalogue of documents that are necessary for certain processes. Needs UI to create,update catalogue entries. To CREATE a Required Document List, follow the steps below:
Navigation
By default, you will be in Search Mode.
- Click on the New icon
 (you will then be in Insert Mode).
 - Enter the new Required Document List information. Fields with an asterisk
 are mandatory fields.
 - Enter the ID and Name, click on the Active, and select the Language, as required.
- ID: Unique identification code of the Required Document List
- Active: Active Status - if checked, Required Document List is available
- Name: Name of the individual
- Language: Language used
- Enter Description.
- Description: Provide a short description of the Required Document List.
5. Click on the Save icon  at the bottom of the Required Document List to save your new Required Document List information. A window will appear to confirm.

Delete a Required Document List
This entity is a catalogue of documents that are necessary for certain processes. Needs UI to create,update catalogue entries. To DELETE a Required Document List, follow the steps below:
Navigation
By default, you will be in Search Mode.
- Find the Required Document List you want to Delete
- Enter the information to be used as retrieval criteria in the appropriate field(s). If you prefer to see all Required Document List, leave all fields blank.
- Click Find

- Select the Required Document List you want to Delete
- Click on the Delete icon

- A window will appear asking you to confirm

- Click OK to confirm and delete the Required Document List.
- A window will be displayed confirming the Required Document List has been deleted

To Verify that the Required Document List has been Deleted:
- Click on the Search icon

- Enter the Required Document List information
- Click on the Find icon

- The window will appear

Modify a Required Document List
This entity is a catalogue of documents that are necessary for certain processes. Needs UI to create,update catalogue entries. To Modify a Required Document List, follow the steps below:
Navigation
By default, you will be in Search Mode.
- Enter the information to be used as retrieval criteria in the appropriate field(s).
If you prefer to see the list of all Required Document List , leave all fields blank. - Click on the Find icon
 . The list of Required Document List meeting the retrieval criteria will appear.
 - Click on the Required Document List you want to modify.
You will then be in Update/Delete Mode. - Make the necessary modification(s).
- Click on the Update icon
 at the bottom of the screen to save your modifications. A window will appear to confirm the modification. Click OK to confirm.

