Leave Request
Overview
Leave Requests are used to organize and control all types of leaves that employees can take within an organization.
The manager approves a variety of Leave requests sent by his employees, like Sick Leave, Maternity Leave and Vacation Leave.
To approve a Leave Request:
Option 1:
Go to Human Resources > Employee Management > Leave Management > Leave Request
1. Click on the Find  icon.
icon.
2. Select a Leave request with a status of Approval Requested from the list. Note. The user`s number matches the manager`s number. Example: The Leave Request from Riley Smith1 will be assigned to Manager Jordan Tremblay1 and the Leave Request from Riley Smith2 will be assigned to Manager Jordan Tremblay2.
3. Select Approve from the Transition drop down menu
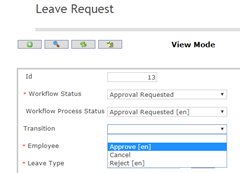
4. Click on the Transition  icon. A new window will appear.
5. Click on the Finish icon.
icon.
6. A message will confirm that the Workflow Transition has been Executed.
7. Click OK.
Option 2:
1. Go to Internal Message  section at the right side of the main screen.
2. The Leave Request will be accessed by clicking on the Green  dot.
dot.
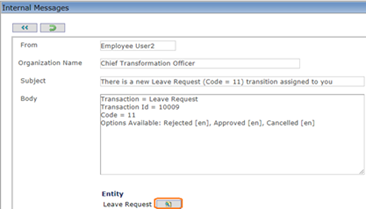
3. Accessing the Leave Request by clicking on the Update Domain  icon beside the Leave Request.
4. The window will display the Record waiting for an action.
5. Select Approve from the Transition drop down menu.
6. Click on the Transition  icon. A new window will appear.
7. Click on the Finish  icon.
icon.
8. A message will confirm that the Workflow Transition has been Executed.
9. Click OK.
Example:
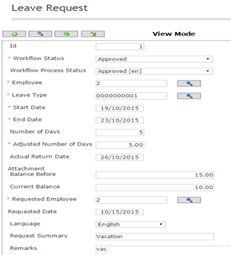
Option 3:
1. Click on the Dashboard  icon that is located on the right side panel of the main screen.
2. The window will display the Record waiting for an action.

3. Click on Leave Request button 
4. Another window will display more details on the request.
5. On the stage section, select Approval requested stage. The list will display all the leave request pending for your approval.
6. Click on the Update  icon. A new window will display the Leave Request form.
7. Select Approve from the Transition drop down list.
8. Click on the Transition  icon. A new window will appear.
9. Click on the Finish  icon.
icon.
10. A message will confirm that the Workflow Transition has been Executed.
11. Click OK.
Cancel a leave request
Cancel a leave request
To cancel a new leave request that’s has just been created
Go to Menu -> Employee Self Service -> Forms and Requests -> Leave Request
1. Click on the New  icon. The Employee Number will be populated automatically by the system.
2. Click on the Lookup  icon to select the Leave Type. Example: Annual Leave
3. Enter the Start and End Dates.
Notes
o The Number of Days will automatically display. The Length of leave will display also.
o The system will display the Balance Before and the Current Balance at the moment of the request. The Current Balance will be updated ONLY once the request is Saved.
4. Click on the Save  icon.
icon.
5. The request Workflow Process Status is set to Created.
6. To Cancel the Leave Request, select Cancel from the Transition drop down list.
7. Click on the Transition  icon. A new window will appear.
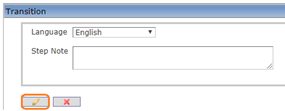
8. Click on the Finish  icon.
icon.
9. A message will confirm that the Workflow Transition has been Executed. As soon as the transition is performed, the Workflow Process Status is set to Cancelled.
To cancel a leave request that’s has been already sent to the manager for approval
Go to Menu -> Self Service -> Forms and Request -> Leave Request
1. Click on the Find  icon.
icon.
2. Select the Leave Request to cancelled.
3. Click on the hyperlink of the Leave Request on Approval Requested status workflow.
4. Go to the Transition field at top of the Form, select Cancel from the drop down list.
5. Click on the Transition  icon. A new window will display.

6. Click on the Finish  icon.
icon.
7. A message will confirm that the Workflow Transition has been Executed. As soon as the transition is performed, the Workflow Process Status is set to Cancelled.
Example:

Create Attachment
To UPLOAD an Attachment that supports the reason for the leave request, follow the steps below:
1. Click on New  under attachment to attach more information. A screen will pop-up.
2. Choose the desired Language from the drop down menu.
3. Enter a Description to the file you'll be attaching.
4. For Attachment click on  to choose a file on your computer and upload it.
5. Choose the desired Language from the drop down menu.
6. Click on the Save and Return icon  to save the Attachment information and return to the Leave Request, or click on the Discard icon
  to discard the Attachment entry and return to the Leave Request.
Request 1 week vacation
The Employee can easily request his own Vacation Leave via self-service
Note. Assumption: the Employee gets his or her annual vacation entitlement at the beginning calendar year.
The Employee is entitled to 15 days per calendar year.
To Request a week vacation
Go to Menu > Employee Self Service > Forms and Requests > Leave Request
1. Click on the New icon. The Employee Number will be populated automatically by the system.
2. To select the Leave Type click on the Lookup  icon.
icon.
3. Click on the Find  icon.
icon.
4. Select the Annual Leave
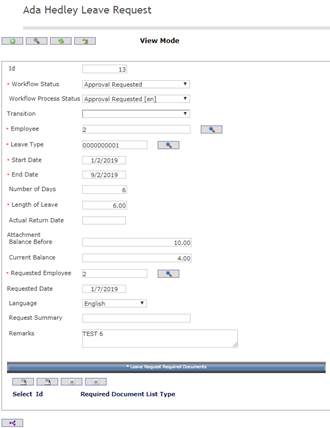
5. Enter the Start Date, example 1/2/2019
6. Enter the End Date, example: 9/2/2019
Notes.
o The Number of Days and the Length of leave will be automatically displayed.
o The system will display the Balance Before and the Current Balance at the moment of the request. The Current Balance will be updated ONLY once the request is Saved.
o When the employee requests one week of vacation, the system will keep track of the balance of his remaining vacation.
7. Click on the Save  icon.
icon.
8. Go to the Transition field at top of the Form, click on Request Approval. (Do not select the option Cancel at this stage).
9. Click on the Transition  icon. A new window will appear.

10. Click on the Finish  icon. A message will confirm that the Workflow Transition has been Executed.
11. Click OK. As soon as the transition is performed, the workflow will transition to Approval Requested.
Example:

Note. The direct manager will receive an Internal Message prompting him to take action. Once the manager approves the leave request, the Employee will receive an Internal Message stating that his vacation has been approved.