Retirement Request
Overview
This form is used to apply for retirement. It is the first part of the retirement process. The user must enter and select all required information to complete the Retirement Request. At the bottom of the form, the user can click on the tab titled View Calculation Results to analyze the results administered through the Retirement Request process.
Navigation


How to SEARCH:
- Enter the information to be used as retrieval criteria in the appropriate field (s). If you prefer to see a list of all Retirement Requests, leave all fields blank.
- Click on the Find icon
 .
.
The Retirement Request screen includes the following fields:
| Report Fields | Description |
| ID | Unique identification code of the Retirement Request |
| File Number | Physical File Number associated to this request |
| Retirement Status | The current state of the Retirement Request. The first step is to request validation of the Retirement Request from the HR officer. If approved, the Retirement Request continues to the next workflow step. If it is not approved, the Retirement Request is cancelled |
| Retirement Request Mode | Allows the user to view whether the Retirement Request was generated by a batch file (Automatic) or added manually (Manual) by a user |
| Issue Date | Automatically assigned by the System, this is the date when this retirement request has been issued |
| Effective Date | The effective date for this retirement request |
| Approved Date | The date when this retirement request has been approved. System generated when it returns as approved |
| Calculation Date | Default value is left blank and will be automatically updated with the System date |
| Retirement Type | The retirement type is a way of defining different retirements. As an example, an employee may retire because of death so there will be a death retirement type. Also, the employee may retire because he/she has reached the retirement age, which would be a mandatory retirement type |
| Applicant | The employee that is applying for this retirement request |
| Effective Assignment | When adding a new request, this will default to the last assignment of this employee. The user can change and select a different assignment. When selecting a new assignment, Salary Transition should change automatically and display the cost item scale step of the latest salary transition of the new assignment selected |
| Salary Transition | Should default to the last effective salary transitions of the assignment from Effective Assignment. This is a read-only function. The user needs to see group-subgroup-level, step, and the amount from salary transition is not the primary key |
| Requested By | The employee who requested this retirement request |
| Retirement Pay Code | The retirement pay code selected will be used when the employee assignment is created, once the retirement request is approved. Also, the pay code is used to group employees for payroll purposes |
| Calculated Consecutive Periods | The value which was calculated by the system for the Retirement Request. This value includes the periods of service that the employee has worked consecutively |
| Manual Consecutive Periods | The value which can be manually entered to override the Calculated Consecutive Periods value. If not entered, the calculated amount will be used |
| Calculated Periods | The value which was calculated by the system for the Retirement Request. This value includes the periods of service that the employee has worked |
| Manual Periods | The value which can be manually entered to override the Calculated Consecutive Periods value. If not entered, the calculated amount will be used |
| Language | Language used |
| Comments | Comments related to this retirement request |
Create a Retirement Request (2nd proposal)
 | The Retirement Request screen requires the user to manually add a Retirement Request to a specific employee within the organization. |
Navigation
By default, you will be in Search Mode. To CREATE a Retirement Request, follow the steps below:
i. Click on the New icon ii. Click on the Save and Return icon iii. Click the individual Select Checkbox(es), under iv. Click the Remove icon v. Repeat steps (i) to (iv) for all additional Attachments. 4. Click on the Save icon
ADDITIONAL INSTRUCTIONS FOR FIELDS/TABS
|
Create a Retirement Request
 | The Retirement Request screen requires the user to manually add a Retirement Request to a specific employee within the organization. |
To CREATE a Retirement Request, follow the steps below: Navigation
By default, you will be in Search Mode.
To ADD Attachments to the Retirement Request, if required: 1. Click on the New icon 2. Click on the Save and Return icon 3. Click the individual Select Checkbox (es), under 4. Click the Remove icon 5. Repeat steps 1 to 4 for all required Attachments.
Retirement Benefits Retirement Calculation Results Click on the Save icon
|
Retirement Calculation Results
Navigation  click the New Icon
 under
under  ,
,
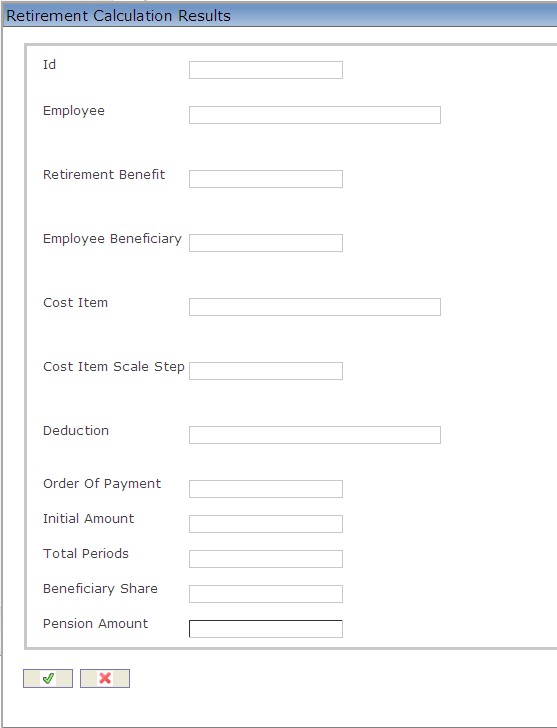
Note:The results can be viewed with this form. The pension amount is modifiable if it is set as a manual benefit.
Delete a Retirement Request
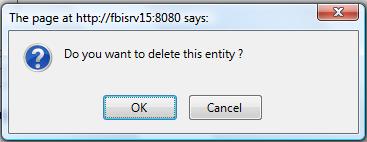
 | The Retirement Request screen requires the user to manually add a Retirement Request to a specific employee within the organization. Note: Only a Retirement Request that has the status Created is allowed to be deleted. If you need to eliminate a Retirement Request once it has started its workflow, the only option is to change its Retirement Status to Cancelled. |
To DELETE a Retirement Request, follow the steps below: Navigation
By default, you will be in Search Mode.
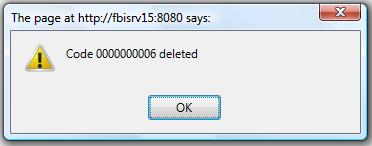
To Verify that the Retirement Request has been Deleted:
|
Modify a Retirement Request
The Retirement Request screen requires the user to manually add a Retirement Request to a specific employee within the organization.
To MODIFY a Retirement Request, follow the steps below:
Note:A Retirement Request can only be modified if the status is set to Created or Validation Approved. Depending on the status, certain fields will be read only.
Navigation 
By default, you will be in Search Mode.
- Enter the information to be used as retrieval criteria in the appropriate field(s).
If you prefer to see the list of all Retirement Requests, leave all fields blank. - Click on the Find icon
 . The list of Retirement Requests meeting the retrieval criteria will appear.
 - Click on the Retirement Request you want to modify.
You will then be in Update/Delete Mode. - Make the necessary modifications. To add or remove Attachments, refer to Attachments. Too add or remove Retirement Calculation Results, refer to Retirement Calculation Results.
- Click on the Update icon
 at the bottom of the screen to save your modifications. A window will appear to confirm the modification. Click OK to confirm.
Once a Retirement Request is Approved, the retiree will have a new assignment and automatic cost items created for payroll purposes. The results also appear in Retirement Summary and Details.
Workflow Transitions for Retirement Request
Validation of Retirement Request
Overview
The Retirement Request screen requires the user to manually add a Retirement Request to a specific employee within the organization.
Navigation 
To Request Validation to a Retirement Request, follow the steps below:
By default, you will be in Search Mode.
1. Find the Retirement Request which you would like to change status to Validation Requested.
Note: In order to Request Validation for a Retirement Request Status must be Created.
Note: Once Validation Requested, changes to the Retirement Request are no longer permitted.
Note: Once Validation is Requested there are two possibilities, Approve Validation, Reverse Validation Approval, Reject Validation, or Cancel Validation.
- Enter Code, Description or other Attributes of the Retirement Request.
- Click on the Find icon

2. Select the Retirement Request you would like to VALIDATE.
3. Select "Request Validation" from the drop down list in the Transition field.

4. A Transition Window will be displayed confirming the Transition. If necessary add a description in the Step Note in the Transition Window.

5. Click on the Finish Icon  to complete the Transition transaction, or click the Discard Icon
  to abort the transition.
6. Upon clicking the Finish Icon  a window will be displayed confirming the Retirement Request Workflow Transition was executed.

7. Click Okay on the Workflow Transition Executed window. The Retirement Request status is now set to Validation Requested.
To APPROVE a VALIDATION REQUEST, follow the steps below:
Navigation 
By default, you will be in Search Mode.
1. Find the Retirement Request which you would like to change status to Validation Approved.
Note: In order to Approve Validation for a Retirement Request Status must be Validation Requested.
Note: Once Retirement Request Validation is Approved, the next action is to either Reverse Validation Approval or Calculate Pension.
- Enter Code, Description or other Attributes of the Retirement Request.
- Click on the Find icon

2. Select the Retirement Request you would like to change APPROVE VALIDATION.
3. Select "Approve Validation" from the drop down list in the Transition field.

4. Repeat Steps 4-7, from above. The Retirement Request status is now set to Validation Approved.
To REVERSE VALIDATION APPROVAL, follow the steps below:
Navigation 
By default, you will be in Search Mode.
1. Find the Retirement Request which you would like to change status to Request Validation.
Note: In order to Reverse Validation Approval the Retirement Request Status must be Validation Approved.
- Enter Code, Description or other Attributes of the Retirement Request.
- Click on the Find icon

2. Select the Retirement Request you would like to change VALIDATION REQUESTED.
3. Select "Reverse Validation Approval" from the drop down list in the Transition field.

4. Repeat Steps 4-7, from above. The Retirement Request status is now set to Validation Requested.
To REJECT a VALIDATION REQUEST, follow the steps below:
Navigation 
By default, you will be in Search Mode.
1. Find the Retirement Request which you would like to change status to Validation Rejected.
Note: In order to Reject Validation for a Retirement Request Status must be Validation Requested.
- Enter Code, Description or other Attributes of the Retirement Request.
- Click on the Find icon

2. Select the Retirement Request you would like to change REJECT VALIDATION.
3. Select "Reject Validation" from the drop down list in the Transition field.

4. Repeat Steps 4-7, from above. The Retirement Request status is now set to Validation Rejected.
Calculate Pension
Overview
The Retirement Request screen requires the user to manually add a Retirement Request to a specific employee within the organization.
Navigation 
To Calculate Pension to a Retirement Request, follow the steps below:
By default, you will be in Search Mode.
1. Find the Retirement Request which you would like to change status to Calculated.
Note: In order to calculated pension retirement request status must be: Validation Approved, or Calculated.
Note: Once Pension is Calculated, the next step is to REQUEST APPROVAL. Following, the Request for Approval maybe: APPROVED, REJECTED, or CANCELED.
Note: Once validated, calculation is done according to the formulas. Calculations can be preformed automatically calculation or entered manually. In addition, records are created in retirement calculation results or users can enter manual amounts.
- Enter Code, Description or other Attributes of the Retirement Request.
- Click on the Find icon

2. Select the Retirement Request you would like to CALCULATE.
3. Select "Calculate Pension" from the drop down list in the Transition field.

4. A Transition Window will be displayed confirming the Transition. If necessary add a description in the Step Note in the Transition Window.

5. Click on the Finish Icon  to complete the Transition transaction, or click the Discard Icon
  to abort the transition.
6. Upon clicking the Finish Icon  a window will be displayed confirming the Retirement Request Workflow Transition was executed.

7. Click Okay on the Workflow Transition Executed window. The Retirement Request status is now set to Calculated.
To MODIFY a Pensions Calculation, follow the steps below:
1. Select to Pension you wish to calculate from the list available.
2. Make desired changes in the appropriate fields.
3. Click the CALCULATE icon to calculate results.
3. Select the  tab. Select the Pension to View. The following screen will appear:
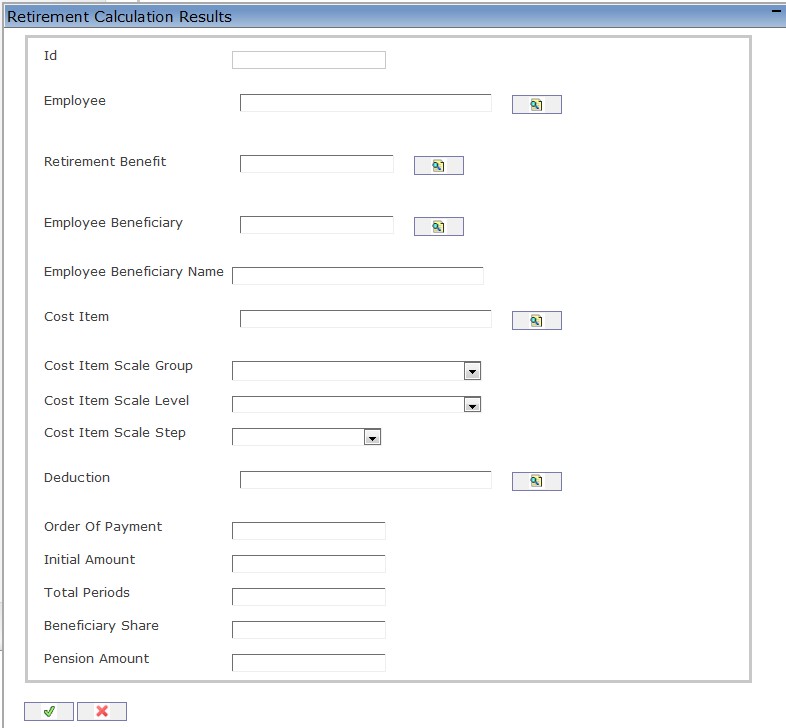
The changes are reflected in the Results window.
To Request Approval to a Pensions Calculation, follow the steps below:
Navigation 
By default, you will be in Search Mode.
1. Find the Retirement Request which you would like to change status to Validation Requested.
Note: In order to Request Approval for a Pensions Calculation the Retirement Request Status must be Calculated.
Note: Once Validation is Requested there are two possibilities, Approved, Rejected, or Cancel.
- Enter Code, Description or other Attributes of the Retirement Request.
- Click on the Find icon

2. Select the Retirement Request you would like to Request an Approval for.
3. Select "Request Approval" from the drop down list in the Transition field.

4. Repeat steps 4-7. The Retirement Request status is now set to Approval Requested.
To APPROVE an APPROVAL REQUEST for a PENSION CALCULATION, follow the steps below:
Navigation 
By default, you will be in Search Mode.
1. Find the Retirement Request which you would like to change status to Approved.
Note: In order to Approve a Pension Calculation a Retirement Request Status must be Approval Requested.
Note: Once Pensions Calculated is APPROVED, there are no further steps.
Note: Once Retirement Request is approved, the follow will occur:
- Records are created in the following entities Retirement Summary, Employee Assignment.
- The system will create Automatic Cost Items and Automatic Deductions. This retirement benefit will be included in the payroll calculation.
- Enter Code, Description or other Attributes of the Retirement Request.
- Click on the Find icon

2. Select the Retirement Request you would like to change APPROVAL REQUESTED.
3. Select "Request Approval" from the drop down list in the Transition field.

4. Repeat Steps 4-7. The Retirement Request status is now set to Approved.
To REJECT APPROVAL REQUEST for a PENSION CALCULATION, follow the steps below:
Navigation 
By default, you will be in Search Mode.
1. Find the Retirement Request which you would like to change status to Rejected.
Note: To Reject an Approval Request for a Pension Calculation, Retirement Request Status must be Approval Requested.
- Enter Code, Description or other Attributes of the Retirement Request.
- Click on the Find icon

2. Select the Retirement Request you would like to change REJECTED.
3. Select "Reject " from the drop down list in the Transition field.

4. Repeat Steps 4-7 above. The Retirement Request status is now set to Rejected.
Cancel a Retirement Request
Overview
The Retirement Request screen requires the user to manually add a Retirement Request to a specific employee within the organization.
To CANCEL a Retirement Request, follow the steps below:
Navigation 
By default, you will be in Search Mode.
1. Find the Retirement Request which you would like to change status to Canceled.
Note: To Cancel a Retirement Request Status must be Request Validation, Validation Approved, Calculated, and Approval Requested.
- Enter Code, Description or other Attributes of the Retirement Request.
- Click on the Find icon

2. Select the Retirement Request you would like to change to CANCELED.
3. Select "Cancel " from the drop down list in the Transition field.

4. A Transition Window will be displayed confirming the Transition. If necessary add a description in the Step Note in the Transition Window.

5. Click on the Finish Icon  to complete the Transition transaction, or click the Discard Icon
  to abort the transition.
6. Upon clicking the Finish Icon  a window will be displayed confirming the Retirement Request Workflow Transition was executed.

7. Click Okay on the Workflow Transition Executed window. The Retirement Request status is now set to Canceled.

 are mandatory fields. See additional instructions for Fields/Tabs in the next section.)
 under
under  to enter the Attachments (refer to
  to save the Attachments information and return to the Retirement Request screen, or click on the Discard icon
  to discard the Attachments entry and return to the Retirement Request screen.
 or Unselect All
  icon, to select or de-select all Attachments, when required.
 to remove the selected Attachment, if required.
 at the bottom of the Retirement Request page to save
 , click on the Find icon
  is a read only tab. It will display the employee's retirement benefits according to their plan.
 is a read only tab. It will display the results once the request has been calculated.

