Forms and Requests
Overview
This is where the user will find time sheet, leave request and travel request forms to fill out and submit as required.
Navigation
My Accumulated Benefit Summary
Overview
This feature shows summary of all Accumulated Benefit by the employee during a fiscal year.
Navigation
Human Resources ► Employee Self Service ► Forms and Requests ► My Accumulated Benefit Summary
My Accumulated Benefit Summary Screen Fields and Tabs
| Fields | Description |
| Employee | Shows the employee name. |
| Fiscal Year | Fiscal year of the accumulated benefits. |
| Accumulated Benefit | Lookup for search accumulated benefits. |
| Details | Details of the accumulated benefits. |
Time Sheets
Overview
Time Sheet is a method for recording the amount of a worker's time spent on each job. Time sheets record the start and end time of tasks and durations (i.e. the duration before & after meal breaks). The Time Sheet also contains a detailed breakdown of tasks accomplished throughout the project or program. The information entered in the Time Sheet is generally used for payroll, client billing, and increasingly for project costing, estimation, tracking and management.
Navigation
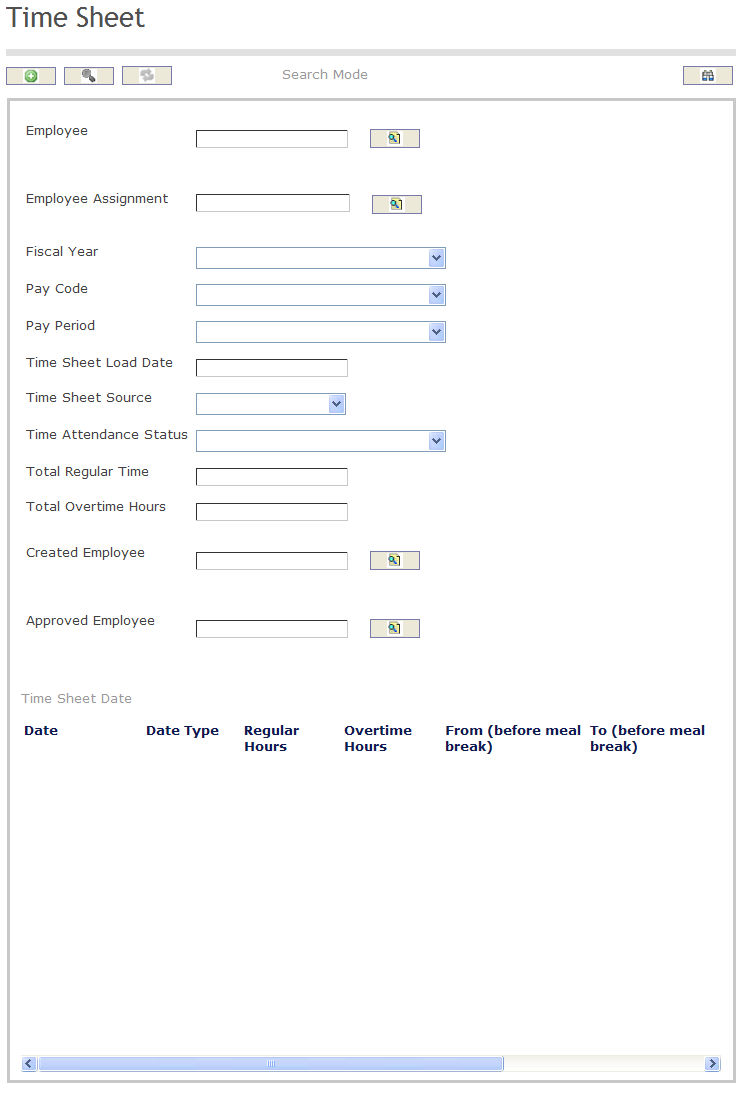
How to SEARCH:
- Enter the information to be used as retrieval criteria in the appropriate field (s). If you prefer to see a list of all Time Sheet, leave all fields blank
- Click on the Find icon

The Time Sheet screen includes the following fields:
Field | Definition |
Employee | The person responsible for completing the job task |
Employee Assignment | The work task assigned to an employee |
| Fiscal Year | Lists all fiscal years in which a time sheet can be recorded |
Pay Code | Lists all the different types of pay that have their own unique pay schedule |
Pay Period | Defines pay schedules |
| Time Record Load Date | Describes the date the time record was accessed |
| Time Sheet Source | Describes the source of the time record |
| Time Attendance Status | used to represent the settings for Time and Attendance assigned to a particular employee's assignment |
| Total Regular Time | Sum of Regular Hours Approved |
| Total Overtime Hours | Sum of Overtime Hours Approved |
| Created Employee | Created employee number. |
| Approved Employee | Approved employee number. |
Create a Time Sheet
To CREATE a Time Sheet that records the start and end time of tasks and durations, follow the steps below:
Navigation
By default, you will be in Search Mode.
1. Click on the New icon ![]() . You will then be in Insert Mode.
. You will then be in Insert Mode.
2. Enter the new Time Sheet information. Fields with an asterisk  are mandatory fields.
3. The Employee will be generated automatically by the system, based on the user.
4. To enter the Employee Assignment, if required, click on the Lookup icon  , click on Find icon
  to retrieve the Employee Assignment list, then select the Employee Assignment. Once the Employee Assignment is selected a Shift Schedule text box comes down to enter the shift. Refer to Employee Assignment for more information.
5. Choose the Fiscal Year, Pay Code and the Pay Period from the drop down menus.
6. Input the Time Record Load Date using the calendar ![]()
7. Select the Time Sheet Source and the Time Attendance Status from the drop down menus as required.
8. To view more details about the Created Employee field, click on the details icon  .
.
9. Click on the Save icon  at the bottom to save your new Time Sheet information. A window will appear to confirm the new Time Sheet creation. Click OK to confirm.
Note: This will create the Time Sheet. To Submit the Time Sheet you must change the Transition Status, which appears as a drop box at the top of the form after the Time Sheet is saved:

Modify a Time Sheet
A Time Sheet can only be modified if the status is Created. Once it has been submitted for approval it can no longer be modified by the user.
To MODIFY a Time Sheet that records the start and end time of tasks and duration, follow the steps below:
Navigation
By default, you will be in Search Mode.
- Enter the information to be used as retrieval criteria in the appropriate field (s). If you prefer to see a list of all Time Sheets, leave all fields blank.
- Click on the Find icon
 .
. - Click on the Time Sheet you want to modify.
You will then be in Update/Delete Mode. - Make the necessary modifications. To add or remove an Employee Assignment, refer to Employee Assignment.
- Click on the Update icon
 at the bottom of the screen to save your modifications. A window will appear to confirm the modification. Click OK to confirm.
Leave Request
Overview
Leave Requests are used to organize and control all types of leaves that employees can take within an organization.
The manager approves a variety of Leave requests sent by his employees, like Sick Leave, Maternity Leave and Vacation Leave.
To approve a Leave Request:
Option 1:
Go to Human Resources > Employee Management > Leave Management > Leave Request
1. Click on the Find  icon.
icon.
2. Select a Leave request with a status of Approval Requested from the list. Note. The user`s number matches the manager`s number. Example: The Leave Request from Riley Smith1 will be assigned to Manager Jordan Tremblay1 and the Leave Request from Riley Smith2 will be assigned to Manager Jordan Tremblay2.
3. Select Approve from the Transition drop down menu
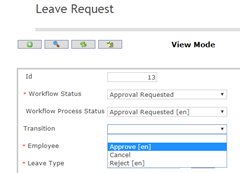
4. Click on the Transition  icon. A new window will appear.
5. Click on the Finish icon.
icon.
6. A message will confirm that the Workflow Transition has been Executed.
7. Click OK.
Option 2:
1. Go to Internal Message  section at the right side of the main screen.
2. The Leave Request will be accessed by clicking on the Green  dot.
dot.
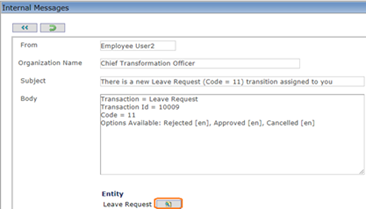
3. Accessing the Leave Request by clicking on the Update Domain  icon beside the Leave Request.
4. The window will display the Record waiting for an action.
5. Select Approve from the Transition drop down menu.
6. Click on the Transition  icon. A new window will appear.
7. Click on the Finish  icon.
icon.
8. A message will confirm that the Workflow Transition has been Executed.
9. Click OK.
Example:
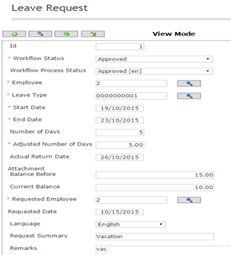
Option 3:
1. Click on the Dashboard  icon that is located on the right side panel of the main screen.
2. The window will display the Record waiting for an action.

3. Click on Leave Request button 
4. Another window will display more details on the request.
5. On the stage section, select Approval requested stage. The list will display all the leave request pending for your approval.
6. Click on the Update  icon. A new window will display the Leave Request form.
7. Select Approve from the Transition drop down list.
8. Click on the Transition  icon. A new window will appear.
9. Click on the Finish  icon.
icon.
10. A message will confirm that the Workflow Transition has been Executed.
11. Click OK.
Cancel a leave request
Cancel a leave request
To cancel a new leave request that’s has just been created
Go to Menu -> Employee Self Service -> Forms and Requests -> Leave Request
1. Click on the New  icon. The Employee Number will be populated automatically by the system.
2. Click on the Lookup  icon to select the Leave Type. Example: Annual Leave
3. Enter the Start and End Dates.
Notes
o The Number of Days will automatically display. The Length of leave will display also.
o The system will display the Balance Before and the Current Balance at the moment of the request. The Current Balance will be updated ONLY once the request is Saved.
4. Click on the Save  icon.
icon.
5. The request Workflow Process Status is set to Created.
6. To Cancel the Leave Request, select Cancel from the Transition drop down list.
7. Click on the Transition  icon. A new window will appear.
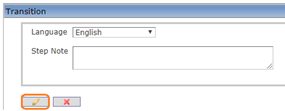
8. Click on the Finish  icon.
icon.
9. A message will confirm that the Workflow Transition has been Executed. As soon as the transition is performed, the Workflow Process Status is set to Cancelled.
To cancel a leave request that’s has been already sent to the manager for approval
Go to Menu -> Self Service -> Forms and Request -> Leave Request
1. Click on the Find  icon.
icon.
2. Select the Leave Request to cancelled.
3. Click on the hyperlink of the Leave Request on Approval Requested status workflow.
4. Go to the Transition field at top of the Form, select Cancel from the drop down list.
5. Click on the Transition  icon. A new window will display.

6. Click on the Finish  icon.
icon.
7. A message will confirm that the Workflow Transition has been Executed. As soon as the transition is performed, the Workflow Process Status is set to Cancelled.
Example:

Create a Leave Request
To CREATE a Leave Request follow the steps below:
Navigation
By default, you will be in Search Mode.
1. Click on the New icon ![]() . You will then be in Insert Mode.
. You will then be in Insert Mode.
2. Enter the new Leave Request information. Fields with an asterisk  are mandatory fields.
3. The Id will be generated automatically.
4. The Employee will be generated automatically, based on the user.
5. To enter the Leave Type, if required, click on the Lookup icon  , click on the Find icon
  to retrieve the Leave Types list, then select the Leave Type.
6. Input the Start Date, the End Date using the calendar ![]()
7. The Status will be generated automatically as Created.
9. The Requested Employee will be generated automatically, based on the user.
11. The Requested Date will be automatically filled by the system, its usually filled with the same date the information for the Leave Request is saved.
12. Choose the Language from the drop down menu.
13. Enter the Request Summary, which is a short description on the leave request.
14. Click on the Save icon  at the bottom to save your new Leave Request information. A window will appear to confirm the new Time Sheet creation. Click OK to confirm.

15. After the Leave Request is Created it must be Submitted. The user may also cancel the request before it has been submitted. A transition drop box will appear at the top of the form:

16. Select Request for Approval to submit the form. A confirmation box will appear:
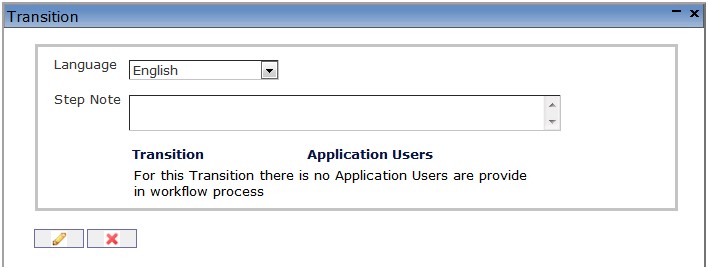
17. Enter a note in the Step Note section and click on the Finish  icon
icon
18. A message will appear:
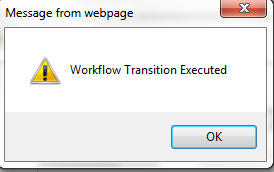
Fields
The Leave Request screen includes the following fields:
Field | Definition |
ID | Unique Leave request identifier generated by the system. |
| Employee | Employee ID of the person requesting the leave. |
| Leave Type | Type of requested leave. Defined as Leave Types |
| Start Date | Requested start date for the leave to start. |
| End Date | Requested end date for the leave to end. |
| Adjusted Number of Days | Number of leave days from start to end. |
| Actual Return Date | Requested date to return or end leave. This field is used if actual return date is different from the requested end date. |
| Status | Leave approval status. Status are: 1. Created 2. Approval Requested. 3. Approved by Supervisor 4. Approved 5. Rejected 6. Canceled |
| Requested Employee | Employee ID of the person requesting the leave will be displayed. |
| Requested Date | Date leave was requested. |
Language | Language used. |
| Request Summary | Short text on the leave request. |
| Create Temporary Position | Create a temporary. |
| Leave Request Required Documents Tab | This tab used to attach and validate the required document for the leave request. |
Request 1 week vacation
The Employee can easily request his own Vacation Leave via self-service
Note. Assumption: the Employee gets his or her annual vacation entitlement at the beginning calendar year.
The Employee is entitled to 15 days per calendar year.
To Request a week vacation
Go to Menu > Employee Self Service > Forms and Requests > Leave Request
1. Click on the New icon. The Employee Number will be populated automatically by the system.
2. To select the Leave Type click on the Lookup  icon.
icon.
3. Click on the Find  icon.
icon.
4. Select the Annual Leave
5. Enter the Start Date, example 1/2/2019
6. Enter the End Date, example: 9/2/2019
Notes.
o The Number of Days and the Length of leave will be automatically displayed.
o The system will display the Balance Before and the Current Balance at the moment of the request. The Current Balance will be updated ONLY once the request is Saved.
o When the employee requests one week of vacation, the system will keep track of the balance of his remaining vacation.
7. Click on the Save  icon.
icon.
8. Go to the Transition field at top of the Form, click on Request Approval. (Do not select the option Cancel at this stage).
9. Click on the Transition  icon. A new window will appear.

10. Click on the Finish  icon. A message will confirm that the Workflow Transition has been Executed.
11. Click OK. As soon as the transition is performed, the workflow will transition to Approval Requested.
Example:
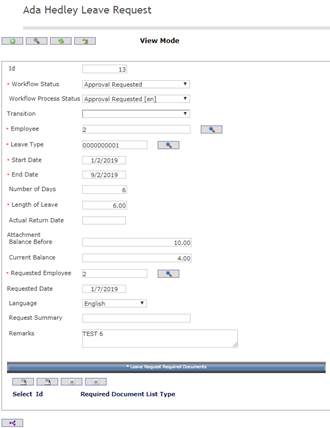

Note. The direct manager will receive an Internal Message prompting him to take action. Once the manager approves the leave request, the Employee will receive an Internal Message stating that his vacation has been approved.
Modify a Leave Request
A Leave Request can only be modified if the status is Created. Once it has been submitted for approval it can no longer be modified by the user.
Navigation 
By default, you will be in Search Mode.
- Enter the information to be used as retrieval criteria in the appropriate field (s). If you prefer to see a list of all Leave Requests, leave all fields blank.
- Click on the Find icon
 .
. - Click on the Leave Request you want to modify.
You will then be in Update/Delete Mode. - Make the necessary modifications.
- Click on the Update icon
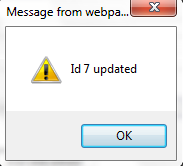
 at the bottom of the screen to save your modifications. A window will appear to confirm the modification. Click OK to confirm.
Travel Request
Overview
The user can review, fill out and submit travel requests for Business Trips. The user can also see other employee's going on the same Business Trip.
Navigation
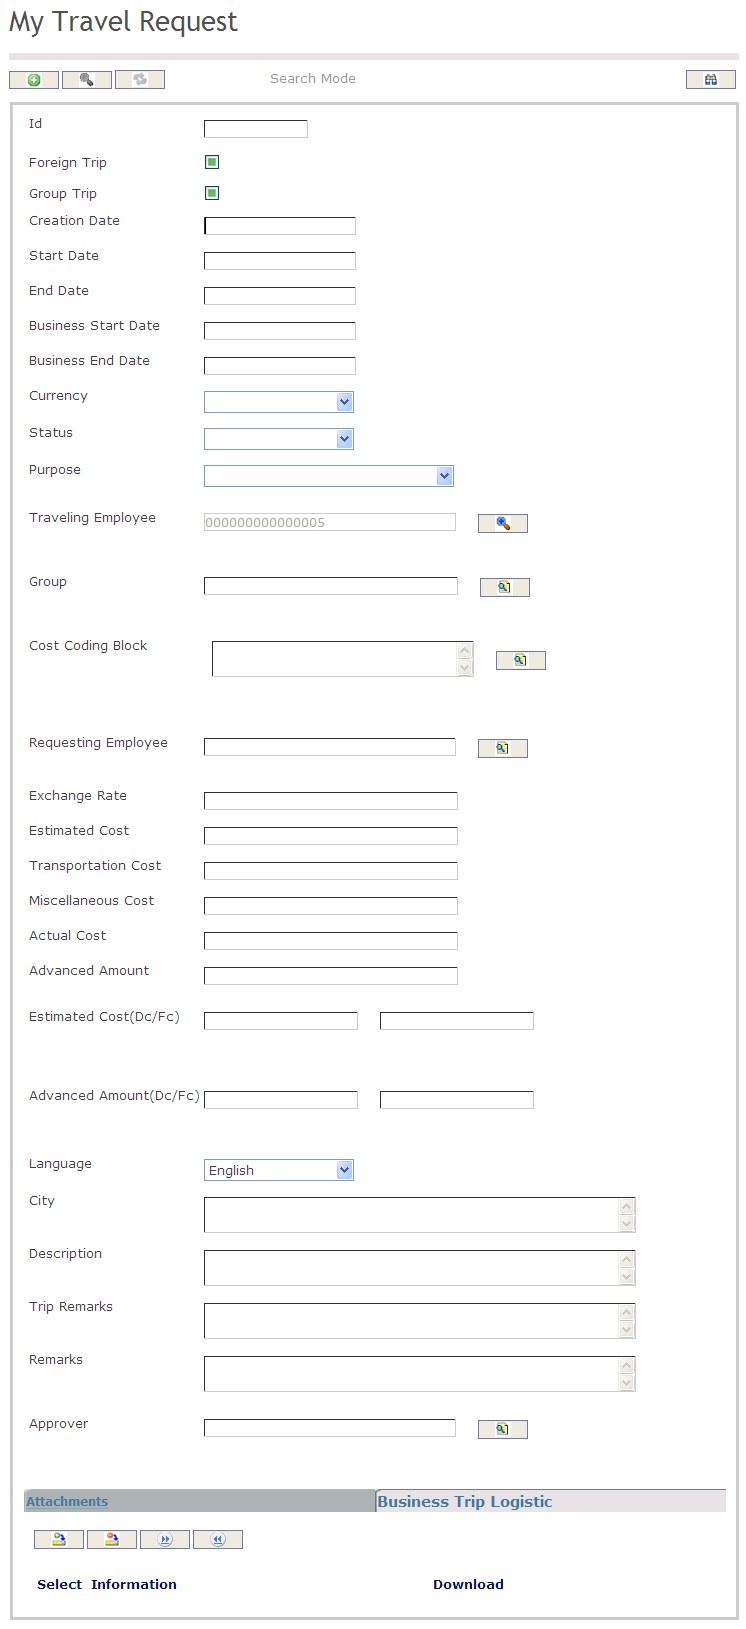
How to SEARCH:
- Enter the information to be used as retrieval criteria in the appropriate field (s). If you prefer to see a list of all Travel Requests, leave all fields blank
- Click on the Find icon

The Travel Request screen includes the following fields:
Field | Definition |
Foreign Trip | Identifies if the trip is outside the country |
Group Trip | Identifies if this trip will be attended by one or by multiple parties |
| Creation Date | Date Travel Request is created |
| Start Date | Start Date of trip (departure date) |
| End Date | End Date of trip (return date) |
| Business Start Date | Date Business Trip intended event starts |
| Business End Date | Date Business Trip intended event ends |
Currency | Contains the central repository for all currencies used throughout the system |
| Status | Status of Travel Request |
Purpose | Describes the purpose of the business trip |
Traveling Employee | The employee leaving on a business trip |
| Group | Select group if applicable |
Cost Coding Block | This entity has the information of every coding block with the structure (number of elements and order of concepts) of the Group |
Requesting Employee | The employee requesting the business trip |
| Exchange Rate | Exchange rate of destination |
Estimated Cost | The estimated cost (budget) for the trip |
| Transportation Cost | Indicates cost related to transportation |
Miscellaneous Cost | Indicates any miscellaneous amounts |
Actual Cost | The actual total cost of the trip |
Advanced Amount | Indicates the advanced funds amount the employee is requesting in order to undertake the trip |
| Actual Cost (Dc/Fc) | Actual cost |
| Language | Language Used |
| City | City of business trip |
| Description | Description of trip |
Trip Remarks | Provides for a brief remark on the trip outside of the trip description |
| Remarks | Other remarks |
| Approver | Trip approver |
| Attachments | Attachments related to trip |
| Business Trip Logistic | Business Trip logistic records |
Create Travel Request
To CREATE a Travel Request follow the steps below:
Navigation
By default, you will be in Search Mode.
1. Click on the New icon ![]() . You will then be in Insert Mode.
. You will then be in Insert Mode.
2. Enter the new Travel Request information. Fields with an asterisk  are mandatory fields.
3. The Creation date will be generated automatically.
4. Check the Foreign Trip box if the trip is outside the country and check box the Group Trip if more than one person is attending the trip.
- Foreign Trip: Identifies if the trip is outside the country
- Group Trip: Identifies if this trip will be attended by one or by multiple parties
5. Input the Start Date, End Date, , Business Start Date, Business End Date using the calendar ![]()
6. Choose the Currency as required from the drop down menu
7. Choose the Purpose for the business trip from the drop down menu
- Purpose: Identifies the purpose of the trip
8. To enter the Traveling Employee, click on the Lookup icon  , click on Find icon
  to retrieve the Employee list, then select the Employee. To view more details about the Traveling Employee click on the Details
  button.
9. To enter the Group, click on the Lookup icon  , click on Find icon
  to retrieve the Business Trip Group list, then select the Business Trip Group. To view more details about the Group click on the Details
  button.
10. To enter the Cost Coding Block click on New ![]() or click on the Lookup icon
or click on the Lookup icon  , click on Find icon
  to retrieve the Cost Coding Block list, then select the Cost Coding Element. To view more details about the Cost Coding Block click on the Details
  button.
11. To view more details about the Requesting Employee click on the Details  button.
12. Enter the Estimated Cost, Transportation Cost, Miscellaneous Cost, Actual Cost, Advanced Amount, Estimated Cost(Dc/Fc), and the Advanced Amount(Dc/Fc).
- Estimated Cost: The estimated cost (budget) for the trip
- Miscellaneous Cost: Indicates any miscellaneous amounts
- Actual Cost: The actual total cost of the trip
- Advanced Amount: Indicates the advanced funds amount the employee is requesting in order to undertake the trip
13. Choose the desired Language from the drop down menu.
14. Enter the City, Description, and any Trip Remarks in the fields provided.
- Trip Remarks: Provides for a brief remark on the trip outside of the trip description
15. Click on the New icon  under
under  to enter the Attachments (refer to Attachments for more information).
16. Click on the Save and Return icon  to save the Attachments information and return to the Business Trip screen, or click on the Discard icon
  to discard the Attachments entry and return to the Business Trip.
17. Click the individual Select Checkbox (es), under  to select and de-select the Attachment (s), as required, or click the Select All icon
  or Unselect All
  icon, to select or de-select all Attachments, if required.
18. Click the Remove icon  to remove the selected Attachment, if required.
19. Click on the New icon  under
under  to enter the Business Trip Logistic (refer to Business Logistic for more information).
20. Click on the Save and Return icon  to save the Business Trip Logistic information and return to the Business Trip screen, or click on the Discard icon
  to discard the Business Trip Logistic entry and return to the Business Trip.
21. Click the individual Select Checkbox (es), under  to select and de-select the Attachment (s), as required, or click the Select All icon
  or Unselect All
  icon, to select or de-select all Attachments, if required.
22. Click the Remove icon  to remove the selected Business Trip Logistic, if required.
23. Click on the Save icon  at the bottom of the Business Trip page to save your new Business Trip information. A window will appear to confirm.
