Travel and Subsistence Management
Business Trip Group
Overview
The Business Trip Group defines the list of individual employees who are on a business trip and are part of the same group. Individual employee itineraries may be different, but their intention is to be part of the same group going on a common business trip.
A Business Trip Group is not required for an employee to go on a business trip. It is an optional component in which when two or more employees want to be part of the same group. An employee may create the trip group and other trip participants can then associate their individual business trips to that same business trip group.
Navigation 
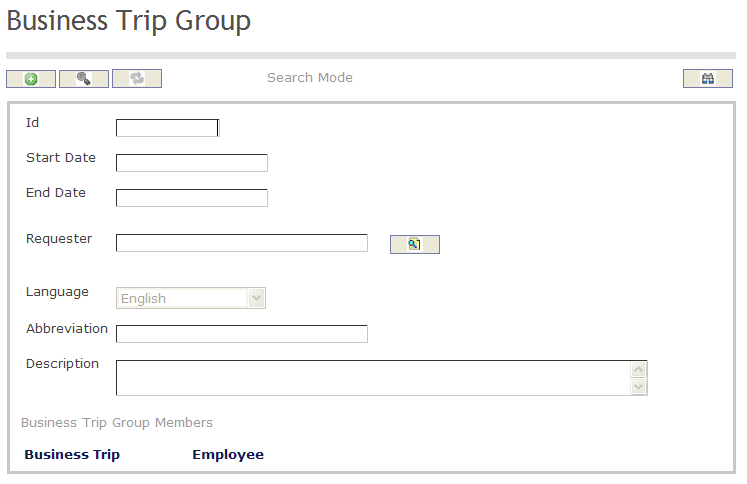
How to SEARCH:
- Enter the information to be used as retrieval criteria in the appropriate field (s). If you prefer to see a list of all tardiness policies, leave all fields blank
- Click on the Findicon

The Business Trip Group screen includes the following fields:
Field | Definition |
ID | Unique identification number describing the business trip group |
Start Date | Start date for the business trip group |
| End Date | End date for the business trip group |
| Requester | Describes the employee requesting the business trip |
| Language | Language used |
Description | Description of the Business Trip Group |
Abbreviation | Refers to the short format describing the Business Trip Group |
Create A Business Trip Group
To CREATE a Business Trip Group that list individual employees who are on a business trip and are part of the same group, follow the steps below:
Navigation 
By default, you will be in Search Mode.
1. Click on the New icon ![]() . You will then be in Insert Mode.
. You will then be in Insert Mode.
2. Enter the new Business Trip Group information. Fields with an asterisk  are mandatory fields.
3. Enter the Business Trip Group Start Date and End Date in the fields provided using the calendar ![]()
4. To see more details about the Requester, click on the details button  to view the employee details.
5. Choose the Language desired from the drop down menu.
6. Enter the Abbreviation, and fill in the Description for the Business Trip Group.
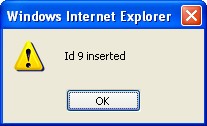
7. Click on the Save icon  at the bottom to save your new Business Trip Group information. A window will appear to confirm the new Business Trip Group creation. Click OK to confirm.
Delete A Business Trip Group
To DELETE a Business Trip Group that list individual employees who are on a business trip and are part of the same group, follow the steps below:
Navigation 
By default, you will be in Search Mode.
- Find the Business Trip Group(s) you want to Delete
- Enter the information to be used as retrieval criteria in the appropriate field(s). If you prefer to see all Business Trip Group, leave all fields blank.
- Click Find
 .
. - Select the Business Trip Group you want to Delete.
- Click on the Delete icon
 .
. - A window will appear asking you to confirm

- Click OK to confirm and delete the Business Trip Group
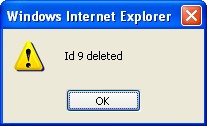
- A window will be displayed confirming the Business Trip Groups has been deleted
To Verify that the Business Trip Group has been Deleted:
- Click on the Search icon

- Enter the Business Trip Group information in the appropriate field (s).
- Click on the Find icon

- This window will appear

Modify A Business Trip Group
To MODIFY a Business Trip Group that list individual employees who are on a business trip and are part of the same group, follow the steps below:
Navigation 
By default, you will be in Search Mode.
- Enter the information to be used as retrieval criteria in the appropriate field (s). If you prefer to see a list of all Business Trip Groups, leave all fields blank.
- Click on the Find icon
 .
. - Click on the Business Trip Group Field you want to modify.
You will then be in Update/Delete Mode. - Make the necessary modifications.
- Click on the Update icon
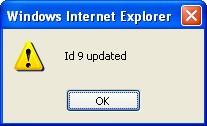
 at the bottom of the screen to save your modifications. A window will appear to confirm the modification. Click OK to confirm.
Business Trip Purpose
Overview
The Business Trip Purpose defines the list of valid rationales for the purposes of requesting a Business Trip. The Business Trip application is filled and submitted by the employee requesting the trip. The employee must provide the Start and End Dates, the Purpose, the Logistics, Estimated Costs and submit them to the managers for approval. An example of a valid business trip rationales include: Study Tour, Training, Site Visit (visiting a site related to government operations), Project/Program, and Operations.
Navigation 
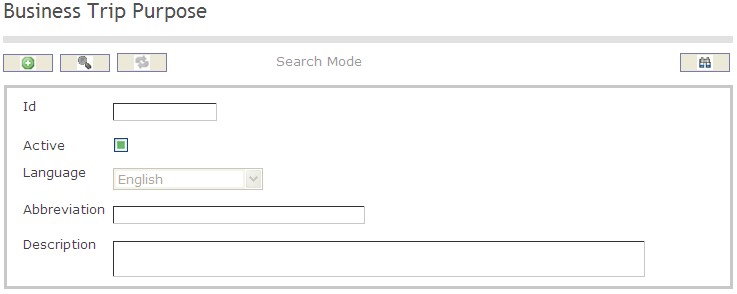
How to SEARCH:
- Enter the information to be used as retrieval criteria in the appropriate field (s). If you prefer to see a list of all business trip purposes, leave all fields blank
- Click on the Find icon

The Business Trip Purpose screen includes the following fields:
Field | Definition |
ID | Unique identification number describing the business trip purpose |
Active | Active Status - if checked, Business Trip Purpose will not be used/active |
Description | Description of the Business Trip Purpose |
Abbreviation | Refers to the short format describing the Business Trip Purpose |
Create A Business Trip Purpose
To CREATE a list of valid rationales for the purposes of requesting a Business Trip, follow the steps below:
Navigation 
By default, you will be in Search Mode.
1. Click on the New icon  . You will then be in Insert Mode.
2. Enter the new Business Trip Purpose information. Fields with an asterisk  are mandatory fields.
3. Check the Active box as necessary, and then select the Language from the drop down menu.
- Active: Active Status - if checked, Business Trip Purpose will not be used/active
4. Enter the Abbreviation of the Business Trip Purpose in the Abbreviation field, and describe the Business Trip Purpose in the Description field.
- Abbreviation: Refers to the short format describing the Business Trip Purpose.
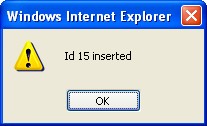
5. Click on the Save icon  at the bottom to save your new Business Trip Purpose information. A window will appear to confirm the new School Type creation. Click OK to confirm.
Delete A Business Trip Purpose
To DELETE a list of valid rationales for the purposes of requesting a Business Trip, follow the steps below:
Navigation 
By default, you will be in Search Mode.
- Find the Business Trip Purpose you want to Delete.
- Enter the information to be used as retrieval criteria in the appropriate field(s). If you prefer to see all Business Trip Purposes, leave all fields blank.
- Click Find
 .
. - Select the Business Trip Purpose you want to Delete.
- Click on the Delete icon
 .
. - A window will appear asking you to confirm.

- Click OK to confirm and delete the Business Trip Purpose
- A window will be displayed confirming the Business Trip Purpose has been deleted

To Verify that the Business Trip Purpose has been Deleted:
- Click on the Search icon

- Enter the Business Trip Purpose information in the appropriate field (s).
- Click on the Find icon

- This window will appear

Modify A Business Trip Purpose
To MODIFY a list of valid rationales for the purposes of requesting a Business Trip, follow the steps below:
Navigation 
By default, you will be in Search Mode.
- Enter the information to be used as retrieval criteria in the appropriate field (s). If you prefer to see a list of all Business Trip Purposes, leave all fields blank.
- Click on the Find icon
 .
. - Click on the Business Trip Purpose you want to modify.
You will then be in Update/Delete Mode. - Make the necessary modifications.
- Click on the Update icon
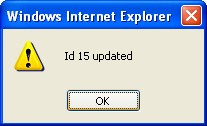
 at the bottom of the screen to save your modifications. A window will appear to confirm the modification. Click OK to confirm.
Per Diem Rate Table
Overview

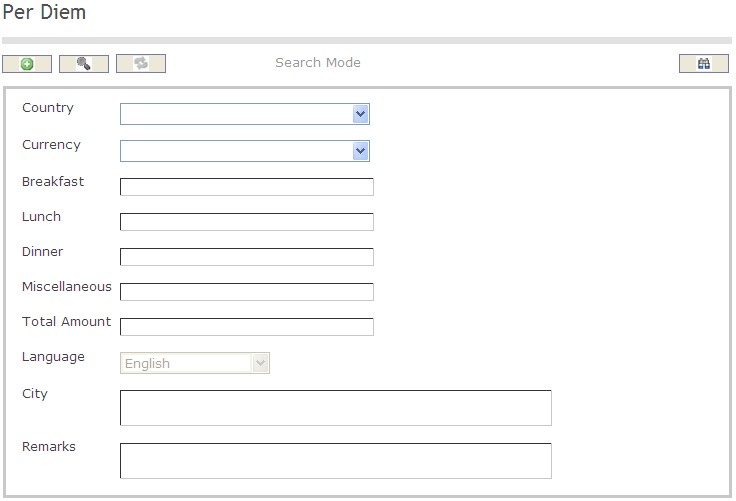
How to SEARCH:
- Enter the information to be used as retrieval criteria in the appropriate field (s). If you prefer to see a list of all Per Diem Rate Table , leave all fields blank
- Click on the Findicon

The Per Diem Rate Table screen includes the following fields:
Field | Definition |
Currency | Defines the type of currency used, i.e: Dollar, Dinar, Euro |
| Breakfast | Refers to per diem amount allocated to the breakfast |
| Lunch | Refers to per diem amount allocated to lunch |
| Dinner | Refers to per diem amount allocated to dinner |
Miscellaneous | Refers to per diem amount allocated to miscellaneous (general) expenses |
| Total Amount | Per diem total amount |
Remarks | Includes any remark or comment related to the Per Diem Table |
City | Refers to the city for which the Per Diem Table is applicable |
Create A Per Diem Rate
To CREATE a Per Diem Rate Table that includes the Per Diem Rates by country and city, follow the steps below:
Navigation 
By default, you will be in Search Mode.
1. Click on the New icon ![]() . You will then be in Insert Mode.
. You will then be in Insert Mode.
2. Enter the new Per Diem information. Fields with an asterisk  are mandatory fields.
3. Choose the Country, and the Currency from the drop down menus.
4. Fill in the Breakfast, Lunch, Dinner, Miscellaneous, and Total Amount as required.
- Miscellaneous: Refers to Miscellaneous (general) expenses.
5. Choose the Language from the drop down menu.
6. Fill in the City name and the Remarks in the fields as required.
- Remarks: Refers to a brief description on the types of of miscellaneous expenses typical the country/city
- City: Refers to a city for which the Per Diem Rate applies.
7. Click on the Save icon  at the bottom to save your new Per Diem information. A window will appear to confirm the new Per Diem creation. Click OK to confirm.

Delete A Per Diem Rate
To DELETE a Per Diem Rate Table that includes the Per Diem Rate for a particular country and city, follow the steps below:
Navigation 
By default, you will be in Search Mode.
- Find the Per Diem Rate you want to Delete
- Enter the information to be used as retrieval criteria in the appropriate field(s). If you prefer to see all Per Diem Rates, leave all fields blank.
- Click Find
 .
. - Select the Per Diem Rate you want to Delete.
- Click on the Delete icon
 .
. - A window will appear asking you to confirm

- Click OK to confirm and delete the Per Diem Rate
- A window will be displayed confirming the Per Diem Rate has been deleted

To Verify that the Per Diem Rate has been Deleted:
- Click on the Search icon

- Enter the Per Diem Rate information in the appropriate field (s).
- Click on the Find icon

- This window will appear

Modify A Per Diem Rate
To MODIFY a Per Diem Rate Table that includes the Per Diem Rates for a particular country and city, follow the steps below:
Navigation 
By default, you will be in Search Mode.
- Enter the information to be used as retrieval criteria in the appropriate field (s). If you prefer to see a list of all Per Diem Rates, leave all fields blank.
- Click on the Find icon
 .
. - Click on the Per Diem Rate you want to modify.
You will then be in Update/Delete Mode. - Make the necessary modifications.
- Click on the Update icon
 at the bottom of the screen to save your modifications. A window will appear to confirm the modification. Click OK to confirm.
