Chart of Accounts Design
Overview
The Chart of Accounts (COA) Design screen is used to populate and structure a specific COA. Information must be populated into the Segments, Concepts, Groups and Elements.
Navigation
Admin ► Chart of Accounts ► Chart of Accounts Design
Understanding Chart of Accounts Design screen Features
NOTE: A Chart of Accounts record must already exist as entered in Chart of Accounts. In order to know about Chart of Accounts, click here.
Building the hierarchical Structure of the Segments
Select the Chart of Accounts by clicking Find
 button.
Click on the drop-down menu to select the COA.

- Click Save button.
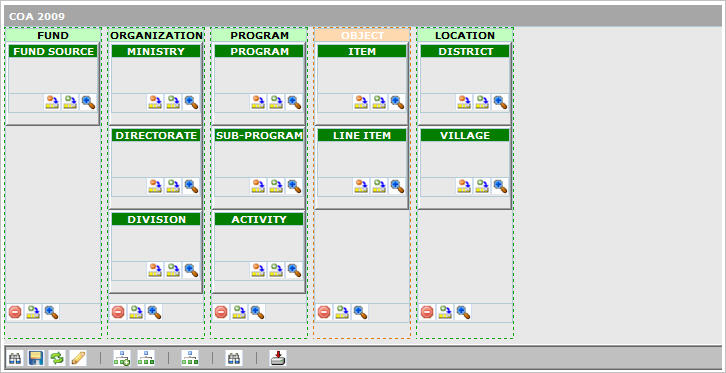
- The Chart of Account structure window will appear

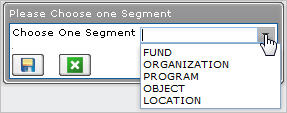
- Add the Segments. In order to know about Segment, click here.
NOTE: Segment records must already exist.

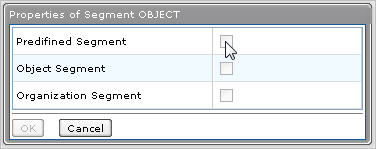
- For Organization, users must tag it as Organization Segment, by clicking on the Organization Segment properties button and selecting the Organization Segment checkbox (as shown below).
- For Economic Classification, you must tag it as Object Segment and Predefined Segment by clicking on the Segment properties button and selecting the Object Segment and Predefined Segment checkboxes.

- Add the Concepts. (A concept within the COA represents a collection of elements, as an example: line items, district, fund source, institution, and main category. In other words, it represents what in the classic application is known as ‘Table’.)
Follow the steps below for each Concept:
- Add lowest level Concept of core structure by clicking on the Add Concept button for the Segment in question
- Add next parent Concept of core structure by clicking on the Add Concept button for the Segment in question (repeat until completion)
- *Note that for the 4 Predefined Concepts, you must flag them as such and specify the Predefined Concept they map to
- For each side table hierarchy, select the core Concept where it is rooted and add Side Concept
- Add parent to side concept (repeat until completion)
- Add the Groups. (A group is a collection of Segment Levels. Currently in Financials, these are known as Coding Blocks: Allotment 1, Allotment 2, Budgets, and GL are examples of Groups. The Chart of accounts definition can allocate as many as groups as needed.)
Follow the steps below for each Group:
- Click on the Define new COA Group button
- Enter all required information in Properties for COA Group screen
NOTE: Select Is Budget Execution and/or Is Budget Preparation as required, at least one Group should be tagged as Budget Execution
- Add Valid Code Combination rules as required, by clicking on the Add New Rule button

As an example, the following expression indicates:
OA?/-[1200|1300]/[PRJ00_PRJ99];-[PRJ11|PRJ21]/-7????
Segment 1: OA? (all the elements that starts with OA are included)
Segment 2: -[1200|1300] (the values 1200 and 1300 are not included)
Segment 3: [PRJ00_PRJ99] (the range of values that starts with PRJ00 and ends with PRJ99 are included)
Segment 4: -[PRJ11|PRJ21] (elements PRJ11 and PRJ21 are not included)
Segment 5: -7???? (elements from 70000 up to 79999 are not included).
- Click on Save button, the following screen will popup
- Click on the Group and Is Mandatory checkboxes as required.
If Group checkbox is selected, then such Concept will be consider as part of the Coding Block.
If Is Mandatory checkbox is selected, then such Concept will be mandatory for General Ledger transactions.
8. Add the Elements. (An element of the COA is the single value of each concept. As an example, the concept Line Item can have the following elements: 6001 Salary, 6002 Allowance. The concept Institution can have: 011 Ministry of Health, 012 Ministry of Finance, etc. There could be transactions where Coding Blocks partially entered are allowed, in that case, the user has to configure 'default value for such elements' like 'XXXXX'. Usually these codes are used in some accounting transactions viz. balance sheet.)
Follow the steps below for each Element:
- Click on the Concept Properties button, the following screen will popup:
- Click on the Add Elements button
 , the following screen will popup:
- Add Element information, including Parent / Children Roll up Elements relationships as required
NOTE: For automatic Element upload, click on the Upload COA XML File button and browse for the file.