- Human Resources
- Support Entities
- Accumulated Benefits Management
- Assignment Management
- Position Management
- Employee Management
- Promotion Management
- Performance Appraisal Management
- Retirement Management
- Leave Management
- Recruitment Management
- Salary Scale Management
- Succession Planning
- Termination of Employment
- Time and Attendance Management
- Training Management
- Travel and Subsistence Management
- Financial Disclosure
- Batch Update
- Position Management
- Batch Update
- Disciplinary
- Employee Management
- Financial Disclosure
- Budget Planning For Salaries
- Export HR Data
- Reports
- PMIS Interface
- External Recruitment
- Help Function
- Employee Self Service
- Support Entities
FreeBalance Accountability Suite
Search
User login
Create a Work Location
Wed, 2010-06-02 10:44 — slind
Work Location provides information regarding where each employee works.
To CREATE a Work Location, follow the steps below:
Navigation 
By default, you will be in Search Mode.
- Click on the New icon
 (you will then be in Insert Mode).
 - Enter the new Work Location information. Fields with an asterisk
 are mandatory fields.
 - Enter the Code, click on the Active checkmark, and select the Language, as required.
- Code: Unique identification code of the work location.
- Active: Active Status - if checked, Work Location is available.
- Language: Language used.
- Enter Name.
- Name: Name of the Work Location.
To ADD Contacts to the Work Location, if required:
1. Click on the  tab and then click on the New icon
  to enter Contacts (refer to Contacts for more information).
2. Click on the Save and Return icon  to save the Contact information and return to Work Locations, or click on the Discard icon
  to discard the Contact entry and return to Work Locations.
3. Click the Remove icon  to remove the selected Contacts, if required.
4. Click the individual Select Checkbox (es) to select and de-select the Contact (s), as required, or click the Select All icon  or Unselect All
  icon, to select all Contacts or de-select all Contacts, if required.
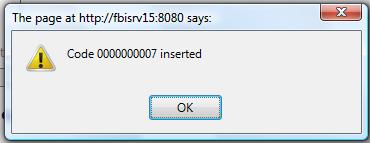
Click on the Save icon  at the bottom of the Work Location to save your new Work Location information. A window will appear to confirm.