The FreeBalance Accountability Platform GUI offers to the end-user the following functionality, via Icons and Buttons:  Create / Add - Set screen to Insert Mode. Users can then create a new record through this button. Create / Add - Set screen to Insert Mode. Users can then create a new record through this button.
 Search - Set screen to Search Mode. Users can enter filter criteria and search existing entries. By default, when entering a feature, users are in Search Mode. Search - Set screen to Search Mode. Users can enter filter criteria and search existing entries. By default, when entering a feature, users are in Search Mode.
 Results - Once a record has been created or searched for, users can return to the results screen when necessary. Results - Once a record has been created or searched for, users can return to the results screen when necessary.
 Generate Data Import Template - Allows users to generate the template file related to the screen. Generate Data Import Template - Allows users to generate the template file related to the screen.
 Execute Data Import - It allows users to execute the data import for the related screen. Execute Data Import - It allows users to execute the data import for the related screen.
 Workflow History - Allows users to view the history of workflow transitions for an item. The following is presented: Workflow History - Allows users to view the history of workflow transitions for an item. The following is presented:

 Workflow Transition - Click this button to change the workflow status, and move the process to the next stage in the workflow. Workflow Transition - Click this button to change the workflow status, and move the process to the next stage in the workflow.
 Delete - Click to remove the record. A window is displayed confirming the item is deleted. Delete - Click to remove the record. A window is displayed confirming the item is deleted.
 Lookup - The Lookup tool allows users to browse and select existing items. Once selected, all available information automatically populates the corresponding fields. Lookup - The Lookup tool allows users to browse and select existing items. Once selected, all available information automatically populates the corresponding fields.
 Save - Click to save the information inputted. The record is stored and a confirmation message is presented. Save - Click to save the information inputted. The record is stored and a confirmation message is presented.
 Import - Import a file from outside the GRP. When clicking the icon, a screen appears: Import - Import a file from outside the GRP. When clicking the icon, a screen appears:
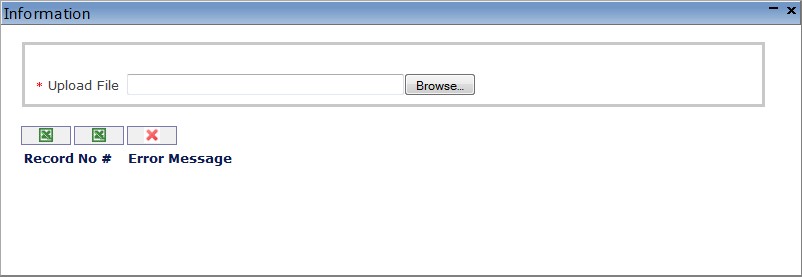
Click the Browse icon , to search for a file. Click the , to search for a file. Click the  icon to Import an Excel or CSV file. icon to Import an Excel or CSV file.  Discard - Eliminate the selected file. Discard - Eliminate the selected file.
 Accept - Save changes and return to the previous screen. Accept - Save changes and return to the previous screen.
 Find - Present a list of existing items as per the selected filter criteria. From the list users may select one record to retrieve the stored information. Find - Present a list of existing items as per the selected filter criteria. From the list users may select one record to retrieve the stored information.
 Update - Select to update all changes made to a record. Update - Select to update all changes made to a record.
 New - Add a new item to the detail tab. A screen appears allowing users to enter new information for a detail item. New - Add a new item to the detail tab. A screen appears allowing users to enter new information for a detail item.
 Remove - Remove a record. A screen appears to confirm the record is deleted. Remove - Remove a record. A screen appears to confirm the record is deleted.
 Select All - When users are required to sort by a specific filtering criterion, the Select All button allows to highlight all the filter criteria. Select All - When users are required to sort by a specific filtering criterion, the Select All button allows to highlight all the filter criteria.
 Unselect All - When users are required to sort by a specific filtering criterion, the Unselect All button unselects all previously highlighted filter criteria. Unselect All - When users are required to sort by a specific filtering criterion, the Unselect All button unselects all previously highlighted filter criteria.
The sort by list appears as follows: 
 Expand tree structure - Click to reveal all items under a particular list. Expand tree structure - Click to reveal all items under a particular list.
 Collapse tree structure - Click to hide all items under a particular list. Collapse tree structure - Click to hide all items under a particular list.
 Mandatory field - Indicates a field that is required. Mandatory field - Indicates a field that is required.
 Range Field - Allows users to select range of values. Range Field - Allows users to select range of values.
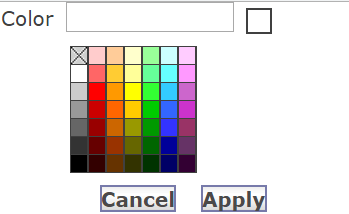
 Color Picker -Allows users to select color code. The following window appears: Color Picker -Allows users to select color code. The following window appears:
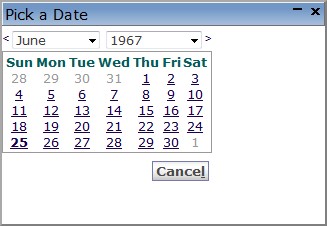
 Calendar - Allows users to select a calendar date. The following window appears: Calendar - Allows users to select a calendar date. The following window appears:
Audit - Allows users to view the audit history for the current record. The following screen appears: 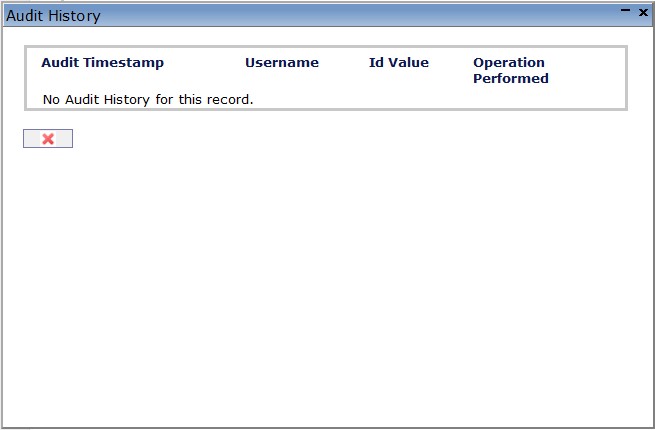
 HTML Export - When exporting a report, click the icon to export in HTML format. HTML Export - When exporting a report, click the icon to export in HTML format.
 PDF - When exporting a report, click the icon to export in PDF format. PDF - When exporting a report, click the icon to export in PDF format.
 PDF - When exporting a report, click the icon to export in PDF format. PDF - When exporting a report, click the icon to export in PDF format.
 Excel - When exporting a report, click the icon to export in Excel format. Excel - When exporting a report, click the icon to export in Excel format.
 Excel XLSX- When exporting a report, click the icon to export in Excel XLSX format. Excel XLSX- When exporting a report, click the icon to export in Excel XLSX format.
 RTF - When exporting a report, click the icon to export in RTF format. RTF - When exporting a report, click the icon to export in RTF format.
 ODT - When exporting a report, click the icon to export in ODT format. ODT - When exporting a report, click the icon to export in ODT format.
 ODS - When exporting a report, click the icon to export in ODS format. ODS - When exporting a report, click the icon to export in ODS format.
 MS Word - When exporting a report, click the icon to export in MS Word format. MS Word - When exporting a report, click the icon to export in MS Word format.
 Full Screen - Full Screen button allows users to see the screen in full screen mode. Full Screen - Full Screen button allows users to see the screen in full screen mode.
 Proceed - Select to execute processes. Proceed - Select to execute processes.
|